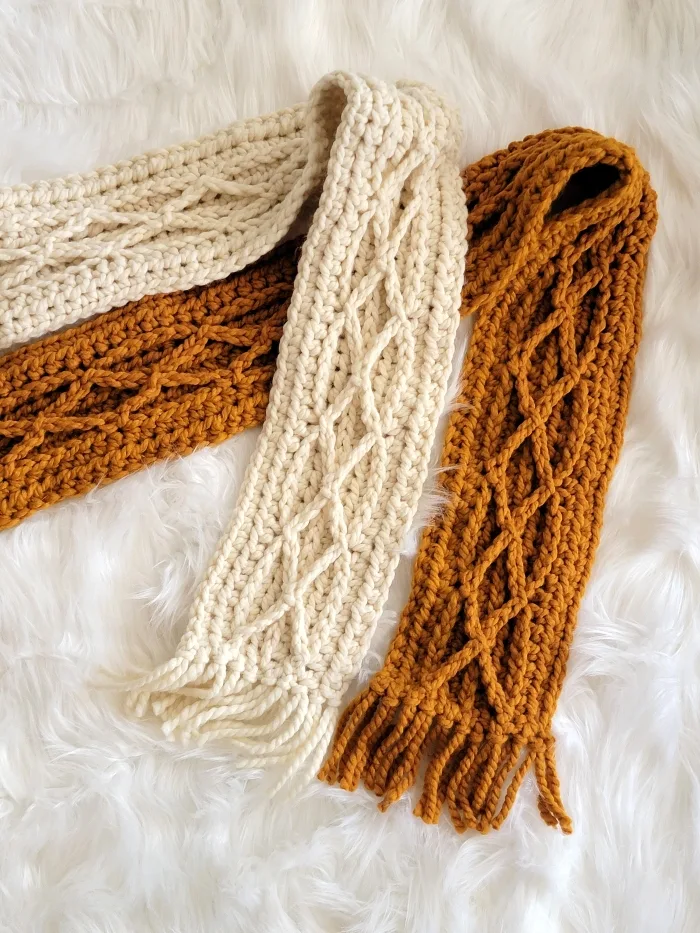
I am excited to share another free crochet pattern for a chunky cable scarf! This beginner-friendly project uses simple chain stitches to create a beautiful cable design.


If you’re new to crochet or looking for an easy yet stylish scarf to make, this pattern is perfect for you. This pattern will be straightforward to follow since not a single post stitch was used in making this scarf.


The bulky yarn works up quickly, giving you a cozy and warm scarf in no time. Follow along with the step-by-step instructions, and you’ll have a wonderful new accessory to wear or gift. Let’s get started!

Crochet Cable Scarf Pattern
Materials
1. Lion Brand Woool-Ease Thick and Quick, a size 6 super chunky yarn. Colors Fisherman and Butterscotch were used for the sample cable scarves.
2. An M/N (9mm) hook.
3. Tapestry needle to weave in the ends
Finished Size
The measurements given below are before adding the fringes. Fringes will add another 6 to 8 inches to the length.
6 to 12 Years: 6″ wide and 61″ long
Teen to Woman: 6″ wide and 72″ long
Yardage
6 to 12 Years: 2 skeins or 212 yards
Teen to Woman: 2 skeins or 212 yards
Stitch Abbreviations
The pattern is written in US terms
ch (chs): chain (chains)
st (sts): stitch (stitches)
sc: single crochet
sl st: slip stitch
hdc: half double crochet
Special Stitches
1. Third loop of a st: The third loop is a loop that runs horizontally behind your hdc stitch as shown in pic 1 below. If you work into the third loop, the ‘V’ of the stitch gets pushed forward to form a ribbed line on your crochet fabric.


1. The 3rd loop of a hdc stitch is a horizontal bar found behind the stitch as shown
Gauge
7 hdc sts= 4 inches
You might also like these crochet scarf patterns:
Beginner Cable Scarf Crochet Pattern
Pattern Notes
1. The base of the scarf is first worked with ribbed lines. The cables are then added between the ribbed lines using chain stitches.
2. Any tails left near the edge of the scarf will not have to be woven in as they will blend in with the fringes.
Scarf Pattern
Notes
Stitch counts for the 2 sizes are given in the order 6-12 years (Teen to Adult)
Ch 107 (128). The initial ch is a multiple of 7 + 2.
Row 1: Working into the back bumps of the chain, 1 hdc in the 2nd ch from hook and each ch across to end, turn. ——106 (127) sts
Row 2: Ch 1 (does not count as a st here and throughout), 1 hdc in the first st and each st across to end, turn. ——106 (127) sts
Note: In the next row, the 3rd loop will be in front of your work as seen in pic 1 above.
Row 3: Ch 1, 1 hdc in the 3rd loop of first st and each st across to end, turn. ——106 (127) sts


2. Ribbed lines formed by working in the third loops
Repeat rows 2 and 3 until you have a total of 7 rows. You will have 3 ribbed lines running along the top of your scarf as shown in pic 2 above.
Last Row: Ch 1, 1 sc in first st and each st across to end, fasten off.
Adding Cables
Note
1. We will now add cables using chain stitches.
2. Start working your cables near the tail where you fastened off.
First Half of the Cable


3. Start at the base of the first ribbed line to make the first half of the cable


4. First half of the cable is worked between the ribbed lines
Pattern Note
1. Take a good look at pics 3 and 4 above before you start making your cables. Each half of the cable is worked in a zig-zag shape between the ribbed lines.
Sl st to the base of the first ribbed line, ch 3, sl st to the 4th st on the middle ribbed line, *ch 3, sl st to the 7th st (counted from the previous sl st made on the same ribbed line) on the first ribbed line, ch 3, sl st to the 7th st on the second ribbed line, repeat from * until just 3 visible sts are left on the middle ribbed line, ch 3 and sl to the top of the first ribbed line. Fasten off leaving a 9-inch tail.
Second Half of the Cable


5. Start the second half of the cable at the base of the 3rd ribbed line on top


6. Starting the second half of the cable


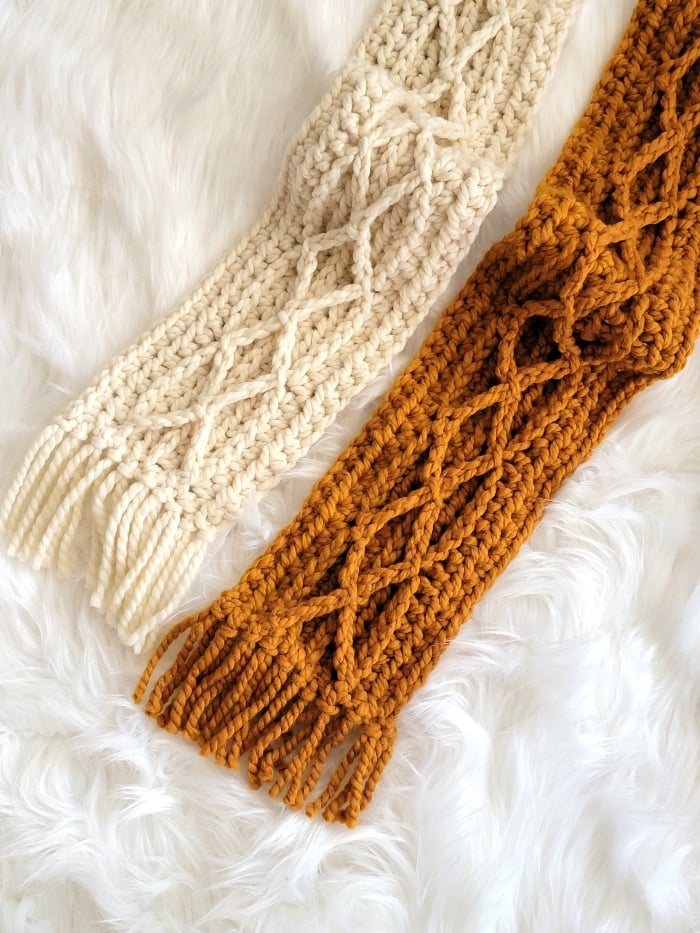
7. Completed cable for each stripe looking like diamonds
Notes
1. The second half of the cable is worked between the middle and third ribbed line on top.
2. Take a good look at pics 5, 6, and 7 before starting the second half of the cable.
Sl st to the base of the third ribbed line, ch 3, sl st into the same st as the first sl st on the second ribbed line, *(ch 3, sl st into the 7th st on the third ribbed line, ch 3, sl st into the same st as the next sl st on the second ribbed line) repeat from * until just 3 visible sts are left on the second ribbed line, ch 3 and sl to the top of the third ribbed line. Fasten off leaving a 9-inch tail.


8. Closeup of finished cables
Adding Fringes
Note: Before adding the fringes, use the tapestry needle to pull the yarn tails left by the cables to the back side, make a knot to secure it, and bring it out through the edge. We can later blend it in with the tassels.
I used a small book to make my fringes. You can also use a thick 5.75-inch wide cardboard to make it.
Wrap the yarn multiple times around a small book or your cardboard. Cut along one side to get strands of the same length.
Take one strand, fold at the middle of the strand, pull through the edge of the crochet scarf to form a loop, grab the 2 ends with your hook, and pull through the loop, if you find any stray single strand of yarn nearby, pull it through the loop as well. Now tug gently to tighten the loop.
Don’t add too many fringes or your scarf will widen out at the edges. Add just enough to cover the edge.
Finishing
1. Weave in any remaining tails on the back side of the crochet cable scarf.
2. Lay the scarf flat, run your fingers through the tassels, and trim the edges to level it.
Pin it for later:
![]()
![]()