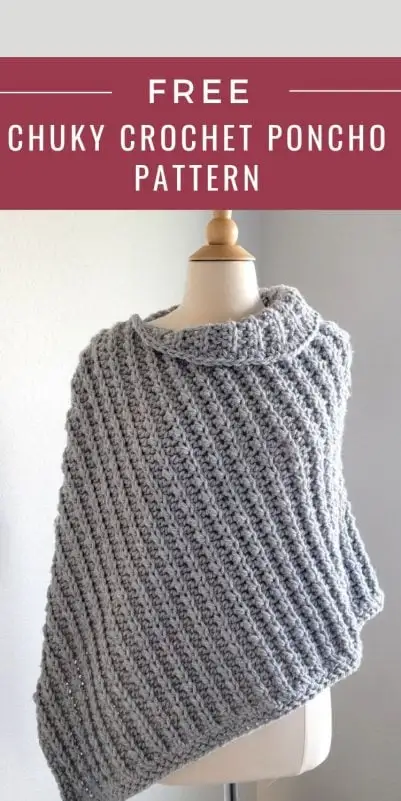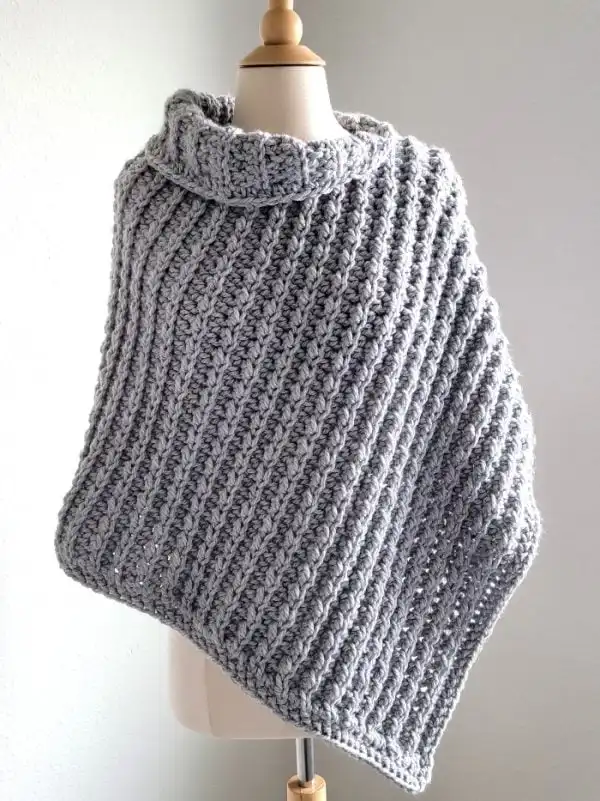
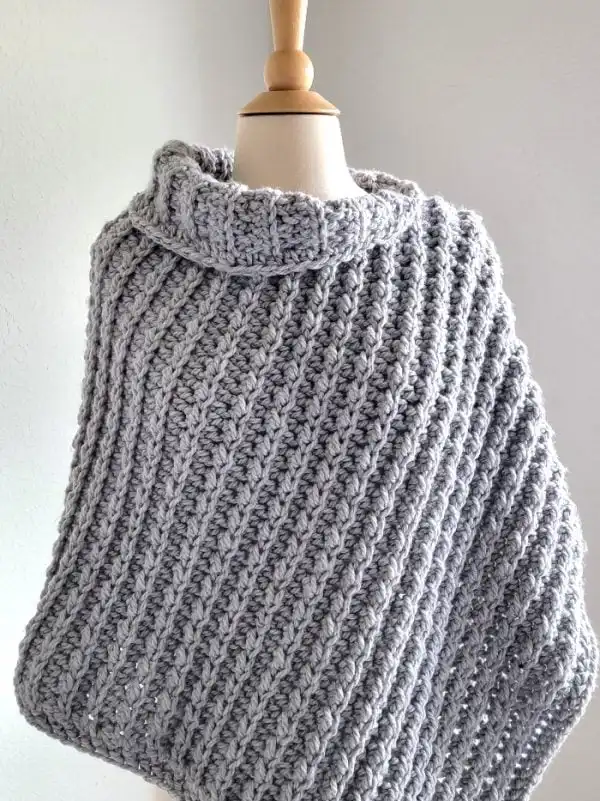
This chunky crochet poncho is cozy, warm, and wonderfully beginner-friendly. Made from a simple long rectangle, it uses the same stitch pattern as the Foggy Day Cardigan everyone loved.
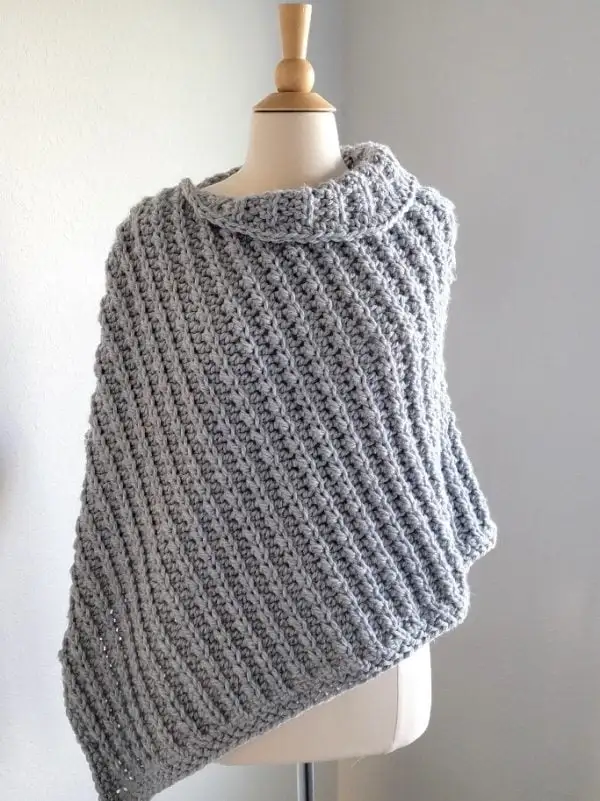
Whether you’re lounging indoors or layering up outdoors, this poncho adds effortless comfort and style. It’s the kind of piece you’ll reach for again and again.
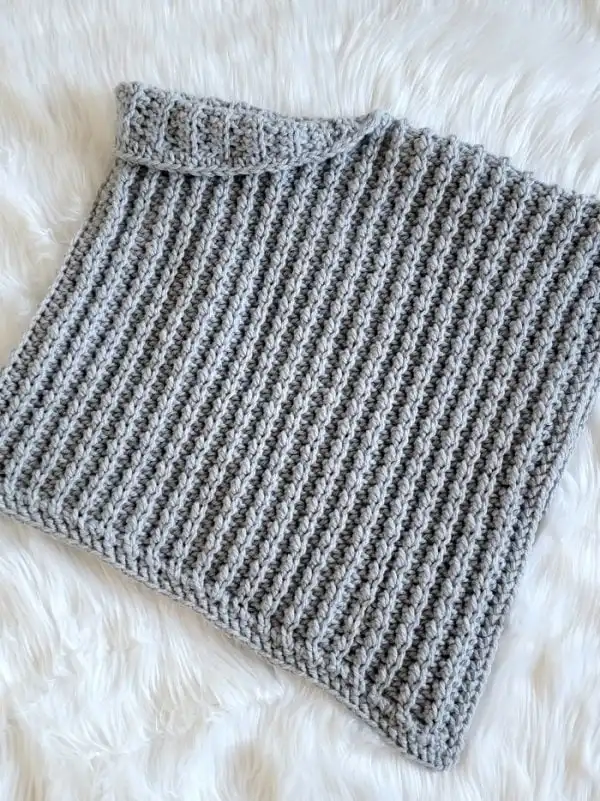


Chunky Crochet Poncho Pattern
Materials
1. Bernat Softy Chunky Yarn in color Grey Heather. It is size 6 Super Bulky yarn.
2. L (8mm) hook
3. Tapestry needle to weave in the ends.
4. Locking stitch markers. You can also use safety pins.
Finished Sizes
1. The measurements for different sizes are written in the order S/M (L/ XL, 2XL/ 3XL, 4XL/5XL)
2. The finished size is measured when laid flat.
S/M (fits up to 40″ bust): 24″ High and 50″ Wide
L/XL (fits up to 44″ bust): 26″ High and 54″ Wide
2XL/3XL (fits up to 48″ bust): 27″ High and 58″ Wide
4XL/5XL (fits up to 52″ bust): 28″ High and 62″ Wide
Yardage
Note: Err on the side of caution and purchase one extra skein.
Each skein is 108 yards.
S/M: 7 skeins
L/XL: 8-1/2 skeins
2XL/3XL: 9-1/2 skeins
4XL/4XL: 11 skeins
Stitch Abbreviations
The pattern is written in US terms.
st: stitch
ch: chain
sc: single crochet
hdc: half double crochet
hhdc: herringbone half double crochet
sk: skip
sl st: slip stitch
RS: Right side of the poncho with braid pattern
WS: Wrong side or inside of the poncho
Stitch Explanations
BLO (Back loop only): You insert your hook only into the back loop of the stitch (the loop away from you). See pic below.


hhdc (herringbone half double crochet): YO, insert your hook into the next st, pull up a loop through the st and the first loop on your hook, 2 loops left on your hook, YO and pull through the remaining 2 loops on your hook.
Gauge
Pattern for Gauge Swatch
Loosely ch 16.
Row 1: Working into the back bumps of the chain throughout, 1 sc in the 2nd from the hook and each ch across to end, turn. (15 sc)
Row 2: Ch 1 (does not count as a st here and throughout), 1 hdc in BLO of the first st, 1 sl st in BLO of the next st, (1 hdc in BLO of the next st, 1 sl st in the BLO of the next st), repeat from * to last st, 1 hdc in both loops of the last st, turn. (15 sts)
Row 3: Ch 1 (does not count as a st here and throughout), 1 hdc in BLO of first st and each st across to last st, 1 hdc in both loops of the last st, turn. (15 sts)
Repeat Rows 2 and 3 four more times and fasten off.
Gauge
Using L (8mm) Hook,
9 sts X 7 Rows in pattern stitch = 4″
Use any size hook to attain the gauge. If you crochet tightly, your fabric might turn out stiff with chunky yarn.
Pattern Notes
1. The length of your foundation chain determines the length of your poncho. About 2 inches will be added to the length when we work the border, and the piece stretches under its own weight.
2. The stitch counts for different sizes are given in the order S/M (L/ XL, 2XL/ 3XL, 4XL/5XL)
Loosely Ch 52 (56, 60, 62).
Row 1: Working into the back bumps of the chain throughout, 1 sc in the 2nd from the hook and each ch across to end, turn. 51 (55, 59, 61)sc
Row 2: Ch 1 (does not count as a st here and throughout), 1 hdc in BLO of first st, 1 sl st in BLO of next st, (1 hdc in BLO of the next st, 1 sl st in the BLO of the next st), repeat from * to last st, 1 hdc in both loops of the last st, turn. 51 (55, 59, 61)sts
Row 3: Ch 1 (does not count as a st here and throughout), 1 hdc in BLO of first st and each st across to last st, 1 hdc in both loops of the last st, turn. 51 (55, 59, 61)sts
Repeat Rows 2 and 3 for a few more rows and check if it measures 22 (24, 25, 26)” wide. If not, you may need to switch hook sizes. Then continue repeating Rows 2 and 3 until your rectangle is approximately 48 (52, 56, 60)” long and you end in Row 3. Fasten off.
Seaming the Shoulder
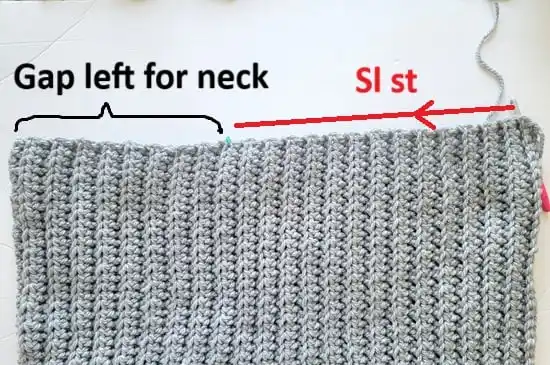

1. Sl st the shoulders up to the neck hole
Fold the rectangle along its length with the RS inside. Leave a 12 (13, 13, 14) inch gap from the fold and place a marker going through both layers. Start from the corners, sl st all the way to the marker as shown in pic 1 above, and fasten off. I inserted the hook only under 1 loop along the top edge to avoid making the seam bulky. Turn the poncho right side out.
Finishing the Hem
Row 1: Working on the WS, sl st to the corner and work a row of sc along the hem and turn. I worked 2 sc between each pair of ribbing (raised line of free loops). Adding too many sts will make your hem wavy.
Row 2: This row is worked on the RS after turning. Ch 1, work 1 hhdc in the first st and in each st across to the next corner. Work 2 additional hhdc in the corner stitch. Continue up the right edge of the poncho, working 1 hhdc in each stitch to the next corner. Fasten off.
Finishing the Neck
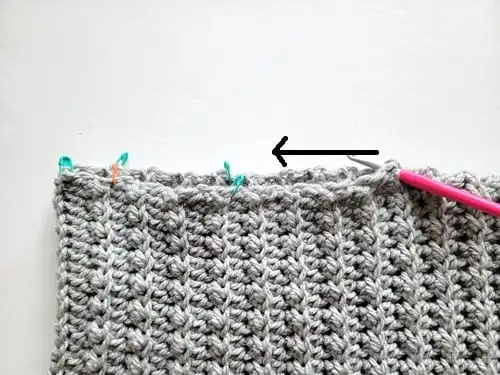

2. Place the markers and work in the direction of the arrow.
Ensure the right side of the poncho is facing out.
Place a marker on the fold, 2 markers 2 (3, 3, 4) inches away from the fold, one on each layer, and 2 more markers 6 (7, 7, 8) inches away from the fold. See pic 2 above.
Finishing Round: Working inside the neck hole from the back right point where the shoulder seam ends, work sl sts until 1″ left to the marker, work 2 sc to reach the marker, work hdc sts starting from the marked point to the next marker, 2hdc in the marked point, 1 hdc until you reach the next marker at the fold, 2 hdc in that marked point, 1 hdc until next marker, 2 hdc in marked point, 1 hdc to next marker, 2 sc after marker, sl st across to seam, fasten off.
Weaving in the Tails
1. Weave in the tails at the neck along the outside of the neckline, as they will be hidden when you fold the neck down to form the collar. You can fold the neckline down now to gauge the best spot to weave them in so they stay fully concealed.
2. Weave in all the other tails along the inside or WS of the poncho. Enjoy!
Pin it for later: