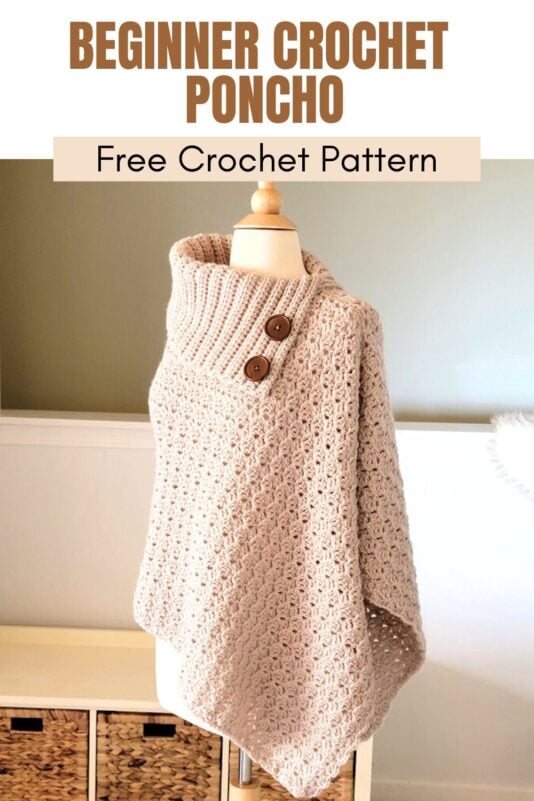
Crochet Poncho with Collar Pattern, Vienna Wrap Poncho
This crochet poncho with collar comes in sizes Small to 3XL. The pattern is very simple and perfect for beginners.

It is made from 2 rectangles, one for the collar and one for the body of the poncho. Does it get easier than that?

If you are nervous to try an item of crochet clothing, a poncho is your best bet. Not having sleeves can really help calm those nerves and give you the confidence to try more complicated projects in the future.

I absolutely love the wide collar on this one. It adds so much pizzazz to this simple piece. You can also button up the collar to wear it as a turtle neck poncho.

When I wrote my first how to crochet a poncho tutorial never did I imagine it is going to be popular for years. After that, I think this crochet poncho is the one that has potential.

The design is simple yet elegant and can delight beginner and experienced crocheters alike. Don’t you agree?

Crochet Poncho Pattern with Collar
Materials
1. Worsted weight size 4 medium weight yarn. I used Lion Brand Wool-Ease in color Antler
2. A size H(5 mm) hook.
3. A pair of 1-1/2 inch wooden buttons
4. 2 stitch markers
5. Tapestry needle to weave in the ends
Finished Size
The poncho is made from a long rectangle. Given below are the dimensions of the finished rectangle before folding.
S/M – 22” x 52”
L/XL – 26” x 60”
2XL/3XL – 30” x 70”
Yardage
Each skein of Lion Brand Wool-Ease is 197 yards long.
S/M: 6 skeins
L/XL: 8 skeins
2XL/3XL: 10 skeins
Stitch Abbreviations
The pattern is written in US crochet terms.
ch: chain
st: stitch
sc: single crochet
hdc: half double crochet
dc: double crochet
sk: skip
RS: Right side of the crochet fabric
Stitch Explanations
BLO (back loop only): You will insert your hook only under the back loop when working a st and not under both loops as shown in the picture below. This is used in making the collar to give it a ribbed look.

Gauge Swatch
Note
A gauge swatch is a small piece you work first to check how many stitches you have per inch also called gauge. Making a swatch and checking the gauge will ensure that you and the designer have the same gauge and that your finished piece will not turn out too big or small. You can switch to a smaller or bigger hook to meet the gauge.
Pattern for Gauge Swatch
Chain 26 and work Rows 1 to 5 of the poncho pattern below. The first row will have 25 sts and each of the following rows will end in 7 pattern repeats.
Gauge
4 pattern repeats = 4 inches
Crochet Pattern
Pattern Notes
1. The length of the starting chain will determine the length of your poncho from the shoulder down.
2. The poncho is made from a simple long rectangle. You fold the rectangle and seam the shoulder leaving a gap for the neck.
3. The collar is also worked as a long ribbed rectangle.
4. You can button up the collar to turn it into a turtle neck.
5. Stitch counts are given in the order S/M (L/XL, 2XL/3XL).
Chain 86 (102, 118). The initial chain is a multiple of 4+2.
Row 1: 1 sc in 2nd ch from hook and each ch across to end, turn.——- 85 (101, 117)sts
Row 2: Ch 3 (counts as a dc here and throughout), (1 dc, ch 2, sc) into the first st, *( sk next 3 sts, (2dc, ch 2, sc) in next st), repeat from * to end, turn.———-22 (26, 30) repeats
Note: In the next row, the sc of the last pattern repeat is not worked into the ch-2 space but into the top of the beginning ch-3. This will ensure that the edge of your poncho stays straight.
Row 3: Ch 3, (1 dc, ch 2, sc) into the adjacent ch-2 space, (2dc, ch 2, sc) in each ch-2 space across until just one ch-2 space is left, (2dc, ch 2) in the last ch-2 space, 1 sc on top of beginning ch-3, place a marker on this side of the fabric to indicate the RS and turn.——-22 (26, 30) repeats
Repeat Row 3 until your rectangle measures approximately 52 (60, 70) inches long and you end in the RS of the fabric. Fasten off.
Seaming the Poncho

Now lay your rectangle with the RS of the fabric facing up and the last row you worked to your right. The marker you placed will tell you it is the RS.
Fold the rectangle to the left along the middle. Leave 11 (12, 13)” from the fold for the neck and seam the rest of the top side with a whip stitch. If you find this confusing, see diagram 2 above. Bring points A together to fold your poncho and seam from point B to A.
Collar
Pattern Note
The finished collar is 8 inches wide. If after working a few rows you find that it isn’t 8 inches, switch to a bigger or smaller hook.
Chain 30.
Row 1: 1 hdc in 3rd ch from hook (2 skipped chs count as a hdc), 1 hdc in next ch and each ch across to end, turn.——29 hdc
Row 2: Ch 2 (counts as a st here and throughout), 1 hdc in BLO of the next st and each st across to beginning ch, 1 hdc on top of beginning ch, turn.——29 hdc
Repeat Row 2 until your collar measures 24 (26, 28)” without stretching. Do not fasten off. The yarn is kept attached so we can adjust the length of the collar later if needed.
Attaching the Collar

Turn the poncho inside out. You will now have the RS of the poncho outside. Place it with the neck opening on the top left side. Measure about an inch from the seam and place a marker on the back of the neck as shown in pic 3 above. This is the point from where we will start attaching the collar.


Fold the collar in half to the right. The attached skein of yarn should be on the back layer at the bottom corner.
Make sure the fold on the poncho and the collar are on the left side, then completely insert the collar into the neck hole as shown in pic 4 above.
Start whip stitching the collar to the neck starting from the marker we placed earlier and going clockwise (see pic 5 above). Work all the way around to the back until you hit the marker again. You will have a tiny part of the collar that is unattached as shown in the pic 7 below. Keep the skein of yarn attached. We will come back to it soon.
Adding Buttons

Pull the collar out through the neck opening. Add 2 big buttons 1/2- inch away from the right edge of the collar. Attach the first button in the corner, and attach the 2nd button in such a way that the middle of the button is 4 inches away from the lower edge of the collar as shown in pic 6 above.
This is because the collar is 8 inches wide and you want the button at the halfway mark.
Buttonholes and Finishing the Back of the Collar
You can button up the collar to turn it into a turtle neck. If you do not want this option, you don’t have to make buttonholes at the back of your collar.

If you opt not to make buttonholes, add or unravel rows on the collar until you have 1-1/2 inches of extra length. Tuck this under the front collar as shown in pic 7 above and sew along the base of the front collar. Fasten off. Jump to finishing the poncho below.
Buttonhole Rows
1. If you want to make buttonholes, add or unravel rows on the collar until you have approximately 3/4- inch of the extra unattached part and you are on the lower edge of the collar away from the neck.
2. Place 2 markers at the points corresponding to the middle of the buttons in the front collar.
Row 1: Ch 2, 1 hdc in BLO of next few sts to the first marker, ch 1, sk 1 for buttonhole, 1 hdc in BLO of each st until you reach the next marker, ch 1, sk 1 for the second buttonhole, 1 hdc in BLO of each st across to beginning ch, 1 hdc on top of beginning ch, turn.
Last Row of Collar: Ch 2, 1 hdc in BLO of the next st and each st and ch space across to beginning ch, 1 hdc on top of beginning ch, turn. Fasten off.
Tuck the unattached part of the back collar under the front collar as shown in pic 7 above and sew along the base of the front collar. Fasten off.
Finishing
Weave in all the tails left to the inside of the poncho.
Pin it for later:


I love the look of this poncho and want to make it. Is there a good yarn substitute for the Lion Wool ease that you recommend that will give it a similar drape and style? I do not like to wear anything with wool in it. Thank you for this lovely pattern.
You can google substitute for Lion Brand Wool-Ease and there is a site that will tell you yarns of similar gauge.
@Shehnaaz, Thank you. I have looked at the site but there are so many options! Was just wondering if you had any experience making a poncho with acrylic yarns that would have the same look as the Wool-Ease. I will try one of the substitutions. Thanks.
It’s beautiful! Thank you.
@Vicki W,
You might take a look at Lion Brand’s Heartland yarn. It is acrylic # 4 weight and the colors are beautiful. I keep my stash stocked as I buy it when I can use a coupon or on sale. I will be making mine in King’s Canyon. I just checked the LB website and this yarn is on sale.
Good Luck!!
I am assuming Red Heart soft should work or Caron Simply Soft.