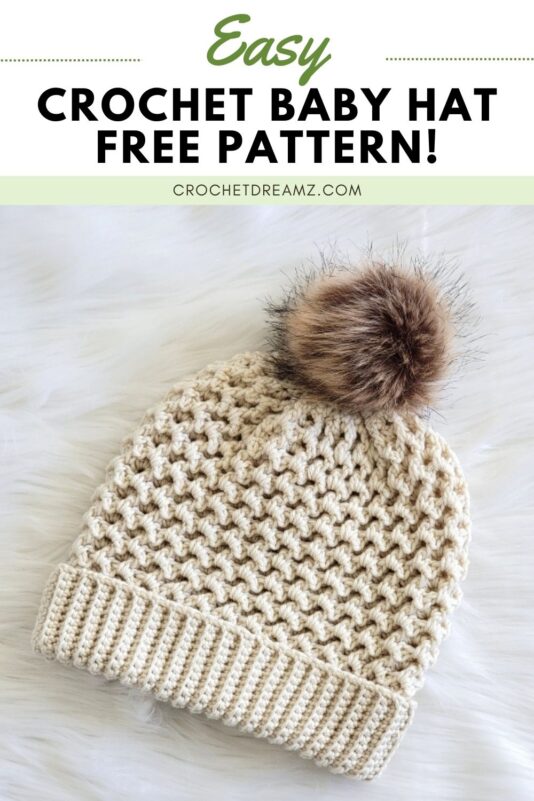
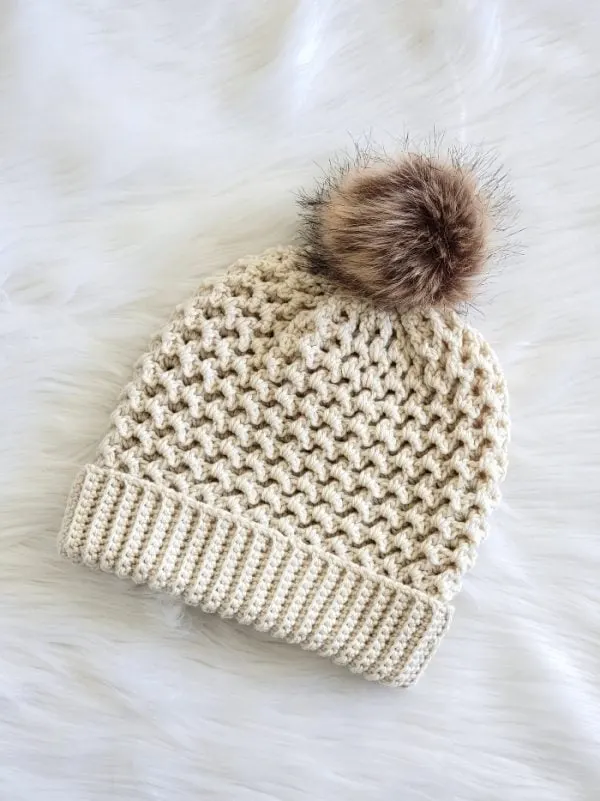
Make your own cozy crochet adult hat with this crochet beanie free pattern for beginners. It also includes smaller sizes starting from baby size.

Inspired by gentle mountain slopes and cozy winter walks, this hat features a beautifully textured stitch pattern. Though it looks hard, it is in fact quite simple.

The beanie is worked bottom up from the brim, the crown is shaped with decreases, and the top is cinched shut. This method reduces the hassle of counting every round.


This free crochet ladies’ beanie pattern gives a stretchy crochet hat. Enjoy this basic crochet hat pattern for free on my blog.

Crochet Beanie Hat Free Pattern
Materials
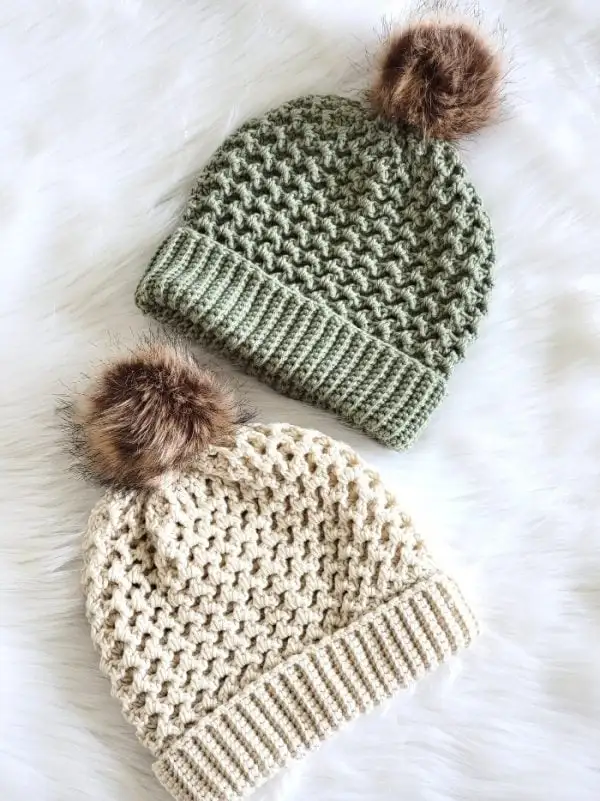
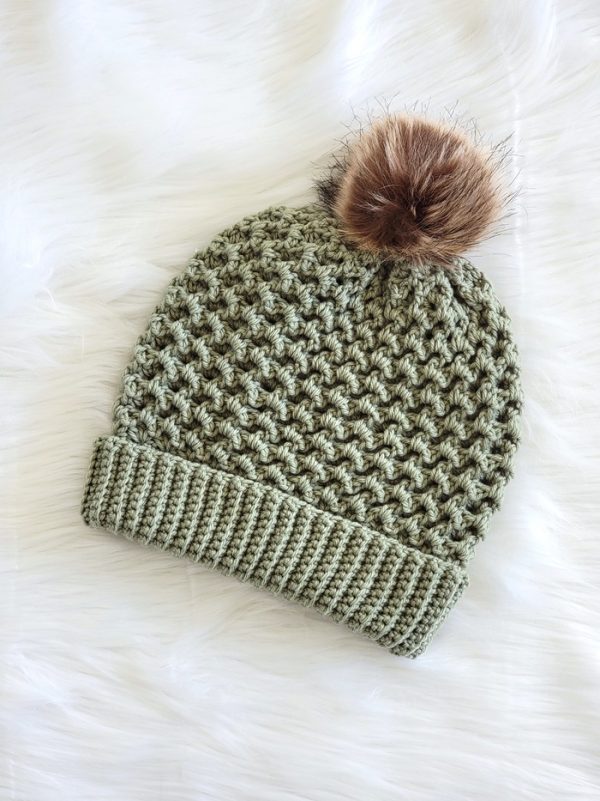
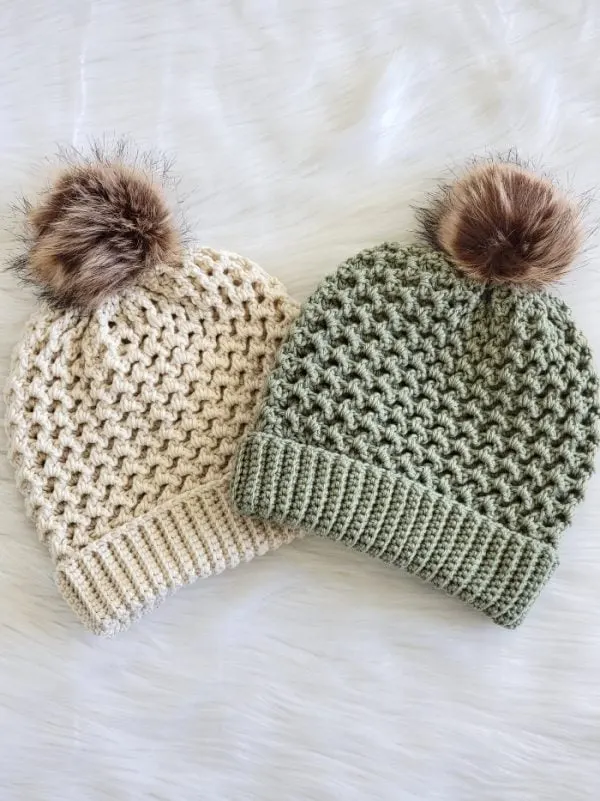
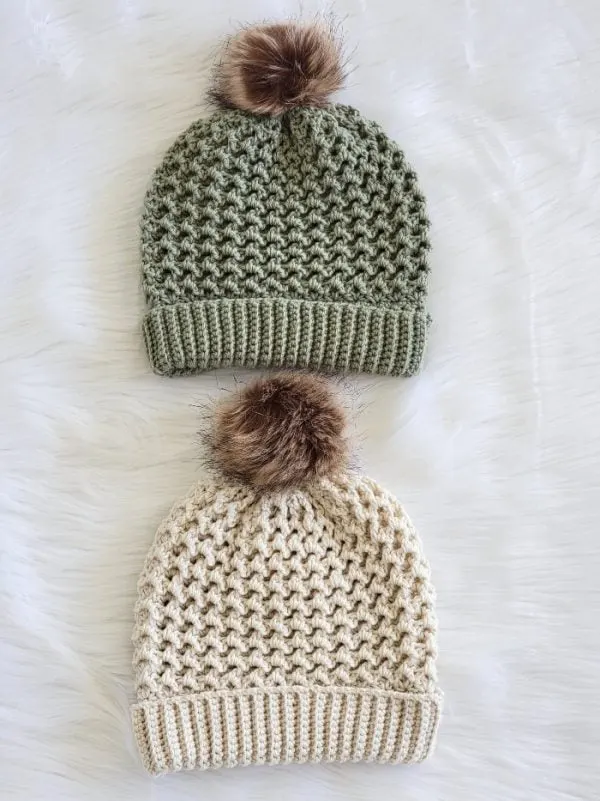
1. Worsted weight yarn. Yarn Bee Easygoing yarn in colors Sage and Frosting was used to make the sample hats.
2. A G (4 mm) hook for ribbing and an H (5 mm) hook for the rest of the hat
3. Tapestry needle to weave in the ends.
4. Stitch marker. You can also use safety pins or contrasting color yarn scraps.
5. A button to attach the fur pom pom and make it detachable
6. A fur pom pom
Finished size
Baby– Fits up to an 18-inch head and is 7 inches tall and 17″ in circumference
Toddler– Fits 19-inch head and is 7-1/2 inches tall and 18″ in circumference
Child– Fits 21-inch head and is 8 inches tall and 19-1/2″ in circumference
Adult Small– Fits a 22-inch head and is 8-1/2″ inches tall and 21″ in circumference
Adult Medium or Large (M/L)– Fits 23-inch head and is 8-1/2″ inches tall and 21-1/2″ in circumference
Yardage
Baby: 220 yards
Toddler: 260 Yards
Child: 280 yards
Teen/Adult Small:- 300 yards
Adult Medium/Large: 340 yards
Stitch Abbreviations
The pattern is written in US terms.
ch: chain
sk: skip
sl st: slip st
sc: single crochet
hdc: half double crochet
YO– yarn over
fpsc: front post single crochet
Stitch Explanations
1. sc in the Back Loops Only (BLO): Instead of inserting your hook under both the loops of your stitch, you will insert it only under the back loop and leave the front loop free while working the sc, see the picture below.


2. Front post single crochet (fpsc): It is worked like a regular sc except for the way you insert your hook. Insert your hook to the back through the gap before the post of the hdc st specified, bring it back to the front through the gap after the post, pull up a loop, YO, and pull through 2 loops to complete a fpsc.
3. sc2tog: It is a decrease worked across 2 sts to join them into one. Pull up a loop in each of the next 2 sts, YO, and pull through all the 3 loops on your hook—–sc2tog completed
Gauge
With 5 mm hook, 6 repeats=4.5 inches long
You might also like these free beanie patterns:
Crochet Hat Pattern
Pattern Notes
1. The hat is worked bottom up, starting with the ribbing.
2. Sizes Baby, Toddler, and Child are grouped, and sizes Adult Small and Adult Medium/Large are grouped. Headings are color-coded for ease. Baby, Toddler, and child headings are Pink, and the bigger sizes are Blue.
Baby (Toddler, Child)
Note: Stitch counts are given in the order Baby (Toddler, Child)
Ribbing
With the G (4 mm) hook, ch 15 (17, 19).
Row 1: 1 sc in 2nd ch from hook and each ch across to end, turn.——–14 (16, 18) sc
Row 2: Ch 1 (does not count as a st), 1 sc in BLO of the first st, 1 sc in the BLO of each st across to last st, 1 sc in the last st (going under both the loops like a regular sc), turn.—–14 (16, 18) sc
Repeat Row 2 until your ribbing is 16 (17, 17-1/2) inches without stretching. Do not fasten off.
Joining the Ends of the Ribbing
Bring the beginning of your ribbing near the last row where your hook and the working yarn are. Sl st both ends together, going under the back loops of the stitches of the last row and the free loops on the foundation chain side.
Body
Pattern Notes
1. Distributing stitches along the ribbing
When working into the ribbing, you won’t have regular stitches to use. Instead, work 1 sc into each row end. Remember that each ridge = 2 rows.
If the number of row ends doesn’t match your total stitch count, adjust by adding a few increases or decreases as you go. To plan ahead, count the total number of ribbing rows before starting Round 1. This will help you estimate how many increases or decreases you’ll need.
Tip: You can also place markers to divide the ribbing into 4 equal sections. Then, work about ¼ of your total stitches in each section to keep the distribution even.
2. While working the Base Sc Round, do not insert your hook into any big holes and make it even bigger; work into the body of the stitches instead.
Base sc Round: Ch 1 at the seam and work 66 (72, 78) sc sts evenly distributed around the ribbing. Sl st to the first st but do not turn.—– 66 (72, 78)sc
Round 1: Switch to the bigger 5 mm hook. Ch 1, (1 sc, ch 2, 2hdc) all into the next st, *[sk 2 sts, (1 sc, ch 2, 2 hdc) all into the next st], repeat from * until 2 sts are left, sk last 2 sts, sl st to first sc, turn. —–22 (24, 26) projections or repeats
Round 2: Do not make a beginning ch. Take your hook out of the loop, bring yarn to the front of your work and reinsert your hook into the loop, sk the first hdc, fpsc in next hdc, place a marker in this st, ch 2, 2 hdc in the adjacent ch-2 space, *[sk next hdc, fpsc in next hdc, ch 2, 2 hdc in the adjacent ch-2 space], repeat from * and after working into the last ch-2 space, sl st to marked st, turn.—–22 (24, 26) projections or repeats
Round 3: Do not make a beginning ch and do not bring the yarn to the front of your work this time, sk the first hdc, fpsc in next hdc, place a marker in this st, ch 2, 2 hdc in the adjacent ch-2 space, *[sk next hdc, fpsc in next hdc, ch 2, 2 hdc in the adjacent ch-2 space], repeat from * and after working into the last ch-2 space, sl st to marked st, turn.—–22 (24, 26) projections or repeats
Repeat Rounds 2 and 3 until your hat is 6-1/2 (7, 7-1/2) inches tall with a folded brim. Rounds 2 and 3 are essentially the same, except that when you work Round 2 on the inside (wrong side) of the hat, you will always bring the yarn to the front of your hook first.
Decreases
Note: In the next round, we will work only 1 hdc into each ch-2 instead of 2 hdc to start shrinking the crown of the hat.
Decrease Round 1: Do not make a beginning ch and bring the yarn to the front of your work only if this round is worked inside the hat, sk the first hdc, fpsc in next hdc, place a marker in this st, ch 2, 1 hdc in the adjacent ch-2 space, *[sk next hdc, fpsc in next hdc, ch 2, 1 hdc in the adjacent ch-2 space], repeat from * and after working into the last ch-2 space, sl st to marked st. Turn if you are on the inside of the hat; if not, continue without turning.—–22 (24, 26) projections or repeats
Note: The next 3 rounds are worked on the Right side or outside of the hat.
Decrease Round 2: Ch 1 (does not count as a st here), 1 sc in next ch-2 space, place a marker in this st, *(sc2tog across next 2 sts, 1 sc in next ch-2 space), repeat from * until you work a sc in the last ch-2 space, sl st to marked st, do not turn. 43 (47, 51) sts
Decrease Round 3: Ch 1 (does not count as a st here), 1 sc in same st you worked your sl st into, place a marker in this st, *(sc2tog across next 2 sts, 1 sc in next st), repeat from * until 1 or no sts are left, sc in any st left, sl st to marked st, do not turn. —-29 (32, 34) sts
Decrease Round 4: Ch 1 (does not count as a st here), sc2tog in across 2 sts, place a marker in this st, *(sc2og across next 2 st), repeat from * until 1 or no sts are left, sc in any st left, sl st to first sc, fasten off with an 20 inch tail for cinching the top of the hat. —–15 (16, 17) sts
Cinching the Hat
1. Turn the hat inside out. Thread the tail at the top through a yarn needle, go in and out through every st at the top of the hat, pull, and cinch the hat shut. Make a couple of knots and securely weave in the remaining tail.
2. Sew a button inside the hat for anchoring your pom pom if you want to make it detachable. Now turn the hat right side out, and use a hook to pull the elastic loop on the pom pom over the button inside. You can twist and go over the button one more time if your pom pom dangles. You can also sew the pom pom directly onto the hat using a needle and thread. Enjoy!
Adult Small (Adult Medium/Large)
Note: Stitch counts are given in the order Adult Small (Adult Medium/Large). If there is only one number, it pertains to both sizes.
Ribbing
With the G (4 mm) hook, ch 22.
Row 1: 1 sc in 2nd ch from hook and each ch across to end, turn.——–21 sc
Row 2: Ch 1 (does not count as a st), 1 sc in BLO of the first st, 1 sc in the BLO of each st across to last st, 1 sc in the last st (going under both the loops like a regular sc), turn.—–21 sc
Repeat Row 2 until your ribbing is 18-1/2 (19-1/2) inches without stretching. Do not fasten off.
Joining the Ends of the Ribbing
Bring the beginning of your ribbing near the last row where your hook and the working yarn are. Sl st both ends together, going under the back loops of the stitches of the last row and the free loops on the foundation chain side.
Body
Pattern Notes
1. Distributing stitches along the ribbing
When working into the ribbing, you won’t have regular stitches to use. Instead, work 1 sc into each row end. Remember that each ridge = 2 rows.
If the number of row ends doesn’t match your total stitch count, adjust by adding a few increases or decreases as you go. To plan ahead, count the total number of ribbing rows before starting Round 1. This will help you estimate how many increases or decreases you’ll need.
Tip: You can also place markers to divide the ribbing into 4 equal sections. Then, work about ¼ of your total stitches in each section to keep the distribution even.
2. While working the Base Sc Round, do not insert your hook into any big holes and make it even bigger; work into the body of the stitches instead.
Base sc Round: Ch 1 at the seam and work 84 (87) sc sts evenly distributed around the ribbing. Sl st to the first st but do not turn.—– 84 (87) sc
Round 1: Switch to the bigger 5 mm hook. Ch 1, (1 sc, ch 2, 2hdc) all into the next st, *[sk 2 sts, (1 sc, ch 2, 2 hdc) all into the next st], repeat from * until 2 sts are left, sk last 2 sts, sl st to first sc, turn. —–28 (29) projections or repeats
Round 2: Do not make a beginning ch. Take your hook out of the loop, bring yarn to the front of your work and reinsert your hook into the loop, sk the first hdc, fpsc in next hdc, place a marker in this st, ch 2, 2 hdc in the adjacent ch-2 space, *[sk next hdc, fpsc in next hdc, ch 2, 2 hdc in the adjacent ch-2 space], repeat from * and after working into the last ch-2 space, sl st to marked st, turn.—–28 (29) projections or repeats
Round 3: Do not make a beginning ch and do not bring the yarn to the front of your work this time, sk the first hdc, fpsc in next hdc, place a marker in this st, ch 2, 2 hdc in the adjacent ch-2 space, *[sk next hdc, fpsc in next hdc, ch 2, 2 hdc in the adjacent ch-2 space], repeat from * and after working into the last ch-2 space, sl st to marked st, turn.—–28 (29) projections or repeats
Repeat Rounds 2 and 3 until your hat is 8 inches tall with a folded brim. Rounds 2 and 3 are essentially the same, except that when you work Round 2 on the inside (wrong side) of the hat, you will always bring the yarn to the front of your hook first.
Decreases
Note: In the next round, we will work only 1 hdc into each ch-2 instead of 2 hdc to start shrinking the crown of the hat.
Decrease Round 1: Do not make a beginning ch and bring the yarn to the front of your work only if this round is worked inside the hat, sk the first hdc, fpsc in next hdc, place a marker in this st, ch 2, 1 hdc in the adjacent ch-2 space, *[sk next hdc, fpsc in next hdc, ch 2, 1 hdc in the adjacent ch-2 space], repeat from * and after working into the last ch-2 space, sl st to marked st. Turn if you are on the inside of the hat; if not, continue without turning.—–28 (29) projections or repeats
Note: The next 3 rounds are worked on the Right side or outside of the hat.
Decrease Round 2: Ch 1 (does not count as a st here), 1 sc in next ch-2 space, place a marker in this st, *(sc2tog across next 2 sts, 1 sc in next ch-2 space), repeat from * until you work a sc in the last ch-2 space, sl st to marked st, do not turn. 55 (57) sts
Decrease Round 3: Ch 1 (does not count as a st here), 1 sc in same st you worked your sl st into, place a marker in this st, *(sc2tog across next 2 sts, 1 sc in next st), repeat from * until 1 or no sts are left, sc in any st left, sl st to marked st, do not turn. —-37 (38) sts
Decrease Round 4: Ch 1 (does not count as a st here), sc2tog in across 2 sts, place a marker in this st, *(sc2og across next 2 st), repeat from * until 1 or no sts are left, sc in any st left, sl st to first sc, fasten off with an 20 inch tail for cinching the top of the hat. —–19 (19) sts
Cinching the Hat
1. Turn the hat inside out. Thread the tail at the top through a yarn needle, go in and out through every st at the top of the hat, pull, and cinch the hat shut. Make a couple of knots and securely weave in the remaining tail.
2. Sew a button inside the hat for anchoring your pom pom if you want to make it detachable. Now turn the hat right side out, and use a hook to pull the elastic loop on the pom pom over the button inside. You can twist and go over the button one more time if your pom pom dangles. You can also sew the pom pom directly onto the hat using a needle and thread. Enjoy!
Pin it for later: