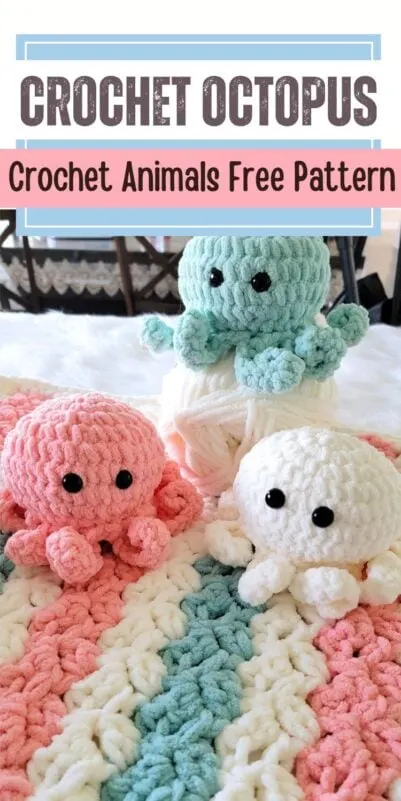
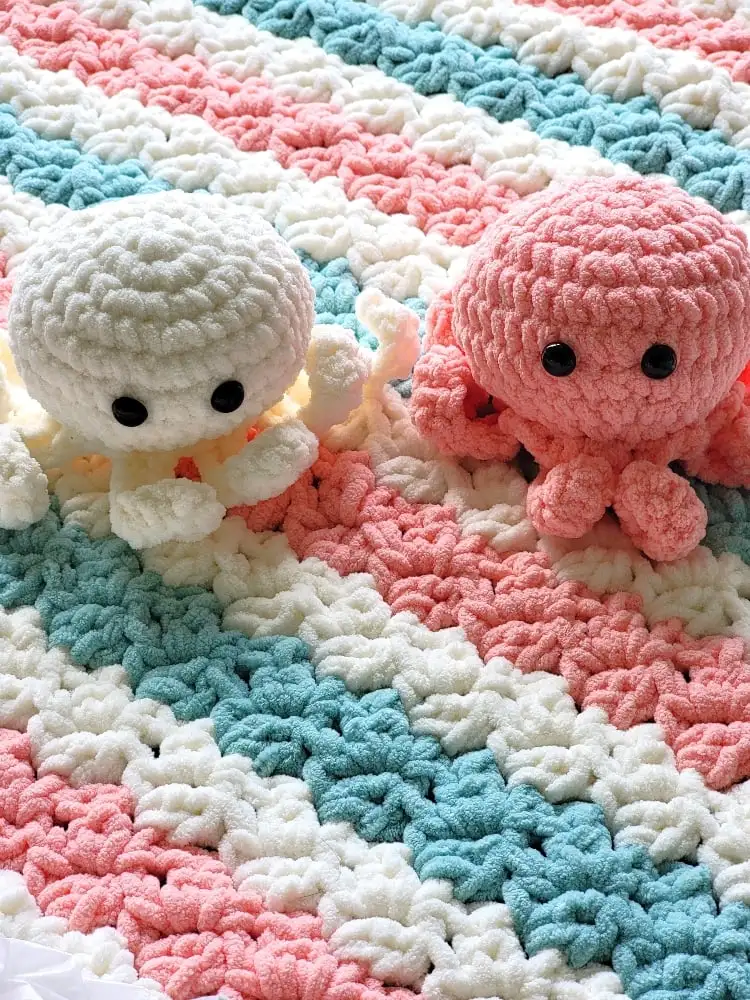
Looking for a super cute, super quick crochet project? This no-sew crochet octopus pattern is just what you need—and it takes only 40 minutes from start to finish!


You’ll be working the whole body and arms in one go—no sewing, no fuss, just fun. And the finished plushie is the perfect size for small hands.

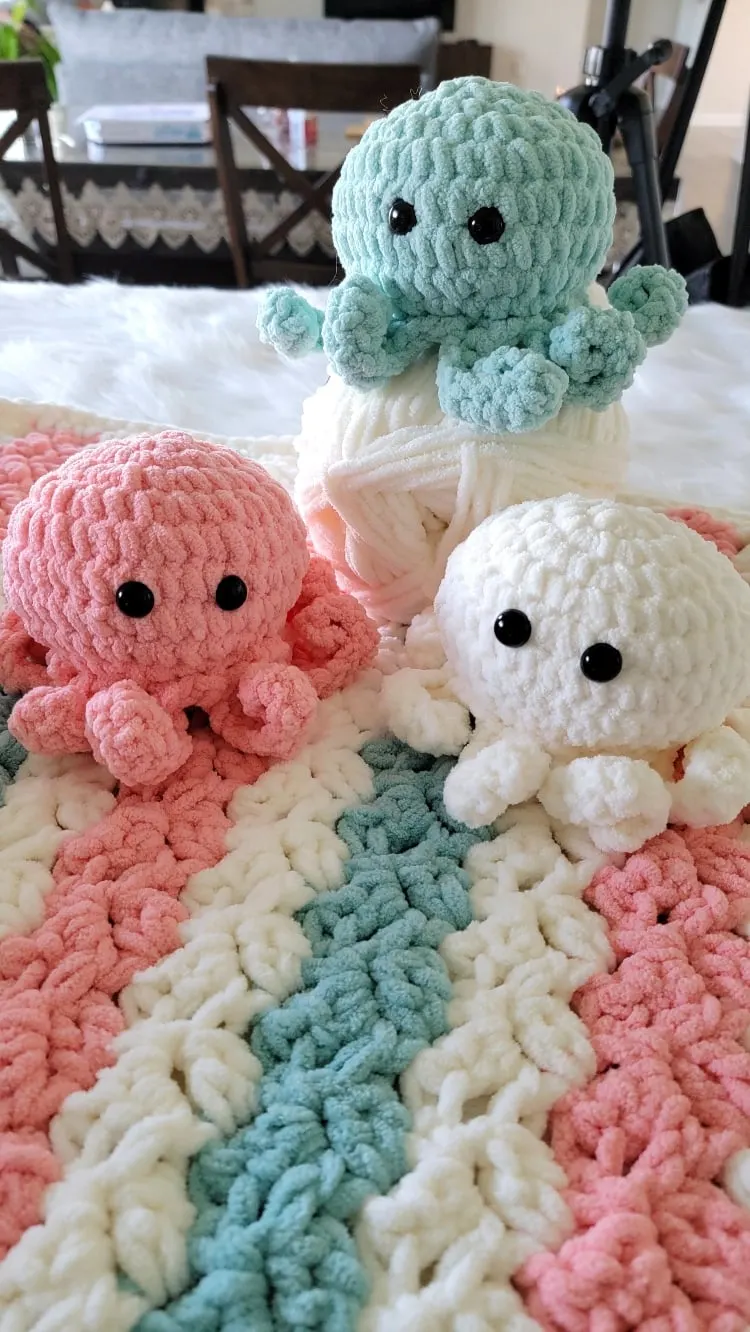
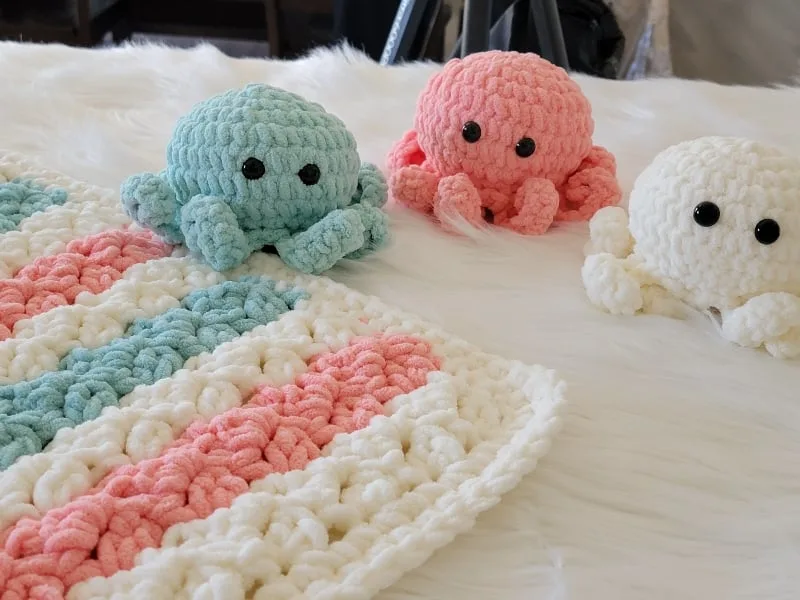
Use your favorite bulky yarn to make it soft and speedy. You can also find a matching blanket pattern here.

Grab your hook and let’s get started—this is one ocean friend you’ll want to make again and again!
Crochet Octopus Pattern
Materials
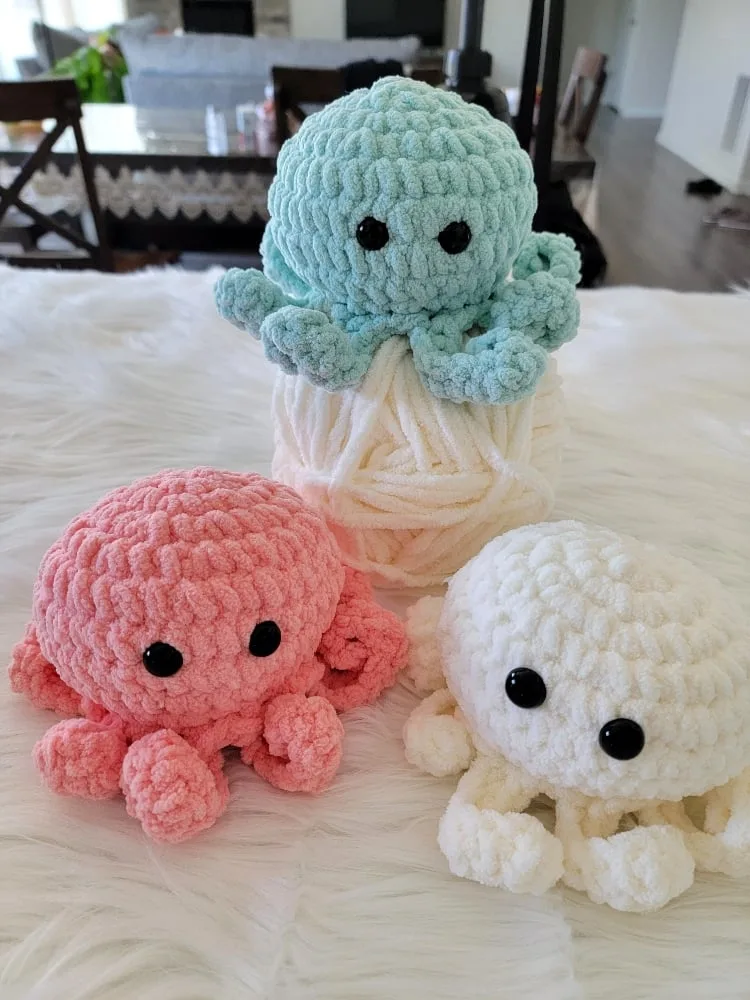
1. Bernat Baby Blanket yarn in colors Vanilla, Seafoam, and Coral Blossom was used for the octopuses. It is a size 6 super chunky chenille yarn
2. K (6.5mm) hook
3. Tapestry needle to weave in the ends
4. Locking stitch marker
5. Fiber fill for stuffing
6. A pair of 14 mm safety eyes
7. A small piece of cross-stitch fabric to secure the eyes.
Finished Size
5-1/2″ wide and 4″ tall
Yardage
Approximately 50 to 60 yards
Stitch Abbreviations
The pattern is written in US terms.
st: stitch
ch: chain
sc: single crochet
YO: yarn over
Stitch Explanations
sc2tog: Pull up a loop in the next 2 sts, YO, and pull through all 3 loops on your hook to complete a sc2tog.


1. Shows how to work in the front or back loops only
BLO (Back loop only): See pic 1 above. Your stitch has 2 loops, a front loop close to you and a back loop. The loop at the back is abbreviated as BLO. To place a marker in the BLO, go under that loop and leave the front loop free.
FLO (front loop only): When the pattern states to crochet “In FLO”, work the stitches in the front loop only.
More free crochet animal patterns:
Octopus Crochet Pattern
Pattern Notes
1. Overview: The body is crocheted first as a squished ball, leaving one round of unused loops at the base of Round 10. The arms are then crocheted into these free loops to complete the octopus.
2. Every time you work into the marked stitch, move the marker up into the first stitch you worked into the marked stitch. This will help you keep track of the rounds.
3. You do not turn at the end of the rounds.
Head
Round 1: 1 sc in magic ring, place a marker in this st, 7 more sc in the magic ring (8 sc)
Round 2: 2 sc in marked st, 2 sc in next 7 sts. (16 sc)
Round 3: *(2 sc in next st, 1 sc in next st), repeat from * to end of the round. (24 sc)
Round 4: *(2 sc in next st, 1 sc in next 2 sts), repeat from * to end of the round. (32 sc)
Round 5: *(2 sc in next st, 1 sc in next 3 sts), repeat from * to end of the round. (40 sc)
Round 6 & 7: 1 sc in next st and each st across to end. (40 sc)
Round 8: *(1 sc i next 3 sts, sc2tog across next 2 sts), repeat from * to end. (32 sc)

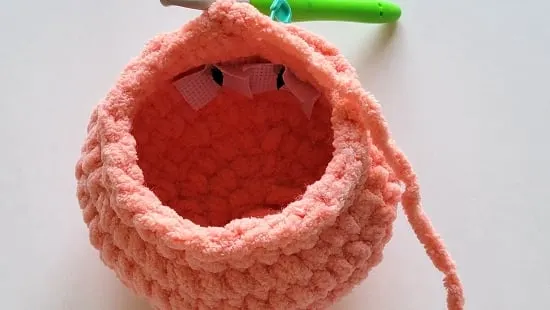
2. Row 9 completed and eyes attached
Round 9: *(1 sc i next 2 sts, sc2tog across next 2 sts), repeat from * to end. (24 sc)
Attach the safety eyes on the 6th round from the top. Place them a little less than 1 inch apart. You will first insert the screw, and check if you like the positioning. Then place a rectangular piece of cross-stitch fabric (1-1/2″ X 1″) on the screw back before adding the backing for the safety eyes. The fabric will add an extra layer of security to the eyes and keep them from pulling out through the stitches. For younger children, embroider eyes with black yarn to avoid a choking hazard.
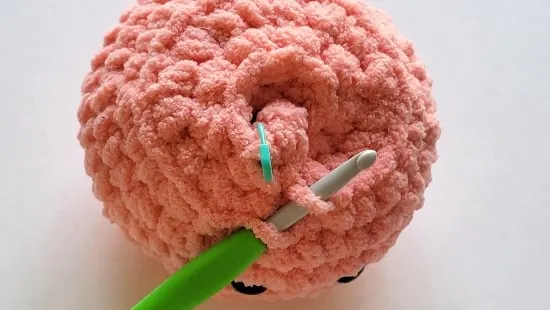
Round 10: 1 sc in BLO of next marked st, move the marker into this st, sc2tog across BLO of next 2 sts, * (1 sc in BLO of next st, sc2tog across BLO of next 2 sts), repeat from * to end, sl st to first marked st. (16 sc)

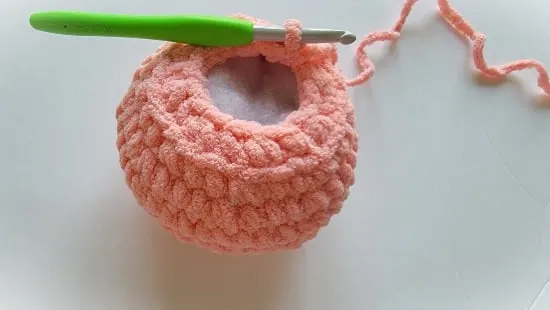
3. Free loops left outside the head after Round 10
We will now have 24 free loops running around the body (see pic 3 above). We will work the arms into these free loops later.
Start stuffing the body, taking care to push fiber fill to the sides to give the sphere a nice squished or disc shape.
Note: The next round is worked into both the loops of a st as usual and NOT into the BLO.
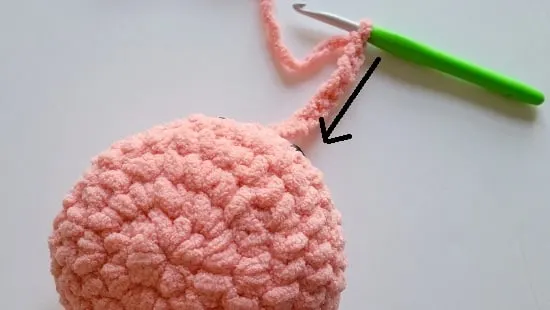
Round 11: Ch 1, sc2tog across same st as ch-1 and next st, move the marker into this st, *(sc2tog across next 2 sts), repeat from * to end, sl st to 1st marked st, fasten off with a 12-inch tail for cinching. We will come back to closing the hole after working on the arms.


4. Head after completing Round 11
Arms/Tentacles
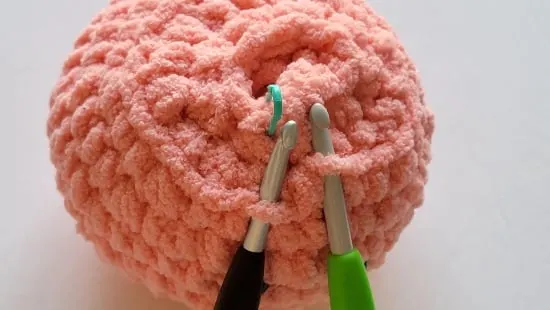

5. Hooks showing the first and last free loop

6. Insert the hook under both the last and first free loop
First Arm: Identify the first and last free loop left after Round 10. One will be to the right of the marker and one to the left under it (see pic 5 above). Insert your hook under both these loops at once (see pic 6 above), pull yarn through and make a ch, make 11 more chs. sl st in second ch from hook, 1 sc in next 10 chs to end. (11 sts)

7. Work back along the long chain to complete an arm
Second Arm: Sl st into the next 3 free loops on the octopus body, ch 12, sl st in second ch from hook, 1 sc in next 10 chs to end. (11 sts)

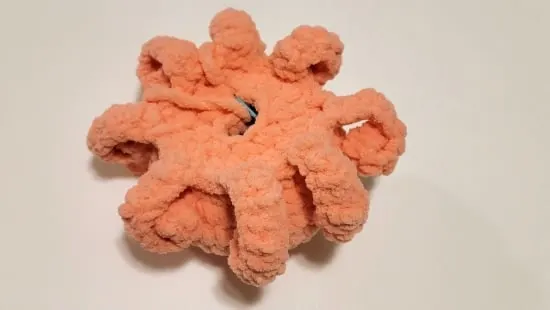
8. All 8 arms finished
Repeat the steps for the second arm until you have completed all 8 arms. Sl st into the last 2 free loops, then sl st into the base of the first arm. Fasten off.
Cinching the Hole
First, add more stuffing through the bottom opening until the body is full and shaped to your liking. Using the yarn tail left earlier, whip stitch through the front loops of each stitch around. Pull tight to close the hole, then knot and weave in the tail inside the head.
Finishing
Hide all remaining tails inside the head of the crochet octopus. Enjoy!
More free crochet animal patterns:
Pin it for later here: