Crochet Caterpillar Pattern Free, Loopy the Caterpillar
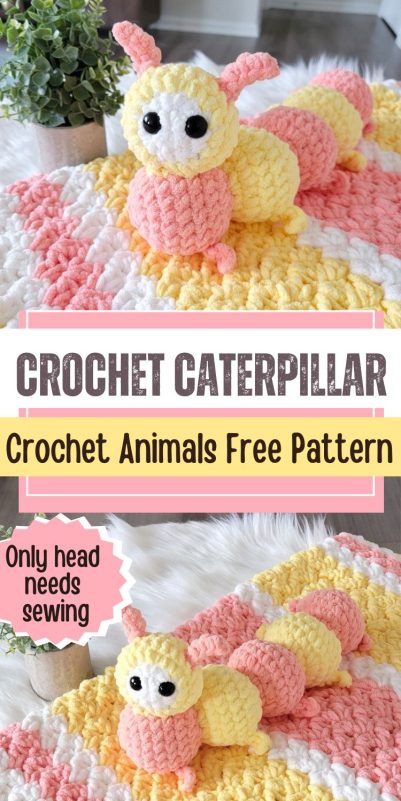
Create this adorable free caterpillar crochet pattern! This crocheted caterpillar makes a perfect beginner Amigurumi project with minimal shaping.

Our crochet worm free pattern is low sew and uses basic stitches to create a charming crochet toy. Free patterns like this help you build your collection of crochet stuffies even if you are new to making crocheted animals.

The body is made in continuous segments with built-in legs. The antennae and head are the only parts that need sewing.

Who wouldn’t love to try a cute crochet caterpillar pattern to go with their baby blanket? You can find the matching blanket pattern here: Marshmallow Blanket

This easy amigurumi free pattern includes simple instructions for perfect results every time. So grab your hook and let’s get started.
Free Caterpillar Crochet Pattern
Materials
1. Bernat Baby Blanket yarn in colors Sunshine Sparkle, Coral Blossom, and small amounts of White. It is a size 6 super chunky chenille yarn
2. K (6.5mm) hook
3. Tapestry needle to hide the ends
4. Stitch markers
5. Fiber fill
6. A pair of 16mm safety eyes
7. Small pieces of cross-stitch fabric to secure the eyes (for added security).
Finished Size
14″ long and 6-1/2″ tall at the head part.
Yardage
80 yards of the main colors Coral Blossom and Sunshine Sparkle, and 8 yards of the white color.
Stitch Abbreviations
The pattern is written in US terms.
st: stitch
ch: chain
sc: single crochet
YO: yarn over
Stitch Explanations
sc2tog: Pull up a loop in the next 2 sts, YO and pull through all the 3 loops on your hook to complete a sc2tog.

BLO (Back loop only): See pic 1 above. Your stitch has 2 loops, a front loop close to you and a back loop. The loop at the back is abbreviated as BLO. To place a marker in the BLO, go under that loop and leave the front loop free.
FLO (front loop only): When the pattern states to crochet “In FLO”, work the stitches in the front loop only.
Overview
The body is crocheted in one piece, consisting of five continuous segments with built-in legs. The head and antennae are made separately and then sewn onto the body to complete the crochet caterpillar.
Pattern Notes
1. Every time you work into the marked stitch, move the marker up into the first stitch or sc2tog you worked into the marked stitch. This will help you keep track of the rounds.
2. You do not turn at the end of the rounds.
3. For convenience, we will call the colors coral and yellow.
Segment 1- Coral
Round 1: With Coral color yarn, 8 sc in magic ring (8 sc)
Round 2: 2 sc in next st, mark the first st you made to indicate the first st of the round, 2 sc in next 7 sts. (16 sc)
Round 3: 2 sc in marked st, 1 sc in next st, *(2 sc in next st, 1 sc in next st), repeat from * to end of the round. (24 sc)
Round 4: 1 sc in marked st and each st across to end. (24 sc)

Round 5: 1 sc in marked st, 1 sc in next 4 sts, *(place a marker in the BLO of the next st, 1 sc in the FLO of this same st, ch 4, 1 sc in 2nd ch from hook, 1 sc in next 2 chs, sc2tog across the FLO of the same st in which you worked the sc and next st)*. First leg made. 1 sc in the next 6 sts, repeat from * to * to make the second leg, 1 sc in each remaining st across to end. See pic 2. (24 sc)
Note: The stitches right before and after the leg will be slanting as shown in pic 3.

Round 6: 1 sc in the marked st, sc in each st until 1 st is left before the leg, sc2tog across the st before the leg and the marked loop behind the leg, sc in the slanting st right after the leg, sc in each st until 1 st is left before the next leg, sc2tog across the st before the leg and the marked loop behind the leg, sc in the slanting st right after the leg, sc in each st across to end. Remove markers behind the legs. (24 sc)
Round 7: sc2tog across marked st and next st, 1 sc in next st, *(sc2tog across next 2 sts, 1 sc in next st), repeat from * to end. (16 sc)
Round 8: sc2tog across marked st and next st, *(sc2tog across next 2 sts), repeat from * to end. Sl st to marked st but do not fasten off. (8sc)
Stuff this segment almost 3/4th full before proceeding to make the next one.
Segment 2- Yellow
Round 1: Pull yellow color yarn through the coral loop left on your hook, tug the coral yarn to make it disappear, ch 1 with yellow, 2 sc in the same st as sl st, place a marker in the first sc, 2 sc in the next 7 sts. You can now cut off the coral yarn and tuck the tail inside. (16 sc)

Round 2: Work a tight sc in the marked st, move marker into this st, 1 more sc into the same st, 1 sc in next, *(2sc in next st, 1 sc in next), repeat from * to end. (24 sc)
Now, completely stuff your previous segment to your liking before you proceed. \
Round 3: 1 sc in marked st and each st across to end. (24 sc)
Round 4: 1 sc in marked st, 1 sc in next 7 sts, *(place a marker in the BLO of the next st, 1 sc in the FLO of this same st, ch 4, 1 sc in 2nd ch from hook, 1 sc in next 2 chs, sc2tog across the FLO of the same st in which you worked the sc and next st)*. First leg made. 1 sc in the next 6 sts, repeat from * to * to make the second leg, 1 sc in each remaining st across to end. (24 sc)
Note: The stitches before and after the leg will be slightly slanting.
Round 5: 1 sc in the marked st, sc in each st until 1 st is left before the leg, sc2tog across the st before the leg and the marked loop behind the leg, sc in the slanting st right after the leg, sc in each st until 1 st is left before the next leg, sc2tog across the st before the leg and the marked loop behind the leg, sc in the st right after the leg, sc in each st across to end. Remove markers behind the legs. (24 sc)
Round 6: sc2tog across marked st and next st, 1 sc in next st, *(sc2tog across next 2 sts, 1 sc in next st), repeat from * to end. (16 sc)
Round 7: sc2tog across marked st and next st, *(sc2tog across next 2 sts), repeat from * to end. Sl st to marked st but do not fasten off. (8sc)
Stuff this segment almost 3/4th full before proceeding to make the next one.
Segment 3- Coral
Round 1: Pull coral color yarn through the yellow loop left on your hook, tug the yellow yarn to make it disappear, ch 1 with coral, 2 sc in the same st as sl st, place a marker in the first sc, 2 sc in the next 7 sts. You can now cut off the yellow yarn and tuck the tail inside. (16 sc)
Round 2: Work a tight sc in the marked st, move marker into this st, 1 more sc into the same st, 1 sc in next, *(2sc in next st, 1 sc in next), repeat from * to end. (24 sc)
Now, completely stuff your previous segment to your liking before you proceed.
Round 3: 1 sc in marked st and each st across to end. (24 sc)
Round 4: 1 sc in marked st, 1 sc in next 10 sts, *(place a marker in the BLO of the next st, 1 sc in the FLO of this same st, ch 4, 1 sc in 2nd ch from hook, 1 sc in next 2 chs, sc2tog across the FLO of the same st in which you worked the sc and next st)*. First leg made. 1 sc in the next 6 sts, repeat from * to * to make the second leg, 1 sc in each remaining st across to end. (24 sc)
Note: The stitches before and after the leg will be slightly slanting.
Round 5: 1 sc in the marked st, sc in each st until 1 st is left before the leg, sc2tog across the st before the leg and the marked loop behind the leg, sc in the slanting st right after the leg, sc in each st until 1 st is left before the next leg, sc2tog across the st before the leg and the marked loop behind the leg, sc in the st right after the leg, sc in each st across to end. Remove markers behind the legs. (24 sc)
Round 6: sc2tog across marked st and next st, 1 sc in next st, *(sc2tog across next 2 sts, 1 sc in next st), repeat from * to end. (16 sc)
Round 7: sc2tog across marked st and next st, *(sc2tog across next 2 sts), repeat from * to end. Sl st to marked st but do not fasten off. (8sc)
Stuff this segment almost 3/4th full before proceeding to make the next one.
Segment 4-Yellow

Round 1: Pull yellow color yarn through the coral loop left on your hook, tug the coral yarn to make it disappear, ch 1 with yellow, 2 sc in the same st as sl st, place a marker in the first sc, 2 sc in the next 7 sts. You can now cut off the coral yarn and tuck the tail inside. (16 sc)
Round 2: Work a tight sc in the marked st, move marker into this st, 1 more sc into the same st, 1 sc in next, *(2sc in next st, 1 sc in next), repeat from * to end. (24 sc)
Now, completely stuff your previous segment to your liking before you proceed.
Round 3: 1 sc in marked st and each st across to end. (24 sc)
Round 4: 1 sc in marked st, 1 sc in next 13 sts, *(place a marker in the BLO of the next st, 1 sc in the FLO of this same st, ch 4, 1 sc in 2nd ch from hook, 1 sc in next 2 chs, sc2tog across the FLO of the same st in which you worked the sc and next st)*. First leg made. 1 sc in the next 6 sts, repeat from * to * to make the second leg in the last 2 sts before the marked st. (24 sc)
Note: The stitches before and after the leg will be slightly slanting.
Round 5: 1 sc in the marked st, sc in each st until 1 st is left before the leg, sc2tog across the st before the leg and the marked loop behind the leg, sc in the slanting st right after the leg, sc in each st until 1 st is left before the next leg, sc2tog across the st before the leg and the marked loop behind the leg, sc in the slanting st right after the leg (this is the last st of the round). Remove markers behind the legs. (24 sc)
Round 6: sc2tog across marked st and next st, 1 sc in next st, *(sc2tog across next 2 sts, 1 sc in next st), repeat from * to end. (16 sc)
Round 7: sc2tog across marked st and next st, *(sc2tog across next 2 sts), repeat from * to end. Sl st to marked st but do not fasten off. (8sc)
Stuff this segment almost 3/4th full before proceeding to make the next one.
Segment 5-Coral
Round 1: Pull coral color yarn through the yellow loop left on your hook, tug the yellow yarn to make it disappear, ch 1 with coral, 2 sc in the same st as sl st, place a marker in the first sc, 2 sc in the next 7 sts. You can now cut off the yellow yarn and tuck the tail inside. (16 sc)
Round 2: Work a tight sc in the marked st, move marker into this st, 1 more sc into the same st, 1 sc in next, *(2sc in next st, 1 sc in next), repeat from * to end. (24 sc)
Now, completely stuff your previous segment to your liking before you proceed.
Round 3: 1 sc in marked st and each st across to end. (24 sc)
Round 4: 1 sc in marked st, *(place a marker in the BLO of the next st, 1 sc in the FLO of this same st, ch 4, 1 sc in 2nd ch from hook, 1 sc in next 2 chs, sc2tog across the FLO of the same st in which you worked the sc and next st)*. First leg made. 1 sc in the next 14 sts, repeat from * to * to make the second leg, 1 sc in each remaining st across to end. (24 sc)
Note: The stitches before and after the leg will be slightly slanting.
Round 5: 1 sc in the marked st, sc2tog across the st before the leg and the marked loop behind the leg, sc in the slanting st right after the leg, sc in each st until 1 st is left before the next leg, sc2tog across the st before the leg and the marked loop behind the leg, sc in the st right after the leg, sc in each st across to end. Remove markers behind the legs. (24 sc).
Round 6: sc2tog across marked st and next st, 1 sc in next st, *(sc2tog across next 2 sts, 1 sc in next st), repeat from * to end. (16 sc)
Round 7: sc2tog across marked st and next st, *(sc2tog across next 2 sts), repeat from * to end. Sl st to marked st and fasten off with a long tail for cinching. (8sc)
Stuff this last segment until it is full. Whip stitch through the FLO of each stitch around, and pull to close the hole. Make a knot and hide the tail inside the segment.
Head

Round 1: With white color yarn, 8 sc in magic ring (8 sc)
Round 2: 2 sc in next st, mark the first st you made to indicate the first st of the round, 2 sc in next 7 sts, sl st to marked st, cut yarn and pull out the tail through the stitch. (16 sc)
Note: To make a sc join, place a slip knot on your hook and pull up a loop in the st specified, YO and pull through the 2 loops on your hook. Now you have joined yarn while working a sc. This will give seamless rounds while changing colors.
Round 3: With yellow yarn, make a sc join a couple of sts before the fasten off point, place a marker in this sc, make one more sc in the same st, 1 sc in next st, *( 2 sc in next st, 1 sc in next), repeat from * to end, sl st to marked st. (24 sc)
Round 4: Ch 1, 1 sc in same st, place a marker in this sc, 1 sc in next 22 sts, sc2tog across last st and the sl st of the previous round (looks like a st too), sl st to marked st. (24 sc)
Attach safety eyes to the head inside the white circle. You will first insert the screw, then place a rectangular piece of cross-stitch fabric (2″ X 1-1/4″) on the back before adding the backing for the safety eyes. The fabric will add an extra layer of security to the eyes and keep them from pulling out through the sts. For younger children, embroider eyes with black yarn to avoid choking hazards.
Round 5 & 6: Repeat Round 4.
Round 7: Ch 1, sc2tog across the same st and next st, place a marker in this sc2tog, 1 sc in next st, *(sc2tog across next 2 sts, sc in next st), repeat form * 5 times, sc2tog across next 2 sts, sc2tog across last st and the sl st of the previous round, sl st to marked st. (16 sc)
Round 8: Ch 1, 1 sc2tog across this same st and next st, place a marker in this sc2tog, *(sc2tog across next 2 sts), repeat from * 6 times, 1 sc in sl st of previous round, fasten off with a long tail for cinching. (9 sc)
Stuff the head with Fiber fill. Whip stitch through the FLO of each st around and pull to close the hole. Make a knot and hide the tail inside the head.
Antennae (Make 2)
Row 1: Leave a long tail for sewing and ch 5 with coral color yarn, sl st in 2nd ch from hook, 1 sc in next 3 sts, turn.
Row 2: Ch 1, 1 sc in first 3 sts, sl st in last st, fasten off with a long tail.
Fold the piece lengthwise, ensuring the smoother side of the fabric is outside, and whip stitch the edges close with a tapestry needle. Leave a long tail before cutting the yarn.
Attaching the Antennae to the Head
Sew the antennae to the top of the head using the tails left. Hide the remaining tail inside the head.
Attaching the Head to the Body
Place the head on the first segment at an angle and sew it in place. Hide the remaining tails inside the head. Enjoy!
Pin it for later here: