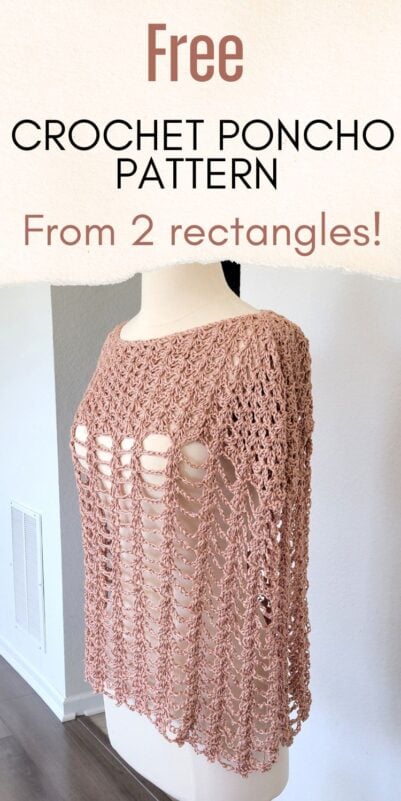
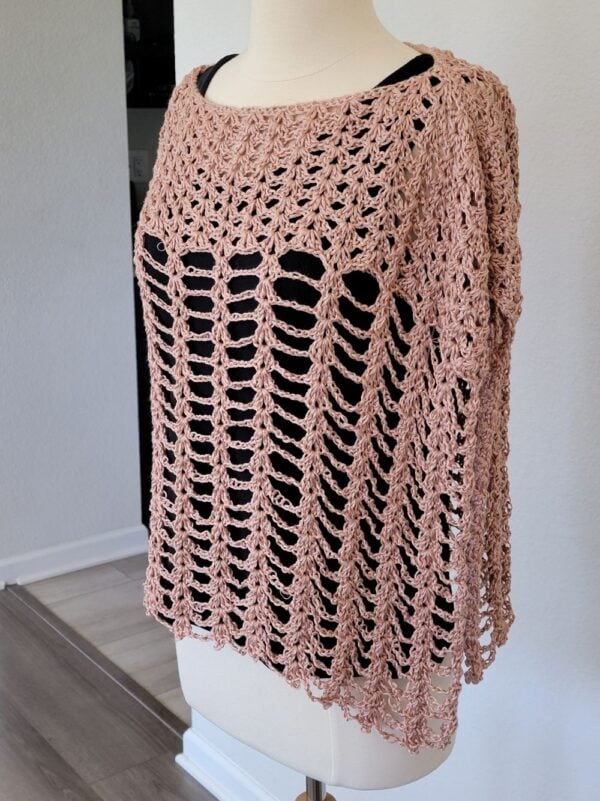
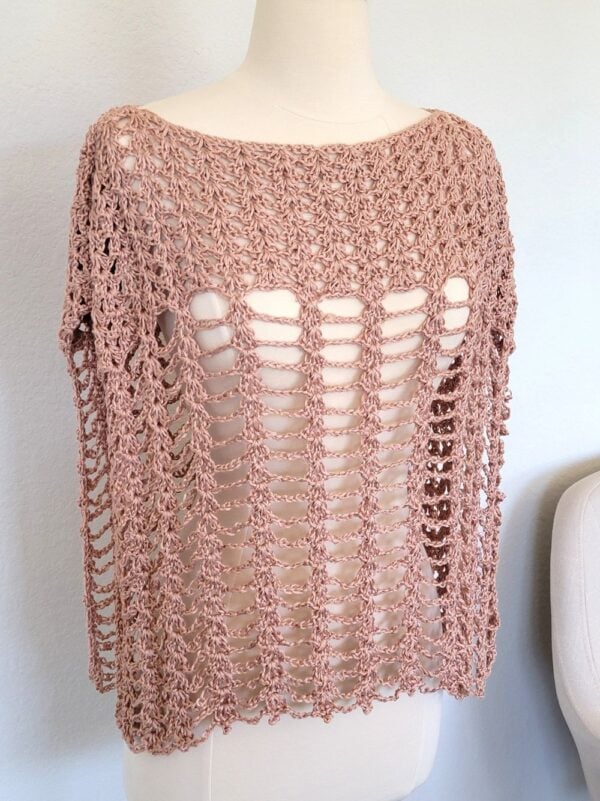
Crochet Poncho Free Pattern for Woman, Breezy Loops Poncho
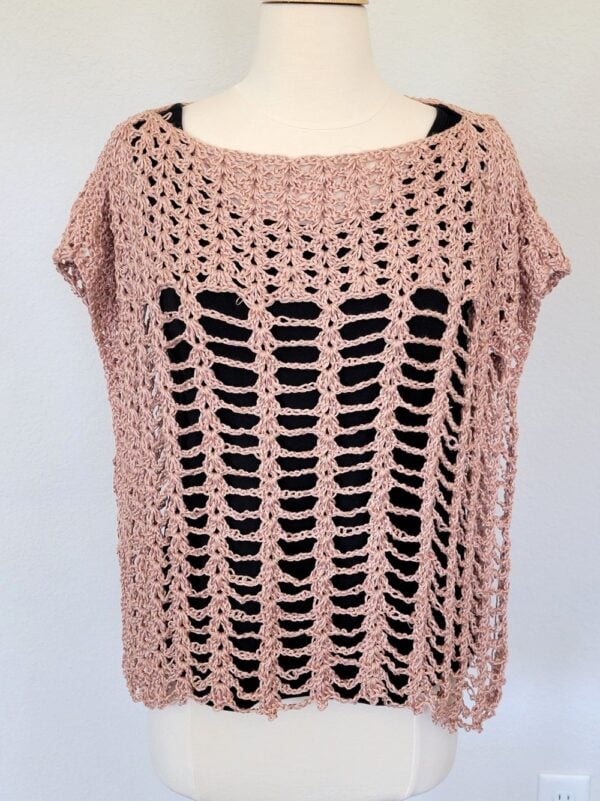
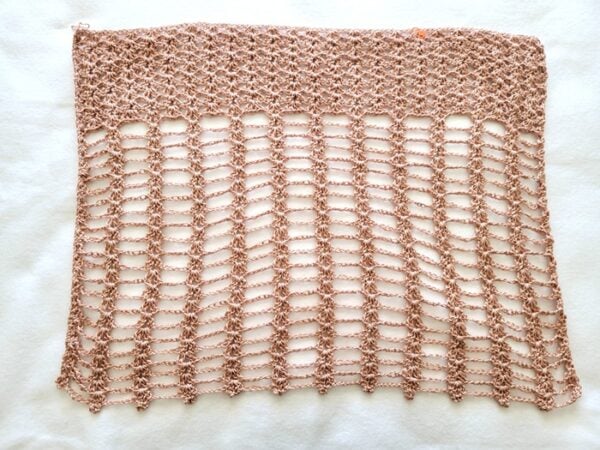
This easy crochet poncho free pattern for women is made from two simple rectangles that are joined together to create a comfortable, relaxed fit. The construction is beginner-friendly and requires no shaping.
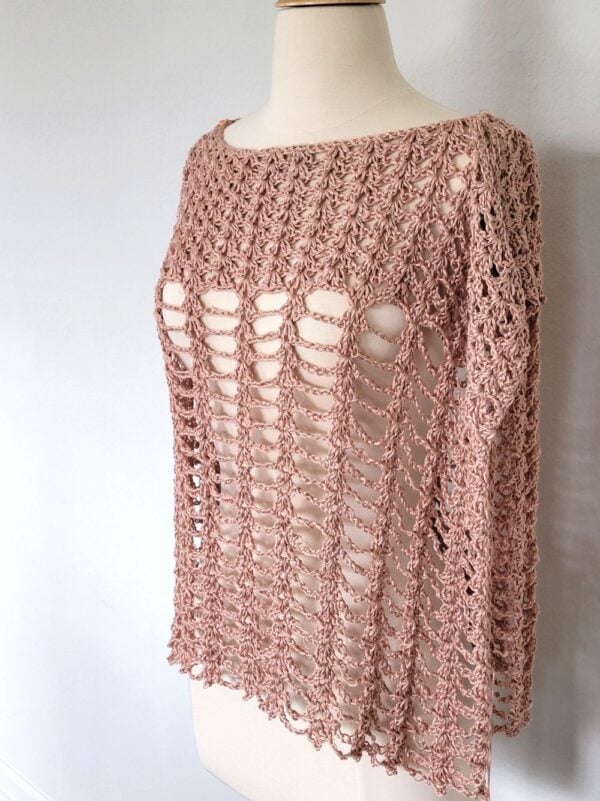
A lacy stitch pattern gives the poncho an open, airy look that is perfect for layering in summer. The stitch repeat is easy to memorize, making it a relaxing project to crochet.
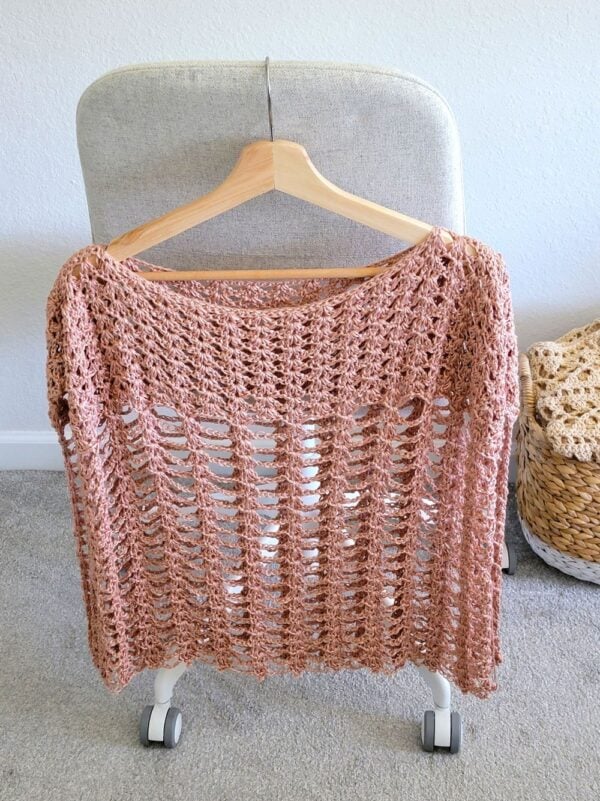
The fabric works up quickly thanks to the open stitch design, so you can finish it in just a weekend. Whether you’re making it for yourself or as a gift, it is a satisfying project from start to finish.
The pattern includes instructions for multiple sizes and can be customized for extra length if desired. Grab your favorite lightweight yarn and enjoy crocheting this simple summer poncho.
Crochet Poncho Free Pattern
Materials
1. Lion Brand Truboo DK weight (size 3) yarn
2. US 7 (4.5mm) hook
3. Locking stitch markers
4. Tapestry needle to weave in the ends.
Finished Size
The poncho is made from 2 rectangles, and the dimensions of each rectangle, when laid flat, are as follows.
S/M: 27-1/2 inches wide and 18 inches tall
L/XL/2XL: 32 inches wide and 21.5 inches tall
3XL/4XL/5XL: 36-1/2 inches wide and 25 inches tall
Yardage
S/M: 450 yards or 2 skeins
L/XL/2XL: 720 yards or 3 skeins
3XL/4XL/5XL: 920 yards or 4 skeins
Stitch Abbreviations
The pattern is written in US terms.
ch: chain
st: stitch
sc: single crochet
dc: double crochet
sk: skip
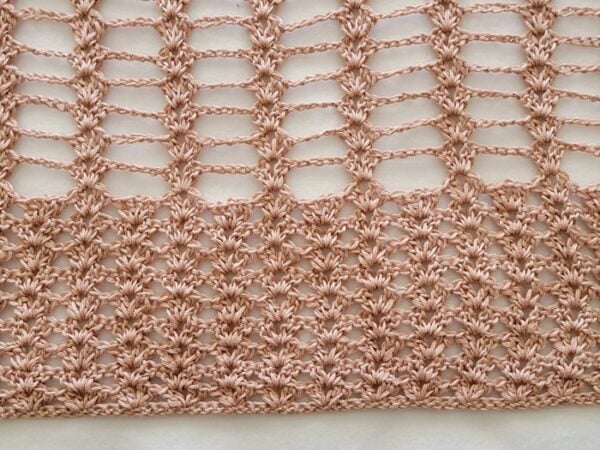
Stitch Explanations
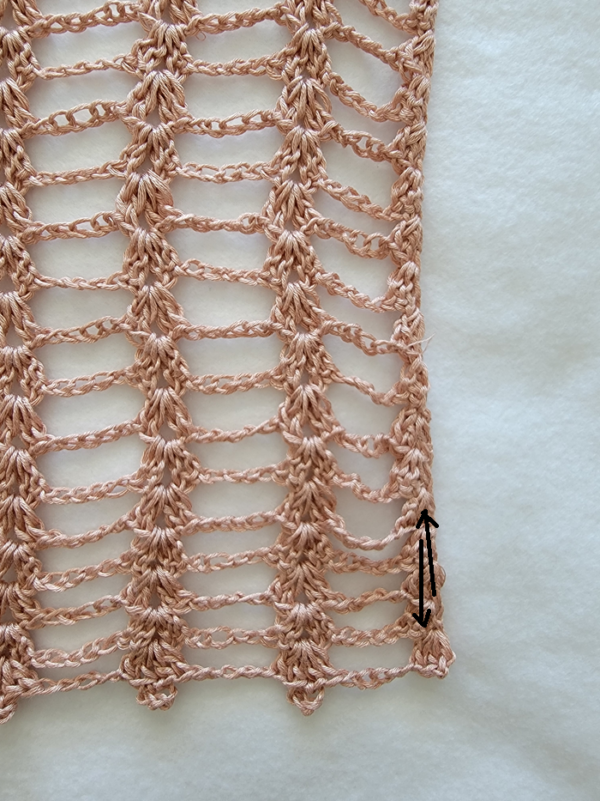
Shell: (2dc, ch 1, 2dc) worked into the same st
Gauge
Pattern for gauge swatch
Ch 34 and follow the pattern from Rows 1 to 6 of the Front and Back Panel below. Then measure for gauge.
Gauge: 4 shells = 4-1/2 inches
Pattern Notes
1. Stitch counts for bigger sizes are given in the order S/M (L/XL/2XL, 3XL/4XL/5XL)
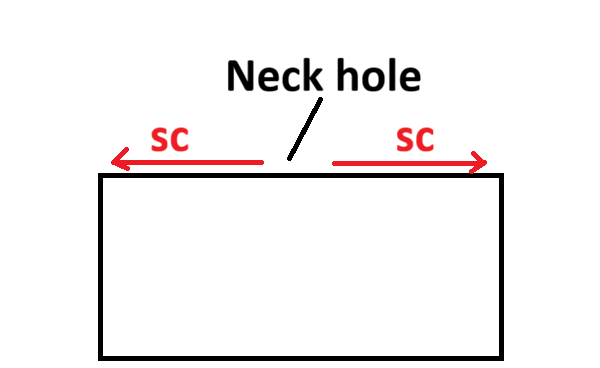
2. The poncho is made by joining 2 identical rectangles at the shoulders.
3. The end of the row stitch counts are given after ———
Front and Back Panel
Loosely ch 106 (122, 138). If you want to make your poncho wider, you can chain any even multiple of 4+2. For example, (26X4)+2 OR (28X4)+ 2 or (30X4)+2, and so on.
Row 1: 1 sc in 2nd ch from hook, 1 sc in each ch across to end. —— 105 (121, 137) sc
Row 2: Ch 3 (counts as a dc here and throughout), 2 dc in first st, *(sk 3 sts, shell in next st), repeat from * to last 4 sts, sk 3 sts, 3 dc in last st, place a marer on this side of the fabric to indicate the right side and turn. ——–25 shells + 6dc (29 shells + 6dc, 33 shells +6dc)
Row 3: Ch 3, 2 dc in first st, shell in ch-1 space of each shell across until you work a shell in the last shell, sk next 4 dc, 3 dc on top of beginning ch-3, turn. ———25 shells + 6dc (29 shells + 6dc, 33 shells +6dc)
Repeat Row 3 until you have completed 9 (11, 13) shell Rows.
Row 10 (12, 14): Ch 3, 2 dc in first st, *(ch 5, sk next shell, shell in ch-1 space of next shell), repeat from * until you work a shell in second to last shell, ch 5, sk last shell and 2 dc, 3 dc on top of beginning ch-3. ——–12 shells + 6 dc (14 shells + 6 dc, 16 shells + 6 dc)
Row 11 (13, 15): Ch 3, 2 dc in first st, *(ch 5, shell in ch-1 space of next shell), repeat from * until you work a shell in the last shell, ch 5, 3 dc on top of beginning ch-3. ——–12 shells + 6 dc (14 shells + 6 dc, 16 shells + 6 dc)
Repeat the above Row 17 (22, 28) more times. You can add more rows if you want it longer.
Last Row: Ch 3, 2 dc in first st, *ch 5, (2dc, ch 5, sl st to top of same dc, 2 dc) in ch-1 space of next shell, repeat from * until you work a shell in the last shell, ch 5, 3 dc on top of beginning ch-3.
Make one more rectangle following the same pattern.
Joining the Front and Back
Place one rectangle with the marked right side facing up. Next, place the next rectangle on top of it with the marked side facing down.
Pin it for later: