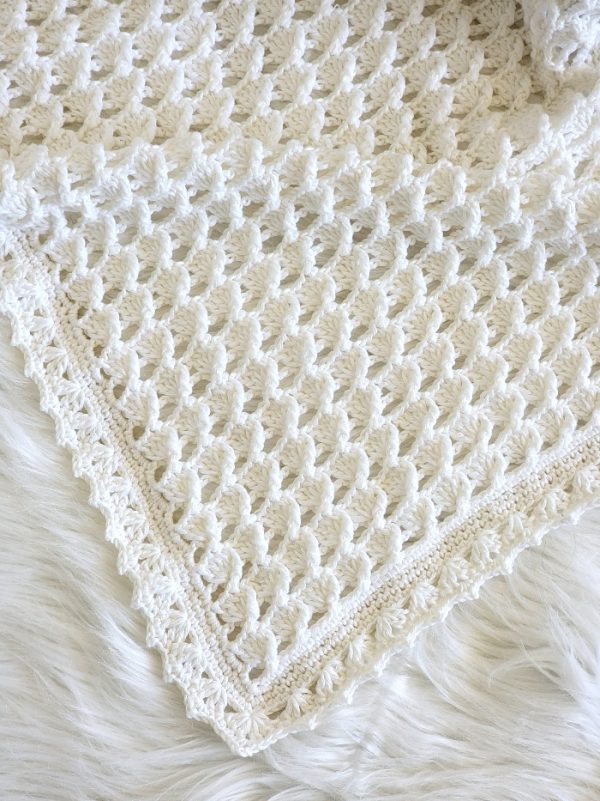

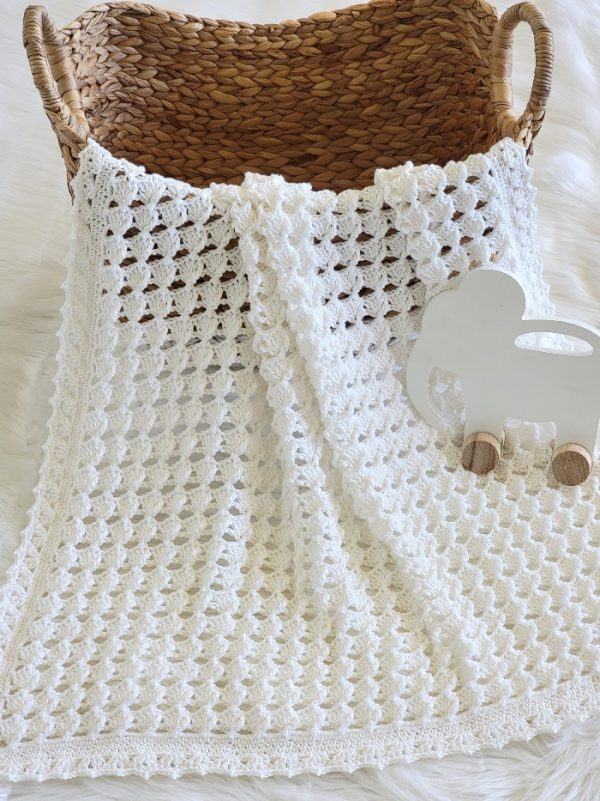
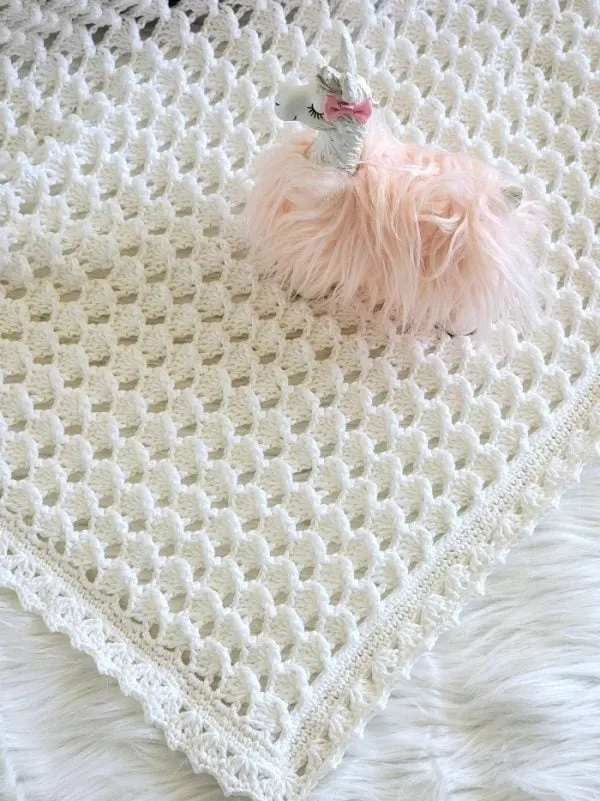
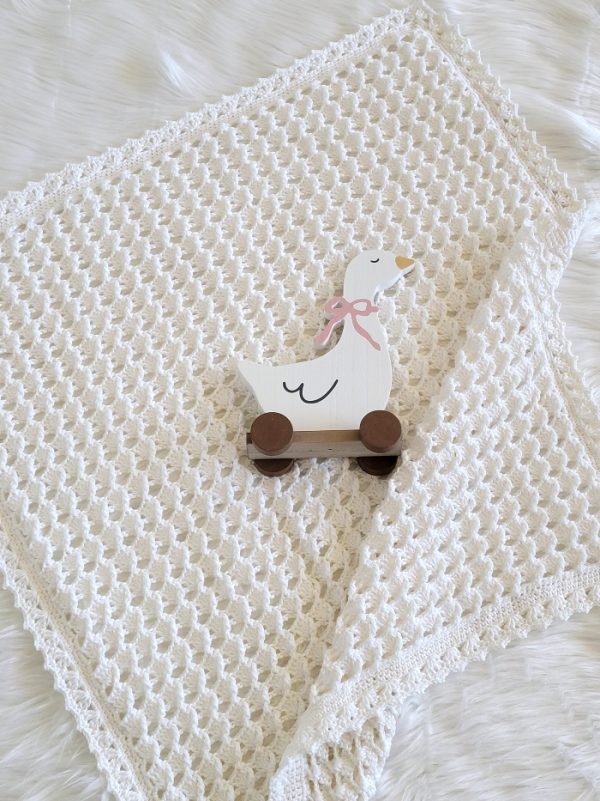
This gender neutral crochet baby blanket is soft, textured, and easy to love. I named it The Angel Wings Blanket because it’s meant to wrap your little one in warmth and comfort, just like gentle wings.

The pattern is a simple two-row repeat that’s easy to remember. It makes the perfect relaxing project to work on while you’re watching your favorite shows.

This blanket is a lovely choice for a baby shower gift or a cozy everyday wrap. The stitch pattern has just enough detail to feel special without being too tricky.

Whether you’re making it for your own baby or as a thoughtful gift, it’s a piece that can be cherished for years. I hope you enjoy making it as much as I enjoyed creating it.

Gender Neutral Crochet Baby Blanket
Pin it for later here.
Materials
1. Lion Brand Coboo in white color. It is a DK, size 3 yarn.
2. An F (3.75mm) and a G (4mm) hook.
3. Tapestry needle to weave in the ends
4. One locking stitch marker or safety pin
Finished Size
36″ wide and 38″ long
Yardage
7 skeins or 1650 yards of Lion Brand Coboo yarn.
Stitch Abbreviations
ch: chain
st: stitch
sc: single crochet
dc: double crochet
hdc: half double crochet
fptr: front post triple (explained below)
sk: skip
Gauge
5 repeats (shells)= 4-1/4 inches
Stitch Explanations
Front post triple (fptr): A front post triple crochet is just like a normal triple crochet (tr), but instead of working into the top of the stitch, you work around the post of the stitch as given below.
Yarn over 2 times, insert your hook from front to back to front again around the post of the dc specified, the post should be sitting in front of your hook now, pull up a loop to get 4 loops on your hook, (YO, pull through 2 loops)3 times- fptr made.
More Crochet Baby Afghans:
Pattern
Using the bigger hook, ch 155. You can chain any multiple of 4 + 3.
Row 1: 1 sc in 2nd ch from hook and each ch across to end, turn. (154 sc)
Row 2: Switch to the smaller F (3.75mm) hook. Ch 3, sk next 2 sts, 1 dc in next st, working along the back of the current dc and inserting your hook from front to back, work a dc in the st right before it to form an ‘X’, *(ch 2, sk 3 sts, 1 dc in next st, working on the back of the current dc and inserting your hook from front to back, work a dc in the st right before it), repeat from * until 2 sts left, DO NOT ch-2, 1 hdc in last sc, turn. (38 crossed dc + 1 dc on each end)
Row 3: Ch 3, *(1 fptr in 1st dc of crossed dc, 4 dc in the gap between the crossed dc), repeat from * in all crossed dc across to end, 1 dc on top of beginning ch -2. (38 shells)
Row 4: Ch 3, sk the next 3 sts, 1 dc in next st, working on the back of the current dc and inserting your hook from front to back, work a dc in the st right before it, *(ch 2, sk 4 sts, 1 dc in next st, working on the back of the current dc and inserting your hook from front to back, work a dc in the st right before it), repeat from * until 1 st and beginning ch is left, DO NOT ch-2, 1 hdc in beginning ch-2, turn. (38 crossed dc + 1 dc on each end)
Repeat Rows 3 and 4 until your blanket is 36 inches long. You will end in a repeat of Row 4 with crossed dc stitches.
Leveling Row: Ch 1, 1 sc in first hdc, *(1 sc in next 2 dc, 2sc in next ch-2 space), repeat from * across and after sc in last 2 dc, 3 sc on top of beginning ch, do not turn. Start border below.
BORDER
Note: The border is worked in the round, without turning and without slip stitching at the end of each round.
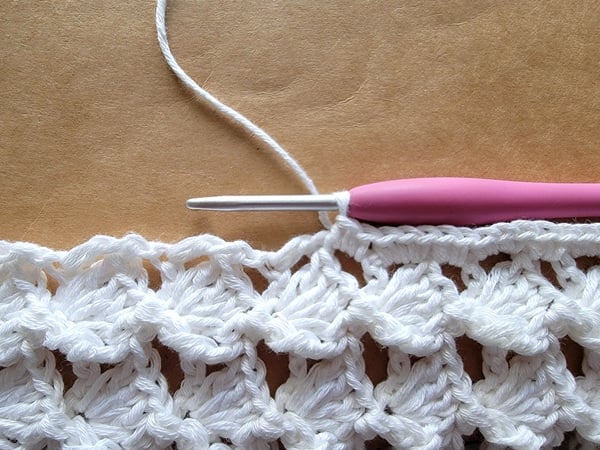
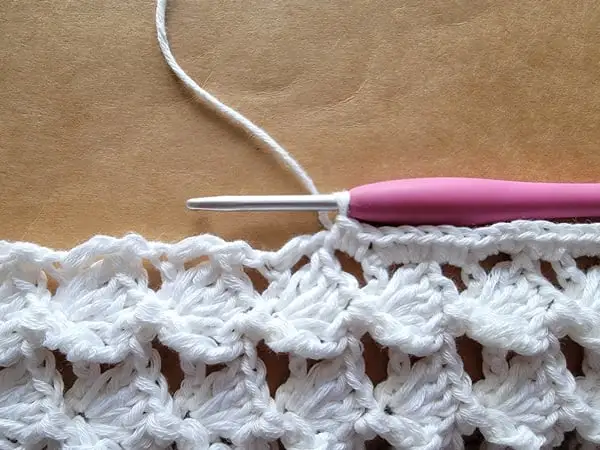
1. Distributing sc along row edges
Round 1 (see pic 1 above): Pivot to work along the left edge of the blanket, 2 sc in the next gap on top of the shell, *(3 sc in gap under the dc on the side of the shell, 2 sc in next gap), repeat from * across and after 2 sc in the last gap on this edge, 3 sc in the corner, work along the foundation chain side, 1 sc in each free loop of the foundation ch across to next corner, 3 sc in the corner, pivot to work along left edge of the blanket, 1 sc on side of the first sc row, *(3sc in next big gap, 2 sc in next small gap on the side of the shell), repeat from * and after you have worked 2 sc on the side of your last shell, 3 sc in the big gap near the corner, 3 sc in the corner st, 1 sc in each st across to next corner st.
Round 2: 3 sc in the corner, place a marker in the middle of these 3 sts, *(1 sc in each st across to next corner, 3 sc in corner), repeat from * until you work all the way around and reach back near the marked corner where you started.
Round 3: 3 sc in the marked st. Move the marker into the middle st of these 3 sts. *(1 sc in each st across to next corner, 3 sc in corner), repeat from * until you work all the way around and reach back near the marked corner where you started, 1 sc in the marked st at the corner, and fasten off.
We fasten off and avoid starting at the corner for a neater and more seamless look.
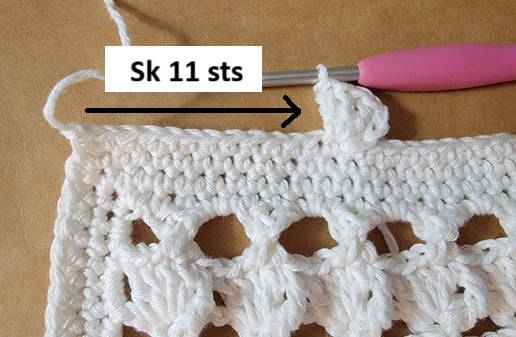

2. Sk 11 sts before the fasten off st and start Round 4
Round 4: Skip 11 stitches before the last sc you just made in the corner (see pic 2 above). Sl st into the stitch right before it, ch 2, then work (1 dc, ch 1, 2 dc) in the same stitch — V-st made. *[Skip next 3 sts, work (2 dc, ch 1, 2 dc) in the next st.], repeat from * one more time, Skip next 3 sts, then in the corner st work (4 dc, ch 1, 4 dc).
*[Skip next 3 sts, work (2 dc, ch 1, 2 dc) in the next st.], repeat from * until you have 3 or 4 sts left before the next corner. If you have 5 sts left, unravel the previous V-st, skip 4 sts instead of 3, and then rework the V-st in the next st. This adjustment will leave you with 4 sts before the corner. Skip the next 3 or 4 sts, then in the corner work (4 dc, ch 1, 4 dc).
Continue the pattern:
[Skip 3 sts, work (2 dc, ch 1, 2 dc) in the next st.]
Repeat around, always working (4 dc, ch 1, 4 dc) into each corner.
When you reach the start of the round, skip the last 2, 3 or 4 sts as needed, then join with a sl st to the top of beginning ch-3. If there are 5 sts left, work a V-st in the middle st and then sl st sl st to the top of the beginning ch-3.
Your border might look slightly wavy now, but the next round will fix it.
Last Round: 1 sc in next dc right before the ch-1 space, (1 sc, ch 2, 1 sc) in next ch-1 space, 1 sc in next dc, *(sk next 2 dc, 1 sc in next dc right before the ch-1 space, (1 sc, ch 2, 1 sc) in next ch-1 space, 1 sc in next dc, repeat from * one more time, 1 sc in next dc (last dc of this shell), 1 sc in first 4 dc of the corner repeat, (1 sc, ch 3, 1 sc) in next ch-1 space, 1 sc in next 4 dc, 1 sc in next 2 dc of the shell, (1 sc, ch 2, 1 sc) in next ch-1 space, 1 sc in next dc.
**(sk next 2 dc, 1 sc in next dc right before the ch-1 space, (1 sc, ch 2, 1 sc) in next ch-1 space, 1 sc in next dc, repeat from ** to next corner repeat, 1 sc in next dc (last dc of shell), 1 sc in first 4 dc of the corner repeat, (1 sc, ch 3, 1 sc), 1 sc in next 4 dc, 1 sc in next 2 dc of the shell, (1 sc, ch 2, 1 sc) in next ch-1 space, 1 sc in next dc.
Repeat from ** all around until you reach back where you started this round, sl st to first sc, fasten off.
Finishing
Weave in any tails along the back of the blanket.
Pin it for later:
![]()
![]()