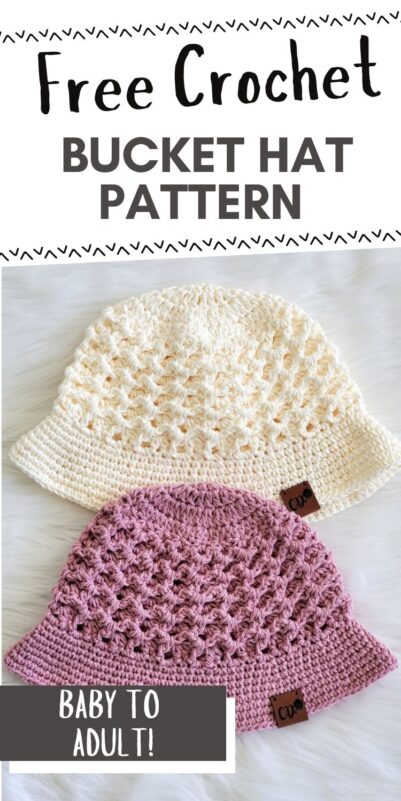
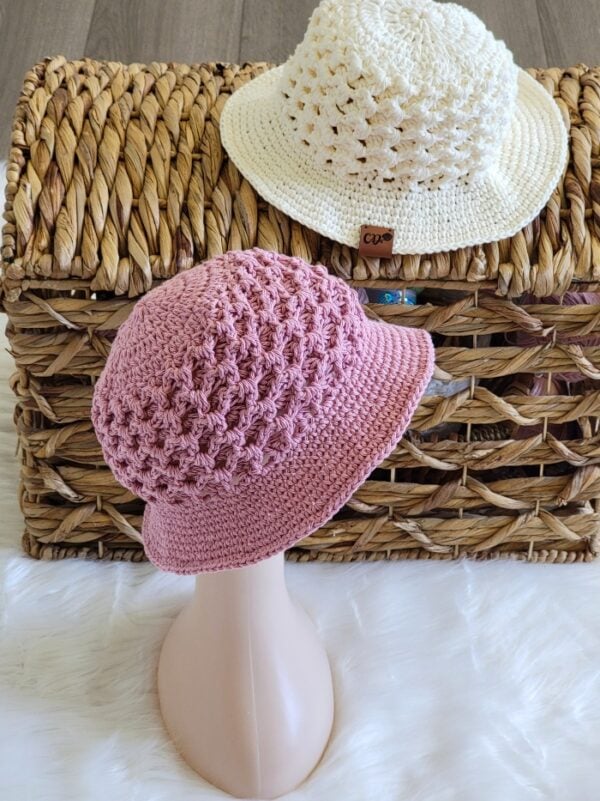
Bucket Hat Crochet Pattern Free, Magnolia Bucket Hat
This is a bucket hat crochet pattern free for Summer. After you all loved my Elsie Bucket hat, it inspired me to design more bucket hats this summer.

The pattern comes in sizes baby to Adult Large. It takes just 1 big skein of Lily Sugar and Cream to make one.
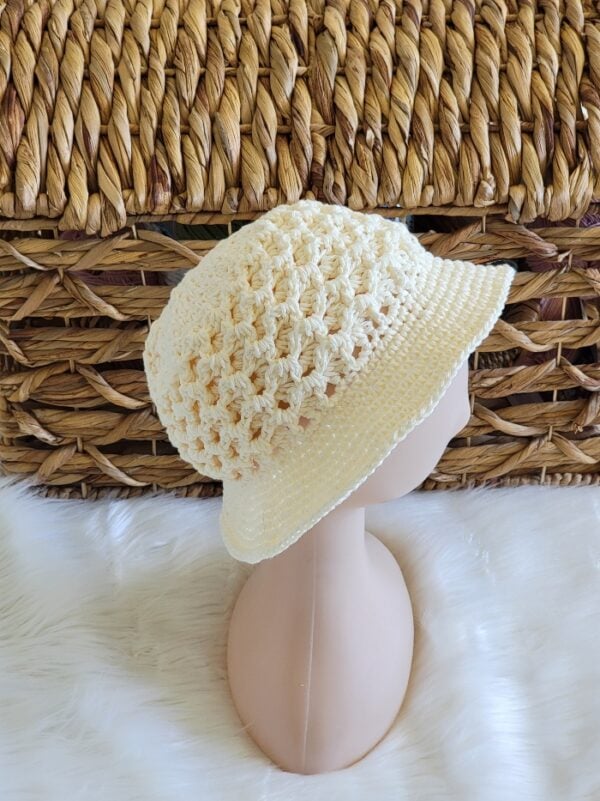
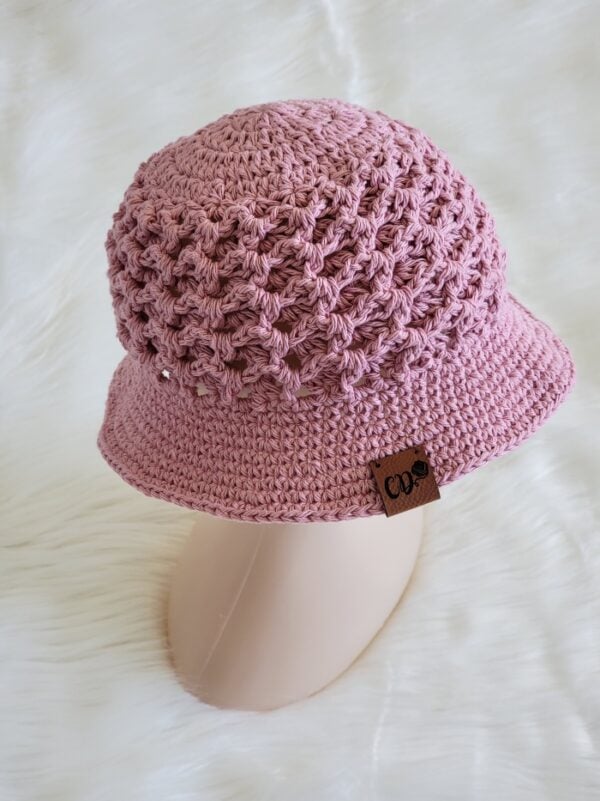
It’s the perfect lightweight accessory to keep you cool while adding a stylish handmade touch to your outfits. The textured stitch detail gives it a modern look while still being simple and beginner-friendly to crochet.
Bucket Hat Crochet Pattern Free
Pin it for later
Materials
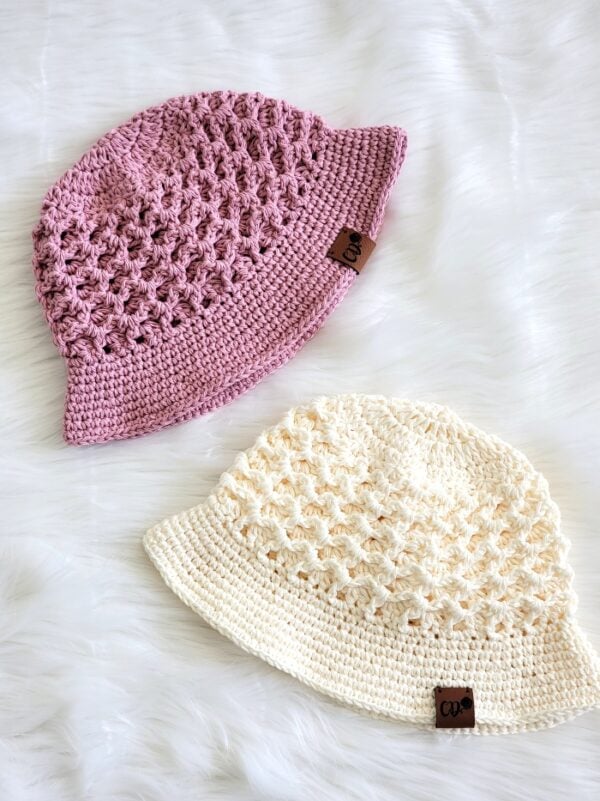
1. Worsted-weight, size 4 cotton yarn. I used Lily Sugar ‘n Cream in color Soft Ecru and Rose for the sample hats pictured.
2. Hook 7 (4.5mm)
3. A yarn needle to weave in the ends
4. A locking stitch marker to keep track of the rounds. You can even use paper clips, a scrap piece of yarn or even a safety pin.
Finished Size
The finished hat measurements are:
Baby (6-12 months): 17″ in circumference
Toddler: 18″ in circumference
Child (3 to 10 Years): 20″ in circumference
Adult Small: 21″ in circumference
Adult Large: 22″ in circumference
Yardage
Baby: 130 yards
Toddler: 140 yards
Child: 150 yards
Adult Small: 160 yards
Adult Large: 190 yards
Stitch Abbreviations
ch: chain
st: stitch
sc: single crochet
dc: double crochet
hdc: half double crochet
sl st: slip stitch
sk: skip
YO: yarn over
fpsc: front post single crochet
Stitch Explanations
Front post single crochet (fpsc): It is worked like a regular sc except for the way you insert your hook. Insert your hook to the back through the gap before the post of the hdc st specified, bring it back to the front through the gap after the post, pull up a loop, YO, and pull through 2 loops to complete a fpsc.
Gauge
5 Repeats = 5″ in length
Pattern Notes
1. Baby and Toddler sizes are grouped together, as are Adult Small and Large sizes. The Child size is listed separately.
2. Headings are color-coded by size group: Baby and Toddler headings are black, Child size is blue, and Adult sizes are magenta.
Baby (Toddler)
Ch 5 and sl st to the 1st chain to form a ring.
Round 1: Ch 2 (does not count as a st), working over the yarn tail, 12 dc in the ring, pull the tail to close the hole in the middle, sl st to 1st dc, do not turn. —–12 dc
Note: In the following rounds, it may appear that you have a tiny extra stitch at the end, but it is the first stitch where you worked your beginning chain-2. So do not accidentally work into it at the end of rounds, or you will unknowingly add extra stitches.
Round 2: Ch 2 (does not count as st), 2 dc in same st as ch 2, 2 dc in each st around, sl st to 1st dc; do not turn.———24 dc
Round 3: Ch 2 (does not count as st), 2 dc in same st as ch 2, 2 dc in each st around, sl st to 1st dc; do not turn.———-48 dc
Round 4 (only for size Baby): Ch 1 (does not count as a st), 1 sc in same st, place a marker in this st, 1 sc in next 14 sts, 2 sc in next st, *(1 sc in next 15 sts, 2 sc in next st), repeat from * to end, sl st to first marked sc, do not turn. —- 51 sc
Round 4 (only for size Toddler): Ch 1 (does not count as a st), 1 sc in same st, place a marker in this st, 1 sc in next 6 sts, 2 sc in next st, *(1 sc in next 7 sts, 2 sc in next st), repeat from * to end, sl st to first marked sc, do not turn. —- 54 sc
Continue for Both Sizes
Round 5: Ch 1, (1 sc, ch 2, 2hdc) all into the next st, *[sk 2 sts, (1 sc, ch 2, 2 hdc) all into the next st], repeat from * until 2 sts are left, sk last 2 sts, sl st to first sc, turn. —–17 (18) projections or repeats
Round 6: Do not make a beginning ch. Take your hook out of the loop, bring yarn to the front of your work and reinsert your hook into the loop, sk the first hdc, fpsc in next hdc, place a marker in this st, ch 2, 2 hdc in the adjacent ch-2 space, *[sk next hdc, fpsc in next hdc, ch 2, 2 hdc in the adjacent ch-2 space], repeat from * and after working into the last ch-2 space, sl st to marked st, turn.—–17 (18) projections or repeats projections or repeats
Round 7: Do not make a beginning ch and do not bring the yarn to the front of your work this time, sk the first hdc, fpsc in next hdc, place a marker in this st, ch 2, 2 hdc in the adjacent ch-2 space, *[sk next hdc, fpsc in next hdc, ch 2, 2 hdc in the adjacent ch-2 space], repeat from * and after working into the last ch-2 space, sl st to marked st, turn.—–17 (18) projections or repeats projections or repeats
Repeat Rounds 6 and 7 until your hat measures approximately 5 (5-1/2) inches tall, ending with Round 7 as the final round on the outside of the hat. Now work the Leveling Row below.
Leveling Row
Note: In the leveling row below, we will work sc sts across the repeats or projections to level them out. We will distribute 3 sts across the first projection and 4 sts across the next, then repeat that sequence.
Leveling Row: After your last round on the outside of the hat, do not turn; continue to work on the same side. * 2 sc in next ch-2 space, sk next hdc, 1 sc in next hdc, 2 sc in next ch-2 space, sk next hdc, 1 sc in next hdc, 1 sc in next sc, repeat from * to end, do not sl st and do not turn. ——-59 (63) sts
Proceed to make the Brim below.
Brim
Notes
1. A marker is placed in the first st of every round. Every time you work into the marked st, move the marker up into the new st you just worked.
2. The increases have been intentionally staggered to avoid giving the brim a hexagonal shape.
Round 1: 2 sc in next st, place a marker in the first st, 1 sc in next st, 2 sc in next, *(1 sc in next 3 sts, 2 sc in next st), repeat from * to end of round, do not sl st and do not turn. —–75 (80) sc
Round 2 (even round): 1 sc in marked st, move the marker up, 1 sc in next st and each st across to end, do not sl st and do not turn. —–75 (80) sc
Round 3: 1 sc in marked st, move the marker up, 1 sc in next st, 2 sc in next st, *( 1 sc in next 4 sts, 2 sc in next st), repeat from * to last 2 sts, 1 sc in last 2 st, do not sl st and do not turn. —–90 (96) sc
Round 4: Repeat Round 2, the even round.
Round 5: 2 sc in marked st, move the marker up into the first st, 1 sc in next 5 sts, *(2 sc in next st, 1 sc in next 5 sts), repeat from * to end, do not sl st and do not turn. ——-105 (112) sc
Round 6: Repeat Round 2, the even round.
Round 7: 1 sc in marked st, move the marker up, 1 sc in next 3 sts, 2 sc in next st, *( 1 sc in next 6 sts, 2 sc in next st), repeat from * to last 2 sts, 1 sc in last 2 sts, do not sl st and do not turn. ——120 (128) sc
Round 8: Repeat Round 2, the even round. Fasten off and finish with an invisible join if you are making the Baby size.
The next 2 rounds are optional for Toddler size if you want to make your brim wider.
Round 9: 2 sc in marked st, move the marker up into the first st, 1 sc in next 7 sts, *(2 sc in next st, 1 sc in next 7 sts), repeat from * to end, do not sl st and do not turn. ——-144 sc
Round 10: Repeat Round 2, the even round. Fasten off and finish with an invisible join.
Finishing
Weave in any tails left inside the hat.
Child
Ch 5 and sl st to the 1st chain to form a chain ring.
Round 1: Ch 2 (does not count as a st), working over the yarn tail, 12 dc in the ring, pull the tail to close the hole in the middle, sl st to 1st dc, do not turn. —–12 dc
Note: In the following rounds, it may appear that you have a tiny extra stitch at the end, but it is the first stitch where you worked your beginning chain-2. So do not accidentally work into it at the end of rounds, or you will unknowingly add extra stitches.
Round 2: Ch 2 (does not count as a st), 2 dc in same st as ch 2, 2 dc in each st around, sl st to first dc, do not turn.—–24 dc
Round 3: Ch 2 (does not count as a st), 2 dc in same st as ch 2, 2 dc in each st around, sl st to first dc, do not turn.——48 dc
Round 4: Ch 1 (does not count as st), 1 hdc in same st, 1 hdc in next 2 sts, 2 hdc in next, *( 1 hdc in next 3 sts, 2 hdc in next) repeat from * to end of the round, sl st to first hdc; do not turn.———60 hdc
Round 5: Ch 1, (1 sc, ch 2, 2hdc) all into the next st, *[sk 2 sts, (1 sc, ch 2, 2 hdc) all into the next st], repeat from * until 2 sts are left, sk last 2 sts, sl st to first sc, turn. —–20 projections or repeats
Round 6: Do not make a beginning ch. Take your hook out of the loop, bring yarn to the front of your work and reinsert your hook into the loop, sk the first hdc, fpsc in next hdc, place a marker in this st, ch 2, 2 hdc in the adjacent ch-2 space, *[sk next hdc, fpsc in next hdc, ch 2, 2 hdc in the adjacent ch-2 space], repeat from * and after working into the last ch-2 space, sl st to marked st, turn.—–20 projections or repeats projections or repeats
Round 7: Do not make a beginning ch and do not bring the yarn to the front of your work this time, sk the first hdc, fpsc in next hdc, place a marker in this st, ch 2, 2 hdc in the adjacent ch-2 space, *[sk next hdc, fpsc in next hdc, ch 2, 2 hdc in the adjacent ch-2 space], repeat from * and after working into the last ch-2 space, sl st to marked st, turn.—–20 projections or repeats
Repeat Rounds 6 and 7 until your hat measures approximately 6 inches tall, ending with Round 7 as the final round on the outside of the hat. Now work the Leveling Row below.
Leveling Row
Note: In the leveling row below, we will work sc sts across the repeats or projections to level them out. We will distribute 3 sts across the first projection and 4 sts across the next, then repeat that sequence.
Leveling Row: After your last round on the outside of the hat, do not turn; continue to work on the same side. * 2 sc in next ch-2 space, sk next hdc, 1 sc in next hdc, 2 sc in next ch-2 space, sk next hdc, 1 sc in next hdc, 1 sc in next sc, repeat from * to end, do not sl st and do not turn. ——-70 sts
Proceed to make the Brim below.
Brim
Notes
1. A marker is placed in the first st of every round. Every time you work into the marked st, move the marker up into the new st you just worked.
2. The increases have been intentionally staggered to avoid giving the brim a hexagonal shape.
Round 1: 1 sc in next st, place a marker in this st, 1 sc in next 8 sts, 2 sc in next st, *( 1 sc in next 9 sts, 2 sc in next), repeat from * to end, do not sl st and do not turn.——77 sc
Round 2 (Even Round): 1 sc in marked st, move the marker up, 1 sc in each st across to end, do not sl st and do not turn.——-77 sc
Round 3: 1 sc in marked st, move the marker up, 1 sc in next 2 sts, 2 sc in next st, *(1 sc in next 6 sts, 2 sc in next), repeat from * to last 3 sts, 1 sc in last 3 sts, do not sl st and do not turn.——-88 sc
Round 4: Repeat Round 2, the Even Round.
Round 5: 1 sc in marked st, move the marker up, 1 sc in next 6 sts, 2 sc in next st, *(1 sc in next 7 sts, 2 sc in next), repeat from * to end, do not sl st and do not turn.——–99 sc
Round 6: Repeat Round 2, the Even Round.
Round 7: 1 sc in marked st, move the marker up, 1 sc in next 3 sts, 2 sc in next st, *(1 sc in next 8 sts, 2 sc in next), repeat from * to last 4 sts, 1 sc in last 4 sts, do not sl st and do not turn.——-110 sc
Round 8: Repeat Round 2, the Even Round.
Round 9: 1 sc in marked st, move the marker up, 1 sc in next 8 sts, 2 sc in next st, *(1 sc in next 9 sts, 2 sc in next), repeat from * to end, do not sl st and do not turn.——–121 sc
Round 10: Repeat Round 2, the Even Round. Fasten off and finish with an invisible join.
Finishing
Weave in any tails left inside the hat.
Adult Small (Adult Large)
Pattern Notes
Stitch counts are given in the order Adult Small (Large). If there is only 1 number, it applies to both sizes.
Ch 5 and sl st to the 1st chain to form a ring.
Round 1: Ch 2 (does not count as a st), working over the yarn tail, 12 dc in the ring, pull the tail to close the hole in the middle, sl st to 1st dc, do not turn. —–12 dc
Note: In the following rounds, it may appear that you have a tiny extra stitch at the end, but it is the first stitch where you worked your beginning chain-2. So do not accidentally work into it at the end of rounds, or you will unknowingly add extra stitches.
Round 2: Ch 2 (does not count as st), 2 dc in same st as ch 2, 2 dc in each st around, sl st to 1st dc; do not turn.———24 dc
Round 3: Ch 2 (does not count as st), 2 dc in same st as ch 2, 2 dc in each st around, sl st to 1st dc; do not turn.———-48 dc
Round 4 (only for size Small): Ch 1 (does not count as a st), 1 hdc in same st as ch 1, 1 hdc in next 2 sts, *(2 hdc in next st, 1 hdc in next 2 sts), repeat from * to end, sl st to first hdc, do not turn. ——-63 hdc
Round 4 (only for size Large): Ch 1 (does not count as a st), 1 hdc in same st as ch 1, 1 hdc in next 2 sts, *(2 hdc in next st, 1 hdc in next st, 2 hdc in next st, 1 hdc in next 2 sts), repeat from * to end, sl st to first hdc, do not turn. ——-66 hdc
Continue for Both Sizes
Round 5: Ch 1, (1 sc, ch 2, 2hdc) all into the next st, *[sk 2 sts, (1 sc, ch 2, 2 hdc) all into the next st], repeat from * until 2 sts are left, sk last 2 sts, sl st to first sc, turn. —–21 (22) projections or repeats
Round 6: Do not make a beginning ch. Take your hook out of the loop, bring yarn to the front of your work and reinsert your hook into the loop, sk the first hdc, fpsc in next hdc, place a marker in this st, ch 2, 2 hdc in the adjacent ch-2 space, *[sk next hdc, fpsc in next hdc, ch 2, 2 hdc in the adjacent ch-2 space], repeat from * and after working into the last ch-2 space, sl st to marked st, turn.—–21 (22) projections or repeats projections or repeats
Round 7: Do not make a beginning ch and do not bring the yarn to the front of your work this time, sk the first hdc, fpsc in next hdc, place a marker in this st, ch 2, 2 hdc in the adjacent ch-2 space, *[sk next hdc, fpsc in next hdc, ch 2, 2 hdc in the adjacent ch-2 space], repeat from * and after working into the last ch-2 space, sl st to marked st, turn.—–21 (22) projections or repeats
Repeat Rounds 6 and 7 until your hat measures approximately 6 (6-1/2) inches tall, ending with Round 7 as the final round on the outside of the hat. Now work the Leveling Row below.
Leveling Row for Size Small
Note: In the leveling row below, we will work sc sts across the repeats or projections to level them out. We will distribute 3 sts across the first 2 projections and 4 sts across the third, and repeat that sequence.
Leveling Row: After your last round on the outside of the hat, do not turn; continue to work on the same side. *(2 sc in next ch-2 space, sk next hdc, 1 sc in next hdc) X 2 times, 2 sc in next ch-2 space, sk next hdc, 1 sc in next hdc, 1 sc in next sc, repeat from * to end, do not sl st and do not turn. ——-70 sts
Proceed to make the Brim below.
Leveling Row for Size Large
Note: In the leveling row below, we will work sc sts across the repeats or projections to level them out. We will distribute 3 sts across the first 2 projections, 4 sts across the third, 3 sts across the 4th, 5th, and 6th projections, and 4 sts across the seventh projection, and repeat that sequence.
Leveling Row: After your last round on the outside of the hat, do not turn; continue to work on the same side. *(2 sc in next ch-2 space, sk next hdc, 1 sc in next hdc) X 2 times, 2 sc in next ch-2 space, sk next hdc, 1 sc in next hdc, 1 sc in next sc, (2 sc in next ch-2 space, sk next hdc, 1 sc in next hdc) X 3 times, 2 sc in next ch-2 space, sk next hdc, 1 sc in next hdc, 1 sc in next sc, repeat from * 2 more times, 2 sc in next ch-2 space, sk next hdc, 1 sc in next hdc, do not sl st and do not turn. ——72 sts
Brim- Adult Small and Large
Notes
1. A marker is placed in the first st of every round. Every time you work into the marked st, move the marker up into the new st you just worked.
2. The increases have been intentionally staggered to avoid giving the brim a hexagonal shape.
Round 1 (For size Small only): 1 sc in next st, place a marker in this st, 1 sc in next 3 sts, 2 sc in next st, *(1 sc in next 4 sts, 2 sc in next), repeat from * to end, do not sl st and do not turn.——84 sc
Round 1 (For size Large only): 1 sc in next st, place a marker in this st, 1 sc in next 4 sts, 2 sc in next st, *(1 sc in next 5 sts, 2 sc in next), repeat from * to end, do not sl st and do not turn.——84 sc
Continue Brim for Both Sizes
Round 2 (Even Round): 1 sc in marked st, move the marker up, 1 sc in each st across to end, do not sl st and do not turn.——-84 sc
Round 3: 1 sc in marked st, move the marker up, 1 sc in next 2 sts, 2 sc in next st, *(1 sc in next 6 sts, 2 sc in next), repeat from * to last 3 sts, 1 sc in last 3 sts, do not sl st and do not turn.——-96 sc
Round 4: Repeat Round 2, the Even Round.
Round 5: 1 sc in marked st, move the marker up, 1 sc in next 6 sts, 2 sc in next st, *(1 sc in next 7 sts, 2 sc in next), repeat from * to end, do not sl st and do not turn.——–108 sc
Round 6: Repeat Round 2, the Even Round.
Round 7: 1 sc in marked st, move the marker up, 1 sc in next 3 sts, 2 sc in next st, *(1 sc in next 8 sts, 2 sc in next), repeat from * to last 4 sts, 1 sc in last 4 sts, do not sl st and do not turn.——-120 sc
Round 8: Repeat Round 2, the Even Round. You can stop here or work the next 2 rounds below to add more width to your brim. If you end here, sl st to the first sc and fasten off.
Finishing
Weave in any tails left inside the hat.
Pin it for later: