
Free Crochet Poncho Pattern with Video, Uptown Poncho
This knit-look free crochet poncho pattern now comes in a Kid’s Sizes too. You can now make a Mommy and Me set. How cool is that?

Some of you had requested an asymmetrical crochet poncho pattern, so this one is for you. I hope you like it. Please leave your feedback. I love hearing from you.

The crochet poncho is designed using the herringbone half double crochet stitch to give it the look of a knit fabric. You can watch this video and learn how to work the beautiful stitch. A full video tutorial for the poncho is given at the end of the blogpost.
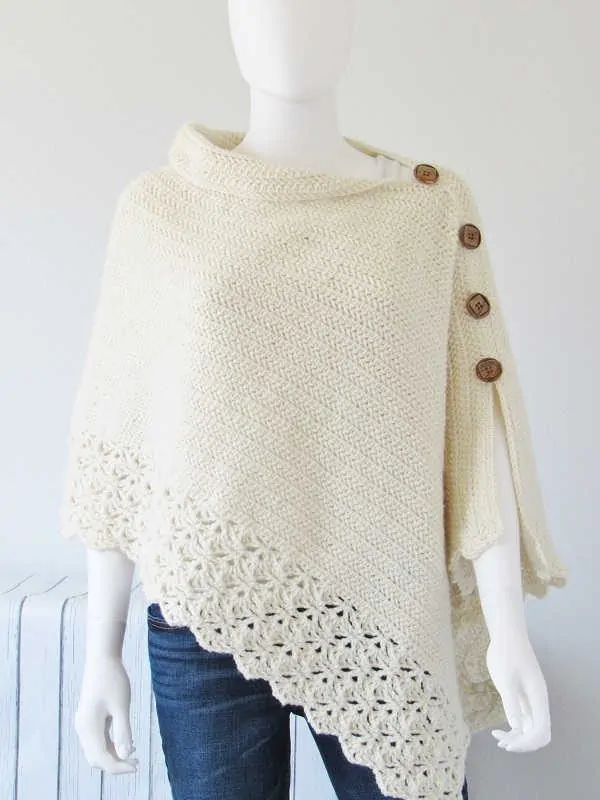


I love the cream color but it was a pain capturing it in pictures. No matter how hard I tried, one side would look brighter than the other and stayed blurry. After taking almost 400 pictures like a crazy woman, this is what I got! I swear, the poncho is far prettier than the pictures.
This is a beginner-friendly poncho pattern that is made from a simple rectangle seamed on the sides. Unlike my lacy Elise Poncho, this design is warm and chunky. I added a lacy hem to complement the solid body of the poncho.
This free crochet poncho pattern was tested using a wool blend worsted weight yarn. A DK yarn will work great for this poncho too, but keep in mind that you might need extra yardage if your yarn is thinner.
You might also like my FREE Elise Poncho Crochet Pattern.

Free Crochet Poncho Pattern-Uptown Poncho
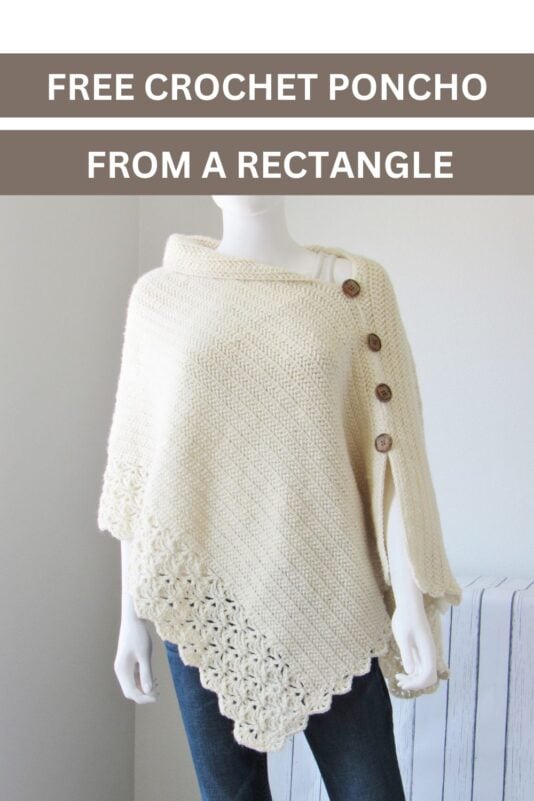
You can pin it for later here.
Materials
- Worsted weight(size 4) yarn. I would suggest a wool blend yarn for good drape. Lion Brand Wool-Ease in color Fisherman was used for the sample poncho.
- Hook J(6mm). Use any size hook to attain gauge.
- Tapestry needle to weave in the ends.
- 1-1/4 inch wooden buttons- 4 for size S/M and 5 for the bigger sizes.
Finished Size
The measurements give the size of the rectangle before seaming.
S/M- 64 inches long and 22 inches wide
L/XL-66.5 inches long and 23 inches wide
2XL/3XL-69 inches long and 24 inches wide
Yardage
S/M – 6 1/2 skeins of Lion Brand Wool-Ease of 197 yards each
L/XL: 7 1/2 skeins of Lion Brand Wool-Ease of 197 yards each
2XL/3XL: 8 Skeins of Lion Brand Wool-Ease of 197 yards each
Gauge
13 hhdc and 11.5 Rows= 4 inches
Stitch Abbreviations
ch- chain
hhdc- herringbone half double crochet
dc- double crochet
beg- beginning
Stitch Explanations
Herringbone Half Double Crochet(hhdc): YO, insert your hook into the next st, pull up a loop through the st and the first loop on your hook, 2 loops left on your hook, YO and pull through the remaining 2 loops on your hook.
V- st: (dc, ch 1, dc)worked into the same st.
Lacy Shell: (dc, ch 1, dc, ch 2, dc, ch 1, dc)worked into the same st or ch-space.
Crochet Poncho Pattern
Note: Stitch counts for bigger sizes are given in the order S/M(L/XL, 2XL/3XL)
Ch 211(219, 227). Initial chain should be a multiple of 8+ 3 for the lacy hem pattern to work.
Row 1: 1 hhdc in the 3rd ch from hook and each ch across to end. Turn.—–209 (217, 225)hhdc
Row 2: Ch 2 (counts as a hhdc), 1 hhdc in each st across to end. Turn.——-209 (217, 225)hhdc
Repeat Row 2 45(48, 53) more times. Your work will measure close to 16 1/2(17 1/2, 19) inches
Do not fasten off. Turn and work the Lacy Hem below.
Lacy Hem for Crochet Poncho
Note: The lacy hem is 5-1/2 inches wide for all the sizes.
Row 1: Ch 3 (counts as 1 dc here and throughout), (dc, ch 1, dc) in the same st as beg ch-3, ch 1, sk 3 sts, 1 sc in next, *( ch 1, sk 3 sts, 1 lacy shell in next, ch 1, sk 3 sts, 1 sc in next), repeat from * to last 4 sts, ch 1, sk 3 sts, (1 dc, ch 1, 2 dc) in last st. Turn.——25(26, 27) full shells + 1 half shell on each end
Row 2: Ch 1, 1 sc in the same st as ch 1, ch 2, V-st in the next sc between shells, *(ch 2, sc in ch-2 space of next shell, ch 2, V-st in the next sc between shells), repeat from * until you work a V-st in the last sc, ch 2, 1 sc in beg ch-3. Turn.—–26(27, 28) V-sts
Row 3: Ch 1, 1 sc in same st as ch 1, ch 1, lacy shell in ch-1 space of the next V-st, *( ch 1, 1 sc in next sc on top of shell, ch 1, shell in ch-1 space of the next V-st), repeat from * until you have worked a shell into all the V-sts, ch 1, 1 sc in last sc. Turn.—–26(27, 28)full shells
Row 4: Ch 3, 1 dc in the same st as ch 3, ch 2, 1 sc in the ch-2 space of next shell, *(ch 2, 1 V-st in the next sc between shells, ch 2, 1 sc in the ch-2 space of next shell), repeat from * until you work a sc in the ch-2 space of the last shell, ch 2, 2 dc in last sc. Turn.——-25(26, 27) V-sts
Row 5: Ch 3, (dc, ch 1, dc) into the same st as ch 3, ch 1, 1 sc in next sc on top of shell, *(ch 1, 1 shell in ch-1 space of next V-st, ch 1, 1 sc in next sc on top of shell), repeat from * until you have worked a sc in the last sc, ch 1, (1 dc, ch 1, 2 dc) in beg ch-3. Turn.——25(26, 27) full shells + 1 half shell on each end
Repeat Rows 2-5 once and then Rows 2 and 3 once. Do not fasten off. We will continue with the working yarn once the poncho is seamed. Fold the rectangle along its length, leave a 13 1/2 inch opening for the neck and using mattress stitch, sew for about 10 inches. The rest of the length is left open for the sleeve slit.
Adding Sleeve Edging

Now pivot your work and work along the shorter side of the rectangle to add shells to the sleeve edges. Place a marker at the base of the 3 half shells on the edge as shown in pic 1 above. You will work shells into these marked spaces.

Work 1 more sc in the corner where you have your working yarn, working along the side of the lacy rows, ch 1, 1 shell in the first marked space, ch 1, 1 sc in the middle of the 2 markers, ch 1, shell in the next marked space, ch 1, 1 sc in the middle of the 2 markers, shell in the last marked space, ch 1, 1 sc at the base of the 3rd hhdc row.


Continue working one shell per 4 rows on an average until you reach the arm slit (pic 3), work sc distributed evenly along the side of the slit, 2 sc at the base of the slit and sc distributed evenly down the second side of the slit (see pic 4), continue to work shells across the backside of the poncho until you hit the hem and fasten off.
Finishing
- Weave in any tails left.
- Sew the wooden buttons onto the seam.
You might also like my free Elise Crochet Poncho Pattern that features a 3D stitch.
You can find more such free patterns on Allfreecrochet.com.
Pin it for later:


OhMyGoshhh!!! It’s gorgeous!!! I absolutely LOVE it!! You did a fabulous job!! I’d love to buy one!!
Does the pattern get sent to the email address associated with your PayPal account or with my email that I login to Facebook with?
It gets sent to your Paypal email.
This is a beautiful poncho! I can’t wait to make it! Thank you so much for the pattern.
Hi Kelly, you are very welcome, I am glad you love the pattern.
I am super excited. This poncho will be perfect for layering in the office. However I did have to knock 16 stitches off of the S/M after realizing how long it would be. I am petite but usually wear a Large top. After about 10 rows (matching the gauge) I realized it would cover my hands 🤣.
Just started over, can’t wait to get caught back up. Thanks for the gorgeous pattern.
Hi Kaitlin, I am petite too and wear a S/M. Once your poncho grows you will need enough length for it to drape over your shoulders too. I hope you took that into account when you recalculated.
I am not a poncho person but this is stunning! I will have to give it a try.
Thank you.
Just a question does the Cajon 211 includes the 8 plus three for the lacy hem thank you
yes, it does.
This is so BEAUTIFUL! Do you have a video on how to do the shell pattern?
I am sorry, I do not have a video for the shell pattern.
Okay so full disclosure I tend to be befuddled by the simplest instructions. When it says fold rectangle along length and leave a 13.5 inch hole for neck and sew for 10 inches,where do I start measuring? Along the top of the piece or side? This is probably a really dense question but I’m an over thinker and well…
Hi Amber, You fold the rectangle, leave 1 13.5 inch hole from the fold and sew the next 10 inches. Does that help?
Nicest poncho pattern I’ve seen in a long time.
Will certainly make it.
I have a question on round 5 of the hem. It says “Row 5: Ch 3, (dc, ch 1, dc) into the same st as ch 3, ch 1, 1 sc in next sc on top of shell, *(ch 1, 1 shell in ch-1 space of next V-st, ch 1, 1 sc in next sc on top of shell), repeat from * until you have worked a sc in the last sc, ch 1, (1 dc, ch 1, 2 dc) in beg ch-3. Turn.——25(26, 27) full shells + 1 half shell on each end” but there are no shells in round 4 only V stitch and single crochet. But it says to sc in the top of shell? Am I misreading this?
Hi Sue, I apologize for the late reply. I was out of town. You are crocheting into the sc st on top of the shells and not directly on the shells. Hope that helps.