Winter Hat Crochet Pattern, Crossroads Beanie
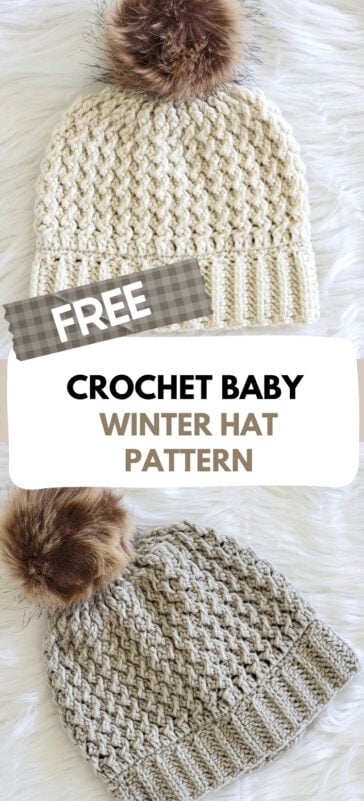
I am excited to share my new textured winter hat crochet pattern with you! The beautiful textured stitch has a knit-like look that gives this hat so much charm.
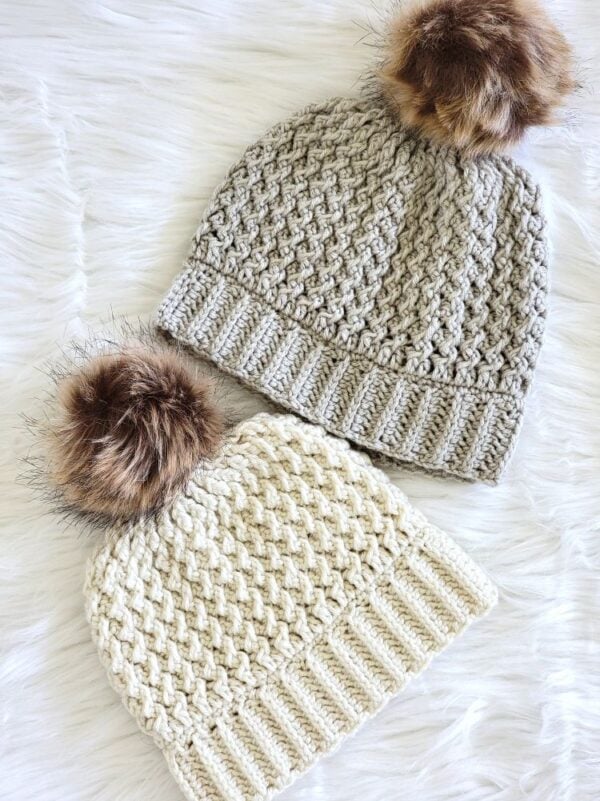
This is an intermediate-level pattern, but adventurous beginners are welcome to give it a try. I will also be adding a video tutorial soon for those who prefer to learn visually.
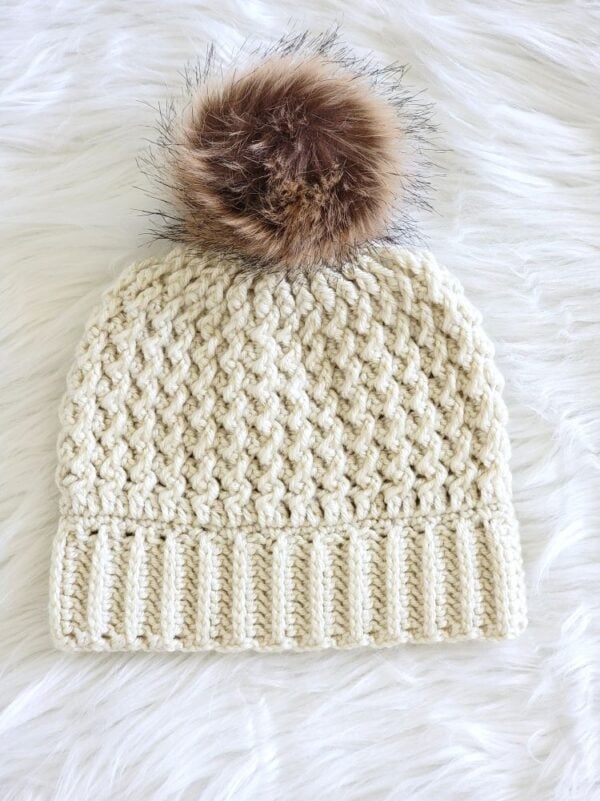
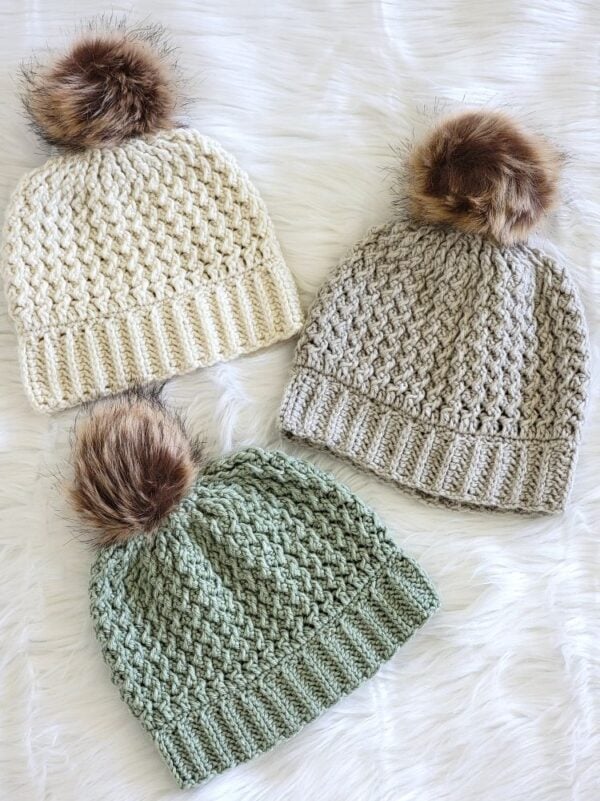
The pattern comes in a full range of sizes from baby and toddler to child and adult. Best of all, you need just one skein of yarn to make a hat.
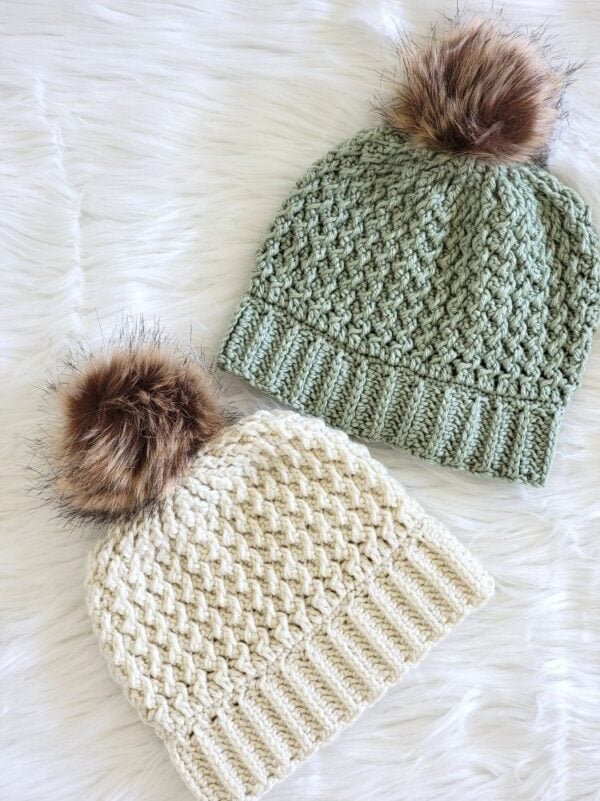
Even the ribbed brim has a lovely knit look, which I think really completes the design. I hope you love making this winter hat as much as I did!
Winter Hat Crochet Pattern
Materials
1. Size 4 Medium worsted weight yarn. Loops and Threads Impeccable yarn in color Aran and Putty, and Lion Brand Basic Stitch yarn in Sage were used for the sample beanies.
2. A G (4 mm) hook for ribbing and an I (5.5 mm) hook for the body of the hat
3. Tapestry needle to weave in the ends.
4. Stitch marker. You can also use contrasting color yarn scraps.
5. A button to attach the fur pom-pom and make it detachable
6. A fur pom pom
Finished size
Baby– Fits up to an 18-inch head and is 6-3/4 inches tall and 16-1/2″ in circumference
Toddler– Fits a 19-inch head and is 7-1/4 inches tall and 17-1/2″ in circumference
Child– Fits a 21-inch head and is 7-3/4 inches tall and 19-1/2″ in circumference
Teen/Adult Small– Fits a 22-inch head and is 8-1/4″ inches tall and 20-1/2″ in circumference
Adult Medium or Large (M/L)– Fits a 23-inch head and is 8-1/4″ tall and 21-1/2″ in circumference
Yardage
Baby: 210 yards
Toddler: 225 Yards
Child: 250 yards
Teen/Adult Small: 275 yards
Adult Medium/Large: 300 yards
Stitch Abbreviations
The pattern is written in US terms.
ch: chain
sk: skip
sl st: slip st
sc: single crochet
dc: double crochet
YO– yarn over
fpdc: front post double crochet
Stitch Explanations
1. Front post double crochet (fpdc): YO, and insert your hook from front to back through the gap before the post of the stitch specified, then back to the front through the gap after the post, YO, and pull up a loop, 3 loops on the hook now (YO and pull through 2 loops on your hook) twice.
2. Front post double crochet 2 together (fpdc2tog): It is a decrease worked across 2 sts to join them into one. Start working a fpdc in the first stitch, and when you have 2 loops left on your hook, keep those 2 loops on your hook and start fpdc in the next stitch. When you have 3 loops on your hook, YO and pull through all 3 loops to complete your fpdc2og.
3. sc2tog: It is a decrease worked across 2 sts to join them into one. Pull up a loop in each of the next 2 sts, YO, and pull through all 3 loops on your hook—–sc2tog completed
Gauge
With 5.5 mm hook, 13 sts in stitch pattern (fpdc alternating with dc)= 4 inches
You might also like these free beanie patterns:
Crochet Hat Pattern
Pattern Notes
1. The hat is worked bottom up, starting with the ribbing.
2. Sizes Baby, Toddler, and Child are grouped, and sizes Adult Small and Adult Medium/Large are grouped. Headings are color-coded for ease. Baby, Toddler, and Child headings are Pink, and the bigger sizes are Blue.
Baby (Toddler, Child)
Notes
1. Stitch counts for the different sizes are given in the order Baby (Toddler, Child).
2. The bolded numbers at the end of each round indicate the stitch count at the end of that round.
Hat Band Ribbing
Row 1: Using 4mm (G) hook, ch 7 (8, 9), 1 hdc in 3rd ch from hook (skipped chs count as first hdc), 1 hdc in each stitch across to end, turn. 6 (7, 8) hdc
Note: All the remaining rows of the ribbing are worked into the 3rd loops of the hdc sts. To work in the 3rd loop, work your hdc into the horizontal loop in the front of your stitch after turning. See pic 1 below.
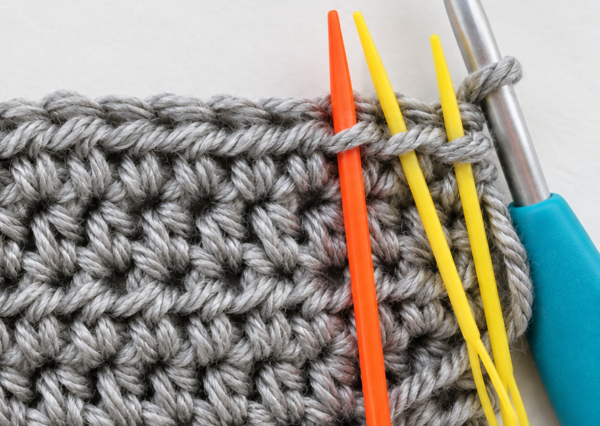
Row 2: Ch 1 (does not count as a st), 1 hdc in 3rd loop of first st (see pic 1 above) and each st across to beginning ch, 1 hdc on top of beginning ch, turn. 6 (7, 8) hdc
Row 3: Ch 1 (does not count as a st), 1 hdc in 3rd loop of first st and each st across to last st, 1 hdc in last st at the corner going through 2 loops (this st will be slanted along the edge). 6 (7, 8) hdc
Repeat Row 3 until your band is 15-1/2 (16-1/2, 18) inches long without stretching. Do not fasten off.
If it seems too big, or you want a tighter hat you are welcome to leave off some of the final rows, but be sure to keep your stitches in round 1 below to maintain the same stitch count as the pattern calls for.
Joining the Band
Bring the ends of the band together, making sure the working yarn is at the front right corner. Ch 1, sl st the ends together by inserting your hook through the back loop only of each stitch on the last row and the corresponding free loop of the foundation chain edge behind it. Do not fasten off. Continue below to work the body of the hat.
Hat Body
Notes
1. Crochet Round 1 below along the side of the band.
2. To distribute sts evenly in Round 1, use stitch markers to divide your band into 4 equal parts and distribute about 1/4 of the stitches in each section. For example, to distribute 58 sts evenly among 4 quarters, work 14 sts, 15 sts, 14 sts, and 15 sts in the four quarters, for a total of 58 sts.
Round 1: Ch 1, distribute 54 (58, 66) sc around the band. You can dig a little deeper to close any holes when needed while working your sc; sl st to the first sc; do not turn.
Round 2: Switch to the 5.5 mm hook, ch 3 (count as a dc), 1 dc in each remaining st across to end, sl st to beg ch-3, do not turn. 54 (58, 66) dc
Round 3: Ch 1, sk the next dc, fpdc in next dc, working behind the fpdc, 1 dc in previous skipped dc, *(sk next dc, 1 fpdc in next dc, working along the back of the fpdc, work 1 dc in previous skipped dc), repeat from * until you have worked 27 (29, 33) fpdc, sl st to first fpdc, turn. 27 fpdc+ 27 dc (29 fpdc+29 dc, 33 fpdc+33 dc)
Round 4: Ch 1 (does not count as a st), 1 sc in the next st, place a marker in this st, 1 sc in next 53 (57, 65) sts, sl st to marked sc, the last st will be a tiny st, so do not miss it, turn. 54 (58, 66) sc
Note: Make sure to work the last st of Round 5 tightly before making the sl st to join the round. This will help prevent a hole from forming at the join.
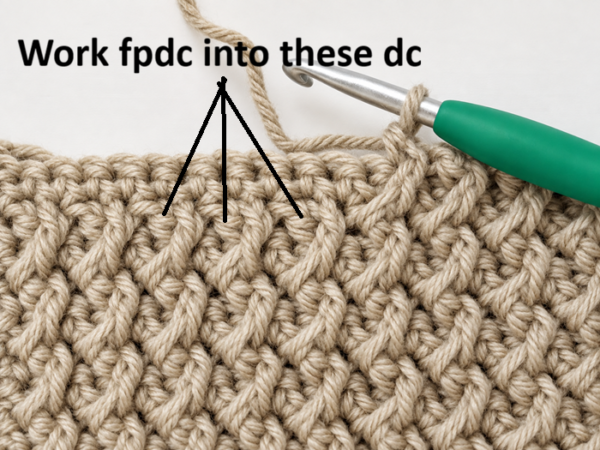
Round 5: Ch 1 (does not count as a st), 1 fpdc in the dc between the ‘next’ 2 fpdc one row below (the dc will be hidden behind the fpdc to the right, you can push it out with your fingers, see pic 2 above), working behind the fpdc you just made, 1 dc in the st after the beg ch, *(1 fpdc in the dc between the next 2 fpdc one row below, working behind this fpdc, sk 1 st after the previous dc of the current row, and work 1 dc in next st), repeat from * until you have worked 27 (29, 33) fpdc, sl st to first fpdc, turn. 54 (58, 66) sts
Repeat Rounds 4 and 5 until your hat is approximately 5-3/4 (6-1/4, 6-3/4) inches tall from the base of the ribbing and work the decrease rounds below. Your last round should be a sc round and not a fpdc round.
Decrease Rounds
Decrease Round 1: Ch 1, fpdc in dc between next 2 fpdc one row below, mark this fpdc, repeat fpdc in dc between next 2 fpdc without working dc behind, sl st to 1st fpdc, do not turn. The gaps between stitches will close in the next round. 27 (29, 33) fpdc
Decrease Round 2: Ch 1, fpdc in first fpdc, mark this fpdc, *(fpdc2tog across next 2 fpdc, fpdc in next fpdc), repeat from * until 2 fpdc is left, fpdc2tog in last 2 fpdc, sl st to marked fpdc, do not turn. 18 (19, 22) sts
Decrease Round 3: Ch 1, 1 fpdc in first fpdc, mark this fpdc, *(1 dc in next fpdc2tog, fpdc in next fpdc), repeat from * to end, sl st to marked fpdc, do not turn. 18 (19, 22) sts
Decrease Round 4 (Only for Baby and Toddler sizes): Ch 1, 1 sc in next st, place a marker in this st, 1 sc in each remaining st across to end, sl st to first marked sc, fasten off with a 12-inch tail for cinching.
Decrease Round 4 (only for Child size): Ch 1, 1 sc in next st, place a marker in this st, *(sc2tog across next 2 sts, 1 sc in next 2 sts), repeat from * to end, sl st to first marked sc, fasten off with a 12-inch tail for cinching.
Cinching the Hat
Turn the hat inside out. Thread the ending tail through a yarn needle and weave it in and out through the sts around the top of the hat. Pull the tail tightly to cinch the top closed, then make a couple of knots to secure it.
Using the same tail, sew a large button to the inside of the hat for attaching your pom pom.
Finishing
Weave in any tail left along the inside of the hat. Attach your fur pom pom by pulling its elastic loop over the button inside. Turn your hat right side out, enjoy!
Adult Small (Adult Large)
Notes
1. Stitch counts for the two sizes are given in the order Adult Small (Adult Large)
2. The bolded numbers at the end of each round indicate the stitch count at the end of that round.
Hat Band Ribbing
Row 1: Using 4mm (G) hook, ch 10 (10), 1 hdc in 3rd ch from hook (skipped chs count as first hdc), 1 hdc in each stitch across to end, turn. 9 (9) hdc
Note: All the remaining rows of the ribbing are worked into the 3rd loops of the hdc sts. To work in the 3rd loop, work your hdc into the horizontal loop in the front of your stitch after turning. See pic 3 below.
Row 2: Ch 1 (does not count as a st), 1 hdc in 3rd loop of first st (see pic 3 above) and each st across to beg ch, 1 hdc on top of beginning ch, turn. 9 (9) hdc
Row 3: Ch 1 (does not count as a st), 1 hdc in 3rd loop of first st and each st across to last st, 1 hdc in last st at the corner going through 2 loops (this st will be slanted along the edge). 9 (9) hdc
Repeat Row 3 until your band is 20 (21) inches long without stretching. Do not fasten off.
If it seems too big, or you want a tighter hat you are welcome to leave off some of the final rows, but be sure to keep your stitches in round 1 below to maintain the same stitch count as the pattern calls for.
Joining the Band
Bring the ends of the band together, making sure the working yarn is at the front right corner. Ch 1, sl st the ends together by inserting your hook through the back loop only of each stitch on the last row and the corresponding free loop of the foundation chain edge behind it. Do not fasten off. Continue below to work the body of the hat.
Hat Body
Notes
1. Crochet Round 1 below along the side of the band.
2. To distribute sts evenly in Round 1, use stitch markers to divide your band into 4 equal parts and distribute about 1/4 of the stitches in each section. For example, to distribute 70 sts evenly among 4 quarters, work 17 sts, 18 sts, 17 sts, and 18 sts in the four quarters, for a total of 70 sts.
Round 1: Ch 1, distribute 70 (74) sc around the band. You can dig a little deeper to close any holes when needed while working your sc; sl st to the first sc; do not turn.
Round 2: Switch to the 5.5 mm hook, ch 3 (count as a dc), 1 dc in each remaining st across to end, sl st to beg ch-3, do not turn. 70 (74) dc
Round 3: Ch 1, sk the next dc, fpdc in next dc, working behind the fpdc, 1 dc in previous skipped dc, *(sk next dc, 1 fpdc in next dc, working along the back of the fpdc, work 1 dc in previous skipped dc), repeat from * until you have worked 27 (29) fpdc, sl st to first fpdc, turn. 35 fpdc+ 35 dc (37 fpdc+37 dc)
Round 4: Ch 1 (does not count as a st), 1 sc in the next st, place a marker in this st, 1 sc in next 69 (73) sts, sl st to marked sc, the last st will be a tiny st, so do not miss it, turn. 70 (74) sc
Note: Make sure to work the last st of Round 5 tightly before making the sl st to join the round. This will help prevent a hole from forming at the join.
Round 5: Ch 1 (does not count as a st), 1 fpdc in the dc between the ‘next’ 2 fpdc one row below (the dc will be hidden behind the fpdc to the right, you can push it out with your fingers, see pic 4 above), working behind the fpdc you just made, 1 dc in the st after the beg ch, *(1 fpdc in the dc between the next 2 fpdc one row below, working behind this fpdc, sk 1 st after the previous dc of the current row, and work 1 dc in next st), repeat from * until you have worked 35 (37) fpdc, sl st to first fpdc, turn. 70 (74)sts
Repeat Rounds 4 and 5 until your hat is approximately 7-1/4 (7-1/4) inches tall from the base of the ribbing and work the decrease rounds below. Your last round should be a sc round and not a fpdc round.
Decrease Rounds
Decrease Round 1: Ch 1, fpdc in dc between next 2 fpdc one row below, mark this fpdc, repeat fpdc in dc between next 2 fpdc without working dc behind, sl st to 1st fpdc, do not turn. The gaps between stitches will close in the next round. 35 (37) sts
Decrease Round 2: Ch 1, fpdc in first fpdc, mark this fpdc, *(fpdc2tog across next 2 fpdc, fpdc in next fpdc), repeat from * until 2 fpdc is left, fpdc2tog in last 2 fpdc, sl st to marked fpdc, do not turn. 24 (25) sts
Decrease Round 3: Ch 1, 1 fpdc in first fpdc, mark this fpdc, *(1 dc in next fpdc2tog, fpdc in next fpdc), repeat from * to end, sl st to marked fpdc, do not turn. 24 (25) sts
Decrease Round 4: Ch 1, 1 sc in next st, place a marker in this st, *(sc2tog across next 2 sts, 1 sc in next st), repeat from * to end, sl st to first marked sc, fasten off with a 12-inch tail for cinching.
Cinching the Hat
Turn the hat inside out. Thread the ending tail through a yarn needle and weave it in and out through the sts around the top of the hat. Pull the tail tightly to cinch the top closed, then make a couple of knots to secure it.
Using the same tail, sew a large button to the inside of the hat for attaching your pom pom.
Finishing
Weave in any tail left along the inside of the hat. Attach your fur pom pom by pulling its elastic loop over the button inside. Turn your hat right side out, enjoy!
Pin it for later: