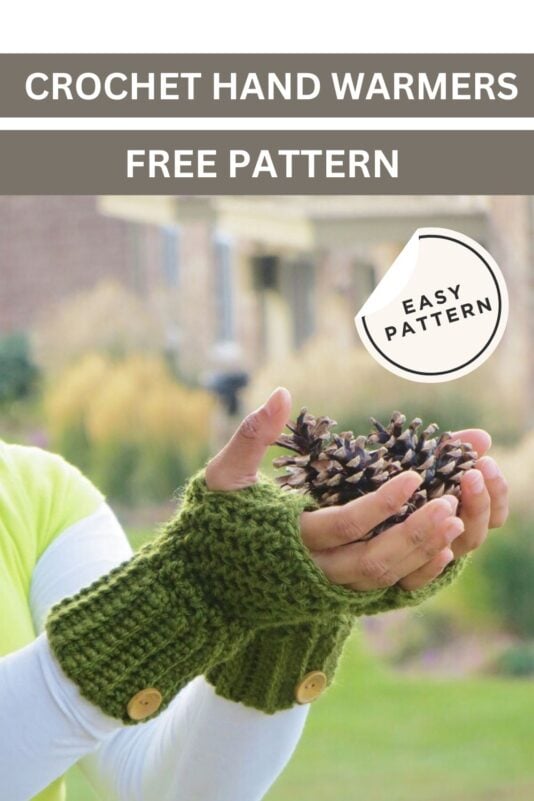
This crochet fingerless gloves pattern was designed as an afterthought to match my Brooklyn Boot cuffs published last week. I must say, they make an amazing pair. The crochet pattern uses the same stitch as the Brooklyn boot cuffs and works up in just half the time.
You can wear it in your cold office rooms or outdoors, a perfect accessory where style meets comfort. Fingerless mitts keep your fingers free to hold a book or text to your heart’s content. What’s more? They are fairly easy to make with very little shaping, unlike the regular mittens.
The stitches used are easy to learn and give it a nice texture. The wooden buttons used are optional and are only for embellishment.
The basic crochet fingerless gloves can be worked in less than two hours and can make a cherished handmade Christmas gift. So grab your hook and a skein of yarn and make a pair today. I promise you-you will be addicted.
Crochet Fingerless Mittens Pattern
Materials
1. Worsted weight ( size 4 medium) yarn
2. Hook – G (4.25mm)
3. Two ¾ inch wooden buttons
Gauge
Using G hook, 16 sc rows worked in back loops = 4 inches
Size
Finished size:3.5 inches wide and 7 ½ inches long
Yardage
100 Yards for a pair
Stitch Explanation
Extended Single crochet (esc): Insert your hook into the next st and pull up a loop, yarn over and pull through one loop, yarn over again and pull through the remaining 2 loops on hook.—–1 esc completed
Work in Back loops or Front loops only: See the picture below to learn what it means to work into back loops only or front loops only. When making a regular stitch the hook is inserted under both the loops as seen in the 1st diagram below but inserted only into one of the loops in case you are working into the back or front loops.
Stitch Abbreviations
The pattern is in standard American terms.
sc- single crochet
esc- extended single crochet
sl st- slip stitch
ch- chain
sk- skip
All the pictures have been numbered sequentially and grouped at the end of the written pattern.
Pattern
With G hook chain 12.
Row 1: 1 sc in 2nd chain from hook and each chain across. Turn.————-11 sc
Row 2: Working in back loops only, ch 1 ( not counted as a st), 1 sc in back loop of the same st as ch 1, 1 sc in back loop of next 10 stitches. Turn.—————– 11 sc
2. Sl st the first and last rows together
Repeat Row 2 till your work measures 7 inches. Do not stretch your band while measuring. Now slip stitch the two shorter ends together inserting your hook through the front loops of the stitches on your last row and the free loops on the very first row to form a circular band as shown in Pic 2 above. See Stitch explanation for working in front loops. I got 14 ridges in the band including the ridge formed by slip stitching the ends together. Now the rest of the mittens will be worked in the round.
3.Work a round of single crochet all around the band
Round 1: Ch 1( does not count as a st), proceed to work a round of sc all around the band, making 1 sc in each sc row end ( one in each ridge and trough). Sl st to the first sc. Do not turn. See Pic 3 above. ——— 28 sc
Round 2: Ch 3 ( counts as first esc and ch 1), skip 1 st, *(1 esc in next st, ch 1 , skip 1 st), repeat from * till end of the round. You would have reached the beginning ch 3, do not sl st and do not turn.—————- 14 esc in the round.
Note: Esc is the stitch right before it to the right and not the one right on top of it. See Pic 4 below to find out where to insert your hook to make an esc.
4. Shows where to insert your hook to work your esc
Round 3: Work 1 esc in to top of beginning chain 2 of the previous round, place a marker in the esc you just made. The marker will show you where Round 3 started. Ch 1, *(1 esc in next esc, ch 1, sk 1 ch), repeat from * till you reach back near the marked st. Do not turn.—————- 14 esc
Round 4: 1 esc in marked st, move the marker up in to the esc you just made, ch 1, sk 1 ch, *(1 esc in next esc, ch 1, sk 1 ch), repeat from * till you reach back near the marked st. Do not turn.—————- 14 esc
Repeat Round 4 four more times. Every time you reach back near the marked stitch you would have completed one round.
For Left Mitten Only
Next Round ( Round 9) : 1 esc in marked st, move the marker up into the esc you just made, ch 1, sk 1 ch, *(1 esc in next esc, ch 1, sk 1 ch), repeat from * 2 times, 1 esc in next esc, chain 3 loosely, skip 1 ch, 1 esc and next ch, *(1 esc in next esc, ch 1, sk 1 ch), repeat from * till you reach back near the marked st. Do not turn.—————- 13 esc
The skipped stitches will form the hole for your thumb.
For Right Mitten Only
Next Round ( Round 9) : 1 esc in marked st, move the marker up into the esc you just made, ch 1, sk 1 ch, *(1 esc in next esc, ch 1, sk 1 ch), repeat from * 8 times, 1 esc in next esc, chain 3 loosely, skip 1 ch, 1 esc and next ch, *(1 esc in next esc, ch 1, sk 1 ch), repeat from * till you reach back near the marked st. Do not turn.—————- 13 esc
The skipped stitches will form the hole for your thumb.
Continue for both Right and Left Mittens
Round 10: 1 esc in marked st, move the marker up into the esc you just made, ch 1, sk 1 ch, *(1 esc in next esc, ch 1, sk 1 ch), repeat from * till you reach the chain 3 of previous round, work 1 esc in to the ch-3 space, ch 1, *(1 esc in next esc, ch 1, sk 1 ch), repeat from * till your reach back near the marked st. Do not turn.—————- 14 esc
Round 11 & 12: 1 esc in marked st, move the marker up into the esc you just made, ch 1, sk 1 ch, *(1 esc in next esc, ch 1, sk 1 ch), repeat from * till you reach back near the marked st. Do not turn.—————- 14 esc
Round 13 ( Last Round): 1 regular sc in the marked esc, sl st to the next ch 1. This will even out the edges. Ch 1, 1 sc in next st, and each ch and st across to end, sl st to beginning ch 1. Fasten off.
Finishing
Weave in any tails left and sew two wooden buttons onto the ribbed band for embellishment.
A free pattern for a matching pair of boot cuffs can be found here: Brooklyn Boot Cuffs.
I'm having some trouble with the pattern and need a little help. I tried crocheting the peice as the instructions say but ended up with something completely different than the photo. I looked closer at the photo and saw that the stitches kinda looked like knit stitches? I'm so confused now. I ended up frogging my cuff out of frustration, but have one photo of it half done if it would be of any help. Any tips to make this work would be very much appreciated! Thank you.
I just finished one of the gloves. I made my cuff quite a bit longer, because I want to fold over about two inches of it and then sew the button on, but otherwise I followed your pattern. It was so easy, about three hours for one glove. Would have been less, but the cats kept running off with my yarn.
This is a great pattern. I adjusted it a bit because my hands are big. I work in a drafty office, but may wear them sooner because they are so cute! Also, I airways wanted to know how to crochet ribbing. Thanks for posting this free pattern! Yours truly, Inky Pinky






I cant get the pattern when a click on free pattern it just refreshes the current page. I want Boot cuffs and fingerless mitts
It could be your browser. Kindly email me using the contact me form.
I'm having some trouble with the pattern and need a little help. I tried crocheting the peice as the instructions say but ended up with something completely different than the photo. I looked closer at the photo and saw that the stitches kinda looked like knit stitches? I'm so confused now. I ended up frogging my cuff out of frustration, but have one photo of it half done if it would be of any help. Any tips to make this work would be very much appreciated! Thank you.
Kindly write to me using my Contact Me form and I will help you out. Nope, they are not knit stitches but crochet.
Thanks a lot for sharing these interesting patterns !!!! Leelou
I just finished one of the gloves. I made my cuff quite a bit longer, because I want to fold over about two inches of it and then sew the button on, but otherwise I followed your pattern. It was so easy, about three hours for one glove. Would have been less, but the cats kept running off with my yarn.
Lovely mitts! I like this fingerless mitts. It is so beautiful and colorful.
i dont know if this is you or allowed by you, but i saw this on a fb post, went to it, and just wanted you to know: (yur pattern but being distributed by someone else (although not claiming it as theirs!)
https://m.box.com/shared_item/https%3A%2F%2Fapp.box.com%2Fs%2Ft5cp45u6agxzkyt9eqhe
This is a great pattern. I adjusted it a bit because my hands are big. I work in a drafty office, but may wear them sooner because they are so cute! Also, I airways wanted to know how to crochet ribbing. Thanks for posting this free pattern! Yours truly, Inky Pinky
I am unable to see the pattern for the gloves or boot cuffs�� any suggestion on finding the pattern?
You will find the links at the bottom of the blog post. It will be in blue while the rest of the text is in black.
I want to make these for my daughter but her hands are quite small. How would I adjust the pattern to fit?
I made these last year and the recipient was so pleased with them I am making another pair this Christmas. Thank you for an easy to follow pattern.