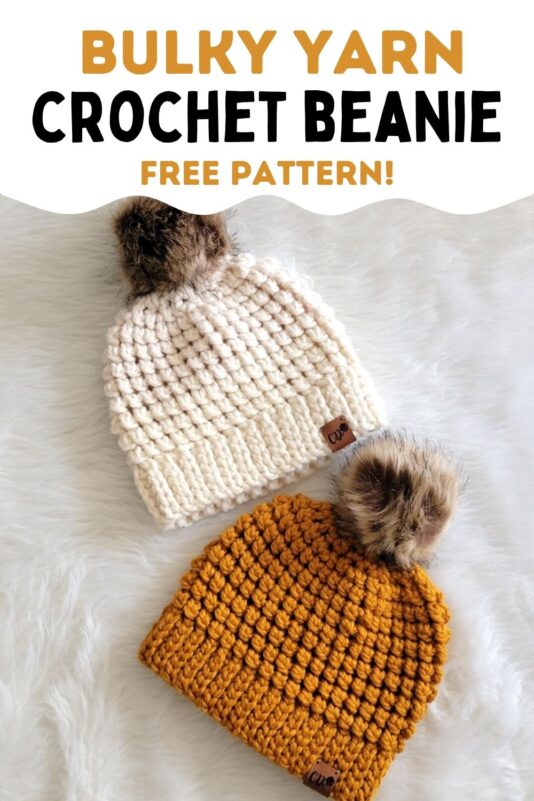
Bulky Yarn Crochet Hat Free Pattern, The Cobblestone Beanie
Crochet Hat Pattern with Bulky Yarn: Easy Pattern in 4 sizes

This bulky yarn crochet hat free pattern is a joy to work. Whether making a crochet toddler hat pattern with bulky yarn or a crochet winter hat pattern with bulky yarn for women, this easy bulky yarn crochet hat pattern free tutorial is a must-have.

This crochet hat is warm, chunky, and stylish. It is perfect for the cold weather ahead.


All sizes up to Adult small can be made with just 1 skein of Lion Brand Wool-Ease yarn. Whip some up for gifts this season. Enjoy!
Bulky Yarn Crochet Hat Free Pattern
Materials
1. Lion Brand Wool-Ease Thick & Quick in colors Fisherman and Butterscotch. It is a size 6, super bulky yarn.
2. A size L (8mm)hook
3. A fur pom pom
4. Tapestry needle to weave in the ends.
5. A 3/3 inch button for attaching the pom pom (optional)
Finished Size
Toddler– Fits 19-inch head and is 8 inches tall and 17-1/2″ in circumference
Child– Fits 21-inch head and is 8-1/2 inches tall and 19-1/2″ in circumference
Adult Small/Medium (S/M)– Fits 22-inch head and is 9 inches tall and 20-1/2″ in circumference
Adult Large (L)– Fits 23-inch head and is 9 inches tall and 21-1/2″ in circumference
Yardage
Toddler– 85 yards
Child– 95 yards
Adult Small/Medium (S/M)– 105 yards
Adult Large (L)– 125 yards
Stitch Abbreviations
ch: chain sl st: slip stitch sc: single crochet BLO: Back loop only (see stitch explanation below)
Stitch Explanations
1. Sc in the Back Loops Only(BLO): Instead of inserting your hook under both the loops of your stitch, you will insert it only under the back loop and leave the front loop free, see the picture below.

2. Sl stitch & sc cluster (cl): A special cluster stitch is used in this pattern that is a sl st and sc worked across 2 sts. We will simply abbreviate it l it as ‘cl’ in the pattern. To work the cl, pull up a loop in the 2 sts specified to get 3 loops on your hook, pull the 3rd loop through the 2nd loop, now YO, and pull through 2 loops left on your hook
3. sc2tog: It is a decrease worked across 2 sts to join them into one. Pull up a loop in each of the next 2 sts, YO, and pull through all the 3 loops on your hook—–sc2tog completed
Gauge
8 sc sts= 4 inches
More free hat patterns:
Crochet Hat Pattern with Bulky Yarn
Pattern Notes
1. Stitch counts for bigger sizes are given in brackets in the order Toddler (Child, Adult Small, Adult Large).
2. The hat is worked bottom up starting with the ribbing.
3. Due to the nature of the stitch pattern, you will get a slight twirl in your hat and a seam at the back that pretty much blends in with the stitches.
4. The finished hat has a slight slouch to it.
Ribbing
Chain 5 (6, 6, 6).
Row 1: Sl st into the 2nd ch from hook and each ch across to end, turn.—–4 (5, 5, 5)sl sts
Row 2: Ch 1, 1 sl in the BLO of the same st as ch 1, 1 sl st in BLO of the remaining 3 (4, 4, 4)sts, turn.——4 (5, 5, 5)sl sts Repeat Row 2 until the ribbing is approximately 15-1/2 (17, 18-1/2, 19) inches without stretching. The ribbing will stretch to fit.

Joining the Ribbing into a Circle

Note: When inserting your hook into the foundation chain side, insert the hook a little deeper, 1/4-inch below, and not at the very edge. This will give a seamless band once you turn it inside out.
Do not turn your work after the last row of the ribbing so your working yarn is on the left (see pic 1 above). Now bring the other end of the ribbing near this end, and flip your work. Take your hook out of the loop, and insert it through the foundation chain side, grab the loop on the other side, and start sl stitching through both the layers by inserting your hook through the foundation chain side and the BLO of the last row of sl sts (see pic 2 above).
Turn your ribbing inside out to hide the seam. Pass your skein through the ribbing to bring it to the other side if needed. Any tiny gap in the ribbing seam can be closed when weaving in the beginning tail later.
Sides and Crown
Pattern Notes:
1. When you work the first round of sc sts into the ribbing, take care to insert your hook NOT at the very edge but a little lower to avoid leaving holes in your hat.
2. You can work your sc into the ridges on your ribbing and work any increases needed into the valleys between the ridges.
3. To distribute your sc, first count the total number of ridges on your ribbing and calculate how many increases or decreases you will need to achieve the total stitch count. Then distribute those increases or decreases evenly around the ribbing.
For example, if you have 29 ridges but you need to work a total of 33 sc sts around the ribbing, you have to add 4 increases. So you can try adding an increase after every 6th sc. If you need only 1 increase or decrease, make it at the seam of the ribbing.
Round 1: Ch 1 at the seam and work 29 (33, 35, 37)sc sts evenly distributed around the ribbing. You can add a few increases or decreases into the valleys to adjust the stitch count if the number of ridges is more or less than your total stitch count. Sl st to the first st but do not turn.—–29 (33, 35, 37)sc sts
Notes
1. Look under Stitch Explanations above to learn how to work the ‘cl’ stitch for this pattern.
2. Every cl is started not in the next free st but in the same st as the previous cl. If you don’t do this, you will accidentally add decreases to your hat.
Round 2: Ch 1, work a cl across the same st as ch 1 and next st, *(work a cl across the same st as previous cluster and next st), repeat from * to end, sl st to first cl. Do not turn.———29 (33, 35, 37) cls Repeat Round 2 until your hat is approximately 6-1/2 (7, 7-1/2, 7-1/2)” tall from the base of the ribbing to the top.
Decrease Rounds
Size Toddler
Decrease Round 1: Ch 1, cl in same st as ch 1 and next st, *(cl across ‘next’ 2 sts, cl in same st as previous cluster and next st), repeat from * to end, sl st to first cl. Do not turn.———19 cls
Decrease Round 2: Ch 1, sc2tog across the same st as ch 1 and the next st, *(1 sc in next 2 sts, sc2tog across next 2 sts), repeat from * to last 3 sts, sc2tog across next 2 sts, 1 sc in last st, sl st to first st, do not turn. —–14 sts
Decrease Round 3: Ch 1, sc2tog across the same st as ch 1 and the next st, *(1 sc in next st, sc2tog across next 2 sts), repeat from * to end, sl st to first sc, fasten off. ——9 sts
Jump to ‘Cinching the Top of the Hat’ below.
Child
Decrease Round 1: Ch 1, cl in same st as ch 1 and next st, *(cl across ‘next’ 2 sts, cl in same st as previous cluster and next st), repeat from * to last st, cl in same st as previous cluster and last st, sl st to first cl. Do not turn.———-22 cl
Decrease Round 2: Ch 1, sc2tog across the same st as ch 1 and the next st, *(1 sc in next 2 sts, sc2tog across next 2 sts), repeat from * to end, sl st to first st, do not turn. ——16 sts
Decrease Round 3: Ch 1, sc2tog across the same st as ch 1 and the next st, *(1 sc in next st, sc2tog across next 2 sts), repeat from * to last st, 1 sc in last st, sl st to first sc, fasten off. —–11 sts
Jump to ‘Cinching the Top of the Hat’ below.
Size Adult S/M
Decrease Round 1: Ch 1, cl in same st as ch 1 and next st, *(cl across ‘next’ 2 sts, cl in same st as previous cluster and next st), repeat from * to end, sl st to first cl. Do not turn.———23 cls
Decrease Round 2: Ch 1, sc2tog across the same st as ch 1 and the next st, *(1 sc in next 2 sts, sc2tog across next 2 sts), repeat from * to last 3 sts, sc2tog across next 2 sts, 1 sc in last st, sl st to first st, do not turn. ——17 sts
Decrease Round 3: Ch 1, sc2tog across the same st as ch 1 and the next st, *(1 sc in next st, sc2tog across next 2 sts), repeat from * to end, sl st to first sc, fasten off. ——11 ts
Jump to ‘Cinching the Top of the Hat’ below.
Size Adult Large
Decrease Round 1: Ch 1, cl in same st as ch 1 and next st, *(cl across ‘next’ 2 sts, cl in same st as previous cluster and next st), repeat from * to end, sl st to first cl. Do not turn.———24 cls
Decrease Round 2: Ch 1, sc2tog across the same st as ch 1 and the next st, *(1 sc in next 2 sts, sc2 tog across next 2 sts), repeat from * to end, sl st to first st, do not turn. ——-18 sts
Decrease Round 3: Ch 1, sc2tog across the same st as ch 1 and the next st, *(1 sc in next st, sc2tog across next 2 sts), repeat from * to end, sl st to first sc, fasten off. —–12 sts
Proceed to ‘Cinching the Top of the Hat’ below.
Cinching the Top of the Hat (All Sizes)
1. Turn the hat inside out. Thread the tail at the top through a yarn needle, go in and out through every alternate st at the top of the hat, pull, and cinch the hat shut. Make a knot and securely weave in the remaining tail.
2. Weave in the beginning and ending tails inside the hat. While weaving in the beginning tail, remember to close any gap in the ribbing.
3. Sew a button inside the hat for anchoring your pom pom if you want to make it removable. Now turn the hat right side out, and attach the fur pom pom to the top of the hat for a final finishing touch. You just have to pull the elastic loop on the pom pom over the button inside. You can also sew the pom pom directly onto the hat using a needle and thread. Enjoy!
More free hat patterns:
Pin it for later: