
Pattern for Crochet Poncho with Video, Sunset Poncho
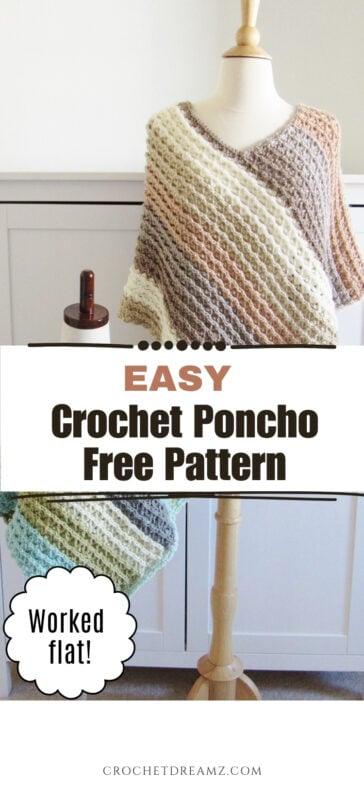
This pattern for a crochet poncho is designed using the gorgeous Caron Cakes yarn. It is a self-striping yarn that comes in gorgeous colorways. You can find the Kid’s Size Poncho here.


I initially planned to design this poncho using 2 rectangles and seaming them together. Later, I realized that the ribbing on the stitch pattern wouldn’t look continuous if I went with the plan.


So I worked the back panel directly on to the front and seamed just at the back. I love how the ribbing looks seamless on the front and really brings out the stitch texture.
I love the colors on this Buttercream colorway, but it was really tricky to photograph. I hope my mediocre photography skills did justice to this beautiful yarn and its colors.

PATTERN FOR CROCHET PONCHO
You can pin it for later here.
Materials
1. Caron Cakes (size 4) yarn in color Buttercream. It is a self-striping yarn.
2. Hook I(5.5mm)
3. Tapestry needle to weave in the ends.
Finished Size
S/M– 22 1/2 inches from the base of neck to hem
L/XL– 25 1/2 inches from the base of neck to hem
2XL/3XL– 28 inches from the base of neck to hem

Yardage
Note: Each skein of Caron Cakes yarn includes 383 yards.
S/M: I used up 2 full cakes of Caron cakes and a few more yards to add the scallop edging.
L/XL: 3 cakes of Caron Cakes yarn.
2XL/3XL: 3-1/2 skeins of Caron Cakes yarn
Stitch Abbreviations
The pattern is written in US terms.
ch- chain
sc- single crochet
dc- double crochet
sk- skip
fpsc- front post single crochet
YO- yarn over
Gauge
5 pattern repeats= 4 inches
Stitch Explanations
Front Post Single Crochet (fpsc): A fpsc is worked as a regular sc except for the way you insert your hook. Insert hook from front to back and to front again around the vertical post (upright part) of the specified dc st and pull up a loop, YO and pull through 2 loops on hook to complete the fpsc.
For a fpsc, the hook is inserted in the same way as working a front post double crochet. See my tutorial on front post double crochet here: Front Post Double Crochet Tutorial
CROCHET PATTERN
Notes
1. The poncho is worked in one big ‘L’ shape and seamed at the back.
2. Stitch counts for bigger sizes are given in the order S/M(L/XL, 2XL/3XL)
3. If there was an abrupt color change in the middle of a dc row, I unraveled it and joined the new color at the beginning of the row. If the color change is in a sc row (Repeat of Row 3), you don’t have to do this as it won’t be visible on your poncho. Again, this is a matter of personal choice and you can choose to let the self-striping yarn do its job of changing colors.
4. When you have to join a new skein, make sure you keep the color sequence the same as your first cake of yarn.
CROCHET PONCHO FRONT PANEL
Ch 142(162, 182)
Row 1: 1 sc in 2nd chain from hook, *(Ch 3, sk next 3 chs, 1 sc in next), repeat from * across to end, turn.———35(40, 45)ch-3 loops
Row 2: Ch 3 ( counts as a dc here and throughout), 1 dc in same st as beginning ch-3, sk next ch-3 loop, *(3 dc in next sc, sk next ch-3 loop), repeat from * across and after you skip the last ch-3 loop, 2 dc in last sc, turn. ———34(39, 44) 3dc groups with 2 dc on each end
Row 3: Ch 1, 1 sc in same st as beginning ch 1, *(ch 3, 1 fpsc around the middle dc of the next 3dc group), repeat from * across until you work a fpsc in the last 3dc group, ch 3, 1 sc in last dc, turn.——35(40, 45)ch-3 loops
Row 4: Ch 3, 1 dc in same st as beginning ch-3, sk next ch-3 loop, *(3 dc in next fpsc, sk next ch-3 loop), repeat from * across and after you skip the last ch-3 loop, 2 dc in last sc, turn. ———34(39, 44) 3dc groups with 2 dc on each end
Repeat Rows 3 and 4 until your work measures 16(18, 20) inches wide and you end in Row 4. Do not fasten off. Your rectangle will be 28(32, 36)inches long.
ADDING THE BACK PANEL

Row 1: Ch 1, 1 sc in same st as beginning ch 1, 1 sc in next dc, 1 sc in the next 47(53, 62) dc sts, you will now be in the middle st of a 3dc group, *(ch 3, 1 fpsc around the middle dc of the next 3dc group), repeat from * across until you work a fpsc in the last 3dc group, ch 3, 1 sc in last dc, turn.———19(22, 24) ch-3 loops
Row 2: Ch 3 (counts as a dc here and throughout), 1 dc in the same st as ch 3, sk next 3 sts, *(3 dc in next fpsc, sk next ch-3 loop), repeat from * across and after you skip the last ch-3 loop, 2 dc in next sc, leave the remaining sc sts unworked and turn. ———18(21, 23) 3dc groups with 2 dc on each end
Row 3: Ch 1, 1 sc in same st as beginning ch 1, *(ch 3, 1 fpsc around the middle dc of the next 3dc group), repeat from * across until you work a fpsc in the last 3dc group, ch 3, 1 sc in the last dc, turn.——19(22, 24) ch-3 loops
Row 4: Ch 3, 1 dc in same st as beginning ch-3, sk next ch-3 loop, *(3 dc in next fpsc, sk next ch-3 loop), repeat from * across and after you skip the last ch-3 loop, 2 dc in last sc, turn. ———18(21, 23) 3dc groups with 2 dc on each end
Repeat Rows 3 and 4 until the back extension measures 28(32, 36)inches long and you end in Row 4.
SEAMING THE PONCHO

Note: In case you get confused, the front panel is the one in which the lines running across the stitch pattern are longer.
Lay your poncho flat in an ‘L’ shape with the wrong side( with no ribbing or lines) facing up. Using a slip stitch, join the front piece to the long side of the back extension as shown in the picture. Take care not to stretch the fabric while seaming.
FINISHING THE NECK

One side of your neck already has a row of single crochet. Work a row of sc on the other raw edge of the neck, sl st to the base of the “V’ at the back, fasten off.
ADDING A BORDER TO THE RIGHT SIDE OF THE CROCHET PONCHO

The left edge of your poncho will already have a scalloped edge from the foundation chain. So we will now add the same to its right edge as shown by the arrow.

Sl st to the right corner of your poncho, ch 1, 1 sc in the corner, *(ch 3, 1 sc in the next ribbing), repeat from * and when you are near the second corner, ch 3 and 1 sc in the corner, fasten off.
You might also like my popular Uptown Poncho Crochet Pattern and my Kalisha Poncho Crochet Pattern.
You can find more such free patterns on Allfreecrochet.com.
You can watch a web story on this crochet poncho here.
Pin it for later:


Your ponchos are just lovely! I can’t wait to make this one! Thank you for the beautiful pattern.
Hi Chris, thank you so much. I am glad to hear you love my ponchos.
I must be having a moment. I can’t for the life of me figure out how to join this!
Hi Alice, watch the video at the end of the blog post. That should help.
Can’t wait to make this! Your patterns are gorgeous and you give excellent directions!💕
Hi Kathy, your comment made my day. Thank you so much <3.
Hi
I am sure to make this one soon
Would you have a size for a child?
Yep, I will be releasing the child size soon.
I loved the colours and look of your Kalisha poncho pattern. More than half way through crocheting it, realised there was no back to it. Could I have misread or misunderstood the pattern?
Hi Jenny, Kalisha poncho is made from 2 same size rectangles seamed together. Hope that clears up the confusion for you.
Is there a long V shape on the back?? Or does our drapes accept the shoulders in the back?? Do you have a picture of the back of the completed poncho?? I’m having trouble streaming it together. I cannot picture what the back looks like. A back photo would be appreciated please
You can watch this video I made for another reader on how to seam the poncho: https://youtu.be/5nK27g21S8Q
Hi, I just purchased and am making it now and my question is: if there is abrupt color change in the middle of dc row, unravel and join the new color at the beginning of a new row. I don’t understand and I don’t know how to continue working on that row with the same color. Do I have to cut? And use the other skein for the same color? This may sound dumb, but I don’t know how to continue with same color.
Thanks!
Hi Judi, Yes, you have to cut the yarn. Unravel the row to the beginning and start with the next color on the same skein. You are trying to avoid a sudden jump in the colors. Makes sense?
Could I use this pattern to make a scarf?
Thank you
Hi Connie, I already have a scarf worked in this stitch: https://crochetdreamz.com/2017/01/ocean-waves-scarf-free-crochet-scarf.html
What a beautiful poncho design! Can I use Caron Cakes Chunky yarn (size 6) to make this pattern? thanks so much!
Hi Linda, it will work if you make the rectangle panels the same size as my poncho.
Hi
I am currently making this poncho and am wondering where you are measuring the back extension from. I measure from 1 side to the other but doesnt sit right, I’m thinking you measure from the corner where back extension is started down?
Yes, you are right. You measure the back extension from where it starts.
Hi, I am almost done this pattern and it was a great and quick work up. I just have a question does your border go all the way around and join with the beginning or is it just on the front side and end at the shoulder when you rejoin to finish it. Thank you!
It is worked only on one side of the poncho. On the other side you will have the foundation chain that will look like scallops already.
I am starting row 1 of the back panel and am stuck after the 47 SC am I supposed to turn?
No, you do not turn, continue to work that row to the end.