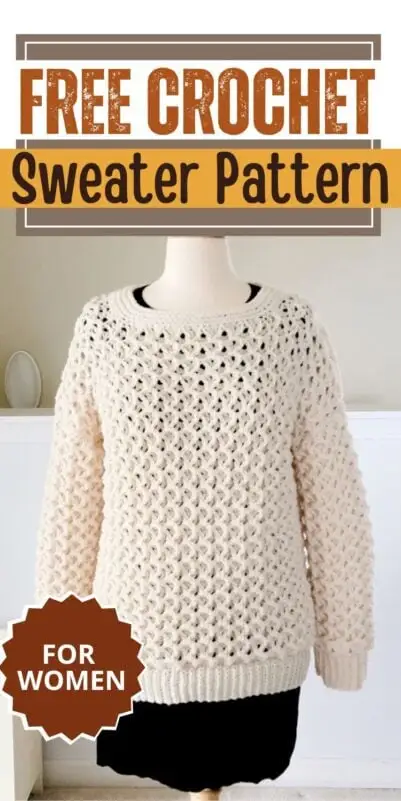
Crochet Sweater Pattern, Chains of Love Sweater


Crochet Pattern
This is a warm, chunky, and loose-fitting sweater with oodles of texture.
Materials
1. Worsted weight (size 4) yarn. The sample sweater was made using Lion Brand Wool-Ease in color Fisherman.
2. Hook J (6mm) for the main body and a smaller hook I (5.5mm)for the ribbing.
Use any size hook to attain gauge.
3. Yarn needle to weave in the tails.
Finished Sizes
The pattern is written for 5 sizes and measurements are given in the order S (M, L) (XL, 2XL/3XL)
*Measurements are taken from the sweater lying flat.
The finished length is measured from the shoulder to the bottom of the finished ribbing when laid flat. The elastic stitch pattern adds another 4-5 inches to the length when worn and this has been taken into account.
Finsihed Length: 23 (23, 25) (25, 26-1/2)inches
Back and Front Panel Width: 20(21, 23) (25, 28)inches
Finished Bust: 40(42, 46) (50, 56)inches
Armhole: 6.5(6.5, 7) (7, 7.5)inches
Sleeve length: 15.5 (15.5, 16) (16, 17)inches
Yardage
Each skein is 197 yards long.
For size S (M, L) (XL, 2XL/3XL): 10(11, 13) (13, 14) skeins
Stitch Abbreviations
The pattern is written in US terms.
ch -chain
sl st- slip stitch
sc- single crochet
dc- double crochet
YO- yarn over
RS- right side of your crochet fabric
Stitch Explanations
fpdc (front post double crochet): See a tutorial for front post double crochet on my blog here: Front Post and Back Post Double Crochet Tutorial.
V-st: (dc, ch 1, dc) all worked into the same ch-1 space.
CL (cluster St): YO, insert your hook into the ch-1 space specified and pull up a loop, YO, pull through 2 loops, keep the remaining 2 loops on your hook, YO again, insert your hook into the same ch-1 space and pull up another loop, YO pull through 2 loops, YO and pull through the remaining 3 loops on your hook.
BLO: When you work your sc st, insert your hook only under the back loop of the stitch. See the picture below.

hdc2tog: YO, insert your hook into the next st and pull up a loop, YO, insert your hook into the next st again and pull up another loop, YO and pull through all the 5 loops on hook.
Gauge
Pattern for Gauge Swatch
With J(6mm) hook, ch 37, and work Rows 1 to 3 of the Front Panel pattern given below.——-7 Repeats+2dc
Keep repeating Row 3 until your piece measures 7 inches tall. Then measure for gauge.
Gauge
With J(6mm)hook, 4 Repeats and 8 Rows= 4 inches
Crochet Pattern
Pattern Notes
1. Stitch counts for bigger sizes are given in brackets in the order S (M, L) (XL, 2XL)
2. The front and back panels are made separately and seamed together at the shoulders and sides leaving a gap for the armhole. Sleeves are then made and attached to the body. Finally, the neck edging is worked directly onto the sweater.
3. When you have worked just a few rows, your piece might be bigger than needed. For example, when I was making the size S, the piece measured, 22-1/2 inches at the end of the first Row, 21-1/2 inches at end of the 6th row, and shrunk to the correct width of 20 inches only after the 9th row. So make sure to check your gauge before you start.
4. You can either work the front and back panels directly onto the ribbing or make them separate and join them with a slip stitch seam. I prefer seaming as it gives a better look to your finished sweater but have also included the other option for people who hate seaming pieces together.
Bottom Ribbing
With smaller hook I(5.5mm), ch 12.
Row 1: 1 sc in 2nd ch from hook and each ch across to end, turn.——11 sc
Note: Starting from the next row, only the last sc is worked into both the loops like a regular sc.
Row 2: Ch 1 (does not count as a st), 1 sc in the BLO of the first st, and each st across to last st, 1 sc in the last st, turn.—–11 sc
Repeat Row 2 until your ribbing measures 18 inches. If you plan to make the ribbing separate and join it with the back and front panels, make one more bottom ribbing for the back panel following this same pattern.
Front Panel

Pattern Notes
If you want to work the front panel directly onto the ribbing, ch 1 and distribute 96 (101, 111) (121, 136) sc sts along the length of the ribbing and jump to Row 2 below. See pic 2 below. Your finished sweater will look like the right picture. If not, start the back panel with a foundation chain as given below and it will look like in the left picture after we join it with the ribbing.

With bigger hook J(6mm), Ch 97 (102, 112) (122, 137)
Row 1: 1 sc in 2nd ch from hook and each ch across to end. —–96 (101, 111) (121, 136)sts
Note: If you are working the front panel directly onto the ribbing, switch to the bigger hook now.
Row 2: Ch 3 (counts as first dc), sk next st, 2 dc in next st, ch 1, 2 dc in next st, *(sk next 3 sts, 2 dc in next st, ch 1, 2 dc in next st), repeat from * to last 2 sts, sk next st, 1 dc in last st, place a marker on this side of the fabric to indicate the RS and turn.——-19 (20, 22) (24, 27) repeats+ 2 dc
Note: At end of every row from now on, you will work your last st into the top of beginning ch-2 and not into beg ch-3 as this will make your edges more straight.
Row 3: Ch 3 (counts as first dc), sk next dc, *(1 fpdc in next dc, V-st in next ch-1 space, 1 fpdc in next dc, sk next 2 dc), repeat from * until just 1 dc and beginning ch-3 is left, sk next dc, 1 dc on top of beg ch-2, turn.———-19 (20, 22) (24, 27)repeats+ 2 dc
Repeat Row 3 until your front panel measures 20.5 (20.5, 22.5) (22.5, 24)inches if you are working it directly onto the ribbing or 18 (18, 20) (20, 21.5)inches if you are making it as a separate piece. Do not fasten off.
First Shoulder Shaping
Size S only
Row 1: Continue with your working yarn and ch 3 (counts as first dc), sk next dc, *(1 fpdc in next dc, V-st in next ch-1 space, 1 fpdc in next dc, sk next 2 dc), repeat from * until you have completed 5 repeats, sk next 2 dc, 1 fpdc in next dc, CL in next ch-1 space, turn.——- 5 repeats+ 2 dc+ 1 CL
Row 2: Ch 3 (counts as a dc), 1 dc in next dc, sk next dc, *(1 fpdc in next dc, V-st in next ch-1 space, 1 fpdc in next dc, sk next 2 dc), repeat from * until just 1 dc and beginning ch-3 is left, sk next dc, 1 dc on top of beg ch-2, turn.———-5 repeats+ 3 dc
Row 3: Ch 3 (counts as first dc), sk next dc, *(1 fpdc in next dc, V-st in next ch-1 space, 1 fpdc in next dc, sk next 2 dc), repeat from * until you have worked 5 repeats, sk next dc, 1 dc in next st, 1 dc on top of turning ch-2, turn.———-5 repeats+ 3 dc
Row 4: Repeat Row 2 above. Fasten off.
Size M (L) only
Note: Stitch counts for size L are given in brackets.
Row 1: Continue with your working yarn and ch 3 (counts as first dc), sk next dc, *(1 fpdc in next dc, V-st in next ch-1 space, 1 fpdc in next dc, sk next 2 dc), repeat from * until you have completed 5(6) repeats, sk next 2 dc, 1 fpdc in next dc, CL in next ch-1 space, 1 dc in next dc, turn.——- 5 repeats+ 3 dc+ 1 CL (6 repeats+ 3 dc+ 1 CL)
Row 2: Ch 3 (counts as a dc), 1 dc in next CL, 1 dc in next st, sk next dc, *(1 fpdc in next dc, V-st in next ch-1 space, 1 fpdc in next dc, sk next 2 dc), repeat from * until just 1 dc and beginning ch-3 is left, sk next dc, 1 dc on top of beg ch-3, turn.———-5 repeats+ 4 dc (6 repeats+ 4 dc)
Row 3: Ch 3 (counts as first dc), sk next dc, *(1 fpdc in next dc, V-st in next ch-1 space, 1 fpdc in next dc, sk next 2 dc), repeat from * until you have worked 5(6) repeats, sk next dc, 1 dc in next 2 sts, 1 dc on top of turning ch-2, turn.——5 repeats+ 4 dc (6 repeats+ 4 dc)
Row 4: Ch 3 (counts as a dc), 1 dc in 2 dc, sk next dc, *(1 fpdc in next dc, V-st in next ch-1 space, 1 fpdc in next dc, sk next 2 dc), repeat from * until just 1 dc and beginning ch-3 is left, sk next dc, 1 dc on top of beg ch-3, turn.———-5 repeats+ 4 dc (6 repeats+ 4 dc)
Size XL(2XL/3XL) only
Note: Stitch counts for size 2XL/3XL are given in brackets.
Row 1: Continue with your working yarn and ch 3 (counts as first dc), sk next dc, *(1 fpdc in next dc, V-st in next ch-1 space, 1 fpdc in next dc, sk next 2 dc), repeat from * until you have completed 7(8) repeats, sk next 2 dc, 1 fpdc in next dc, CL in next ch-1 space, turn.——- 7 repeats+ 2 dc+1 CL (8 repeats+ 2 dc+1 CL)
Row 2: Ch 3 (counts as a dc), 1 dc in next dc, sk next dc, *(1 fpdc in next dc, V-st in next ch-1 space, 1 fpdc in next dc, sk next 2 dc), repeat from * until just 1 dc and beginning ch-3 is left, sk next dc, 1 dc on top of beg ch-3, turn.———-7 repeats+ 3 dc (8 repeats+3dc)
Row 3: Ch 3 (counts as first dc), sk next dc, *(1 fpdc in next dc, V-st in next ch-1 space, 1 fpdc in next dc, sk next 2 dc), repeat from * until you have worked 7(8)repeats, sk next dc, 1 dc in next st, 1 dc on top of turning ch, turn.———-7 repeats+ 3 dc (8 repeats+ 3dc)
Row 4: Repeat Row 2 above. Fasten off.
Second Shoulder Shaping
Size S only
Row 1: Skip 7 repeats from the first shoulder, sl st into ch-1 space of the next repeat, work CL in the ch-1 space, 1 fpdc in next dc, sk next 2 dc, *(1 fpdc in next dc, V-st in next ch-1 space, 1 fpdc in next dc, sk next 2 dc), repeat from * until just 1 dc and beginning ch-3 is left, sk next dc, 1 dc on top of beg ch-3, turn.———-5 repeats+ 2 dc+ 1 CL
Row 2: Ch 3 (counts as first dc), sk next dc, *(1 fpdc in next dc, V-st in next ch-1 space, 1 fpdc in next dc, sk next 2 dc), repeat from * until you have completed 5 repeats, sk next dc, 1 dc in next dc, 1 dc in last CL, turn.——- 5 repeats+ 3 dc
Row 3: Ch 3, 1 dc in next dc, sk next dc, *(1 fpdc in next dc, V-st in next ch-1 space, 1 fpdc in next dc, sk next 2 dc), repeat from * until just 1 dc and beginning ch-3 is left, sk next dc, 1 dc on top of beg ch-3, turn.——- 5 repeats+ 3 dc
Row 4: Ch 3 (counts as first dc), sk next dc, *(1 fpdc in next dc, V-st in next ch-1 space, 1 fpdc in next dc, sk next 2 dc), repeat from * until you have completed 5 repeats, sk next dc, 1 dc in next dc, 1 dc on top of turning ch-2. Fasten off. —- 5 repeats+ 3 dc
Size M(L) only
Note: Stitch counts for size L are given in brackets.
Row 1: Skip 8 (8)repeats from the first shoulder, sl st into the second dc of the next repeat, ch 2, CL in next ch-1 space, 1 fpdc in next dc, sk next 2 dc *(1 fpdc in next dc, V-st in next ch-1 space, 1 fpdc in next dc, sk next 2 dc), repeat from * until just 1 dc and beginning ch-3 is left, sk next dc, 1 dc on top of beg ch-3, turn.——-5 repeats+3 dc+1 CL (6 repeats+3 dc+1 CL)
Row 2: Ch 3 (counts as first dc), sk next dc, *(1 fpdc in next dc, V-st in next ch-1 space, 1 fpdc in next dc, sk next 2 dc), repeat from * until you have completed 5 (6)repeats, sk next dc, 1 dc in next dc, 1 dc in next CL, 1 dc on top of beginning ch-2, turn.——-5 repeats+ 4 dc (6 repeats+ 4 dc)
Row 3: Ch 3, 1 dc in next 2 dc, sk next dc, *(1 fpdc in next dc, V-st in next ch-1 space, 1 fpdc in next dc, sk next 2 dc), repeat from * until just 1 dc and beginning ch-3 is left, sk next dc, 1 dc on top of beg ch-3, turn.——-5 repeats+ 4 dc (6 repeats+ 4 dc)
Row 4: Ch 3 (counts as first dc), sk next dc, *(1 fpdc in next dc, V-st in next ch-1 space, 1 fpdc in next dc, sk next 2 dc), repeat from * until you have completed 5(6) repeats, sk next dc, 1 dc in next 2 dc, 1 dc on top of turning ch-2. Fasten off.
Size XL(2XL/3XL) only
Row 1: Skip 9 (10)repeats from the first shoulder, sl st into ch-1 space of the next repeat, work CL in the ch-1 space, 1 fpdc in next dc, sk next 2 dc, *(1 fpdc in next dc, V-st in next ch-1 space, 1 fpdc in next dc, sk next 2 dc), repeat from * until just 1 dc and beginning ch-3 is left, sk next dc, 1 dc on top of beg ch-3, turn.——–7 repeats+ 2 dc+1 CL (8 repeats+ 2 dc+1 CL)
Row 2: Ch 3 (counts as first dc), sk next dc, *(1 fpdc in next dc, V-st in next ch-1 space, 1 fpdc in next dc, sk next 2 dc), repeat from * until you have completed 7(8) repeats, sk next dc, 1 dc in next dc, 1 dc in last CL, turn.——- 7 repeats+ 3 dc (8 repeats+3dc)
Row 3: Ch 3, 1 dc in next dc, sk next dc, *(1 fpdc in next dc, V-st in next ch-1 space, 1 fpdc in next dc, sk next 2 dc), repeat from * until just 1 dc and beginning ch-3 is left, sk next dc, 1 dc on top of beg ch-3, turn.—-7 repeats+ 3 dc (8 repeats+3dc)
Row 4: Ch 3 (counts as first dc), sk next dc, *(1 fpdc in next dc, V-st in next ch-1 space, 1 fpdc in next dc, sk next 2 dc), repeat from * until you have completed 7(8) repeats, sk next dc, 1 dc in next dc, 1 dc on top of turning ch-2. Fasten off.
Seaming the Ribbing to the Front panel

Fold the front panel and find the middle of the foundation chain edge, match it with the middle of the ribbing you made, and place the ribbing on the front panel touching the RS of fabric (the side with the marker). Place a marker going through the middle of both the layers to hold it in place. Stretch the ribbing to fit on either side of the marker, and join the 2 pieces together with a sl st seam. If you did this right, the seam will be on the wrong side of your crochet fabric with no marker
Back Panel

Pattern Notes
1. The back panel has no shaping for the neck and is straight at the top.
2. If you want to work the back panel directly onto the ribbing, ch 1 and distribute 96 (101, 111) (121, 136) sc sts along the length of the ribbing and jump to Row 2 below. If not, start with the foundation chain as given below.
With bigger hook J(6mm), Ch 97 (102, 112) (122, 137)
Row 1: 1 sc in 2nd ch from hook and each ch across to end. —–96 (101, 111) (121, 136)sts
Note: If you are working the back panel directly onto the ribbing, switch to the bigger hook now.
Row 2: Ch 3 (counts as first dc), sk next st, 2 dc in next st, ch 1, 2 dc in next st, *(sk next 3 sts, 2 dc in next st, ch 1, 2 dc in next st), repeat from * to last 2 sts, sk next st, 1 dc in last st, place a marker on this side of the fabric to indicate the RS and turn.——-19 (20, 22) (24, 27) repeats+ 2 dc
Row 3: Ch 3 (counts as first dc), sk next dc, *(1 fpdc in next dc, V-st in next ch-1 space, 1 fpdc in next dc, sk next 2 dc), repeat from * until just 1 dc and beginning ch-3 is left, sk next dc, 1 dc on top of beg ch-3, turn.———-19 (20, 22) (24, 27)repeats+ 2 dc
Repeat Row 3 until your front panel measures 20.5 (20.5, 22.5) (22.5, 24)inches if you are working it directly onto the ribbing or 18 (18, 20) (20, 21.5)inches if you are making it as a separate piece. Do not fasten off.
Repeat Row 3 until your back panel measures 23 (23, 25) (25, 26.5)inches if you are working it directly onto the ribbing or 20.5 (20.5, 22.5) (22.5, 24)inches if you are making it as a separate piece. Fasten off.
Seaming the Ribbing to the Back panel
Fold the back panel and find the middle of the foundation chain edge, match it with the middle of the ribbing you made, and place the ribbing on the back panel touching the RS of fabric (the side with the marker). Place a marker going through the middle of both the layers to hold it in place. Stretch the ribbing to fit on either side of the marker, and join the 2 pieces together with a sl st seam. If you did this right, the seam will be on the wrong side of your crochet fabric where there is no marker.
Joining the Front and Back Panels
Place the front and back panels with the RS(marked side) touching each other. Seam the shoulders with a sc seam. Leave a 6.5 (6.5, 7) (7, 7.5) inch gap from the shoulder and seam the sides with a sc seam as well.
Neck Edging

Pattern Notes
1. Neck edging is worked on the RS of your sweater where there are no seams.
2. On the front neck, place 2 markers where the neck curves ( see pic above).
Round 1: With smaller hook I(5.5mm), sl st to the shoulder seam on the right and work along the front neck, ch 2 (does not count as a st), 1 hdc in the seam, distribute hdc sts evenly along the side until you reach the first marker, hdc2tog where you have the marker, move the marker up into the st you just made, 1 hdc in each st until you reach the 2nd hdc of the first repeat, *(hdc2tog across the 2nd and 3rd dc of the repeat ignoring the ch-1 in between, 1 hdc in next 2 dc), repeat from * until you work across all the repeats, work hdc sts along the side until you hit the next marker, hdc2tog at the marker, move the marker up, work hdc sts until you hit the back neck, 1 hdc in each st until you reach the 2nd hdc of the first repeat on the back, *(hdc2tog across the 2nd and 3rd dc of the repeat ignoring the ch-1 in between, 1 hdc in next 2 dc), repeat from * until you work across all the repeats, sl st to first dc. Do not turn.

Note: All the stitches of Rows 2-4 below including the hdc2tog will be worked into the 3rd loop of the hdc sts. Third loop of the hdc is a horizontal bar found behind the stitch. Working into this bar will push the “V” of your stitch to the front to create that knit look for your edging. See pic 6 above.
Round 2: Ch 2 (counts as a st), 1 hdc in third loop of each hdc across until you reach the first marker, hdc2tog across the third loop of the marked st and next st, 1 hdc in third loop of each st until you reach the next marker, hdc2tog in third loop of next 2 sts, 1 hdc in each remaining st to end, sl st to beg ch-2, do not turn.
Round 3: Ch 2( counts as a st), 1 hdc in 3rd loop of next st and each st across to end, sl st to beginning ch-2, do not turn.
Round 4: Ch 1, 1 sc in 3rd loop of same st and each st across to end, sl st to first sc, do not turn.
Round 5: Ch 1, work 1 sl st loosely into each sc st around, sl st to beg ch-1, fasten off.
Sleeves
Sleeve Ribbing( Make 2)
Note: I highly recommend that you don’t work the sleeve directly onto the ribbing but make it separately and seam them together. The sleeve will hold its shape well only if you do this.
With smaller hook I(5.5mm), ch 12.
Row 1: 1 sc in 2nd ch from hook and each ch across to end, turn.——11 sc
Note: Starting from the next row, only the last sc is worked into both the loops like a regular sc.
Row 2: Ch 1 (does not count as a st), 1 sc in the BLO of the first st, and each st across to last st, 1 sc in the last st, turn.—–11 sc
Repeat Row 2 until your ribbing measures 10- 1/2(10-1/2, 10-1/2) (11, 11) inches and fasten off.
Sleeves( Make 2)
With bigger hook, ch 62 (62, 67) (67, 72)
Row 1: 1 sc in 2nd ch from hook and each ch across to end. —–61 (61, 66) (66, 71)sts
Row 2: Ch 3 (counts as first dc), sk next st, 2 dc in next st, ch 1, 2 dc in next st, *(sk next 3 sts, 2 dc in next st, ch 1, 2 dc in next st), repeat from * to last 2 sts, sk next st, 1 dc in last st, place a marker on this side of the fabric to indicate the RS and turn.——-12 (12, 13) (13, 14)repeats+ 2 dc
Row 3: Ch 3 (counts as first dc), sk next dc, *(1 fpdc in next dc, V-st in next ch-1 space, 1 fpdc in next dc, sk next 2 dc), repeat from * until just 1 dc and beginning ch-3 is left, sk next dc, 1 dc on top of beg ch-3, turn.———-12 (12, 13) (13, 14)repeats+ 2 dc
Repeat Row 3 until your work measures 13 (13, 13.5) (13.5, 14.5)inches long. Do not fasten off and continue to attach the ribbing.
Attaching the Ribbing to the Sleeves
Align the middle of the foundation chain side with the middle of the ribbing, and place the ribbing on the sleeve touching the RS of the fabric. Place a marker going through the middle of both the layers to hold it in place. Stretch the ribbing to fit on either side of the marker, and join the 2 pieces together with a sl st seam. Repeat with the second sleeve.
Seaming the Sides of the Sleeve
Fold the sleeve with the wrong side out and seam it into a tube with a sc seam. Fasten off.
Joining Sleeves to the Body of the Sweater

Place the sweater with the wrong side out and the sleeve with the right side out. Insert sleeve through the armhole, align the edges and join them together with a whip stitch. See pic above.
Make sure you grab about 1/4 inch of fabric when you whip stitch and do not go through the very edge. This will make sure our heavy sleeve holds well onto the body of the sweater(see pic below).

Finishing
Weave in any tails left along the inside of your sweater.
Pin it for later:


Love this sweater, thank youm going to buy the pattern.
what a beautiful crochet sweater one of the best I have seen for a while . Thank you for the chance to hook that is very generous
Gorgeous jumper, I love it! Top of my to do list
Says you used Lion Brand Wool ease in Fisherman which is a size 6 bulky but pattern says use worsted weight size 4? Which one should I use as I am just learning how to make clothing! Thank you, I cant wait to start!
Lion Brand Wool-Ease comes in both weights and I used the worsted weight one for this crochet sweater. Their Bulky yarn is called Wool-Ease Thick and Quick and the size 4 one is just Wool Ease. Hope that helps!