Keep tiny toes cozy with these adorable crochet toddler slipper boots! This crochet toddler slippers free pattern creates perfect slippers that stay on active feet.

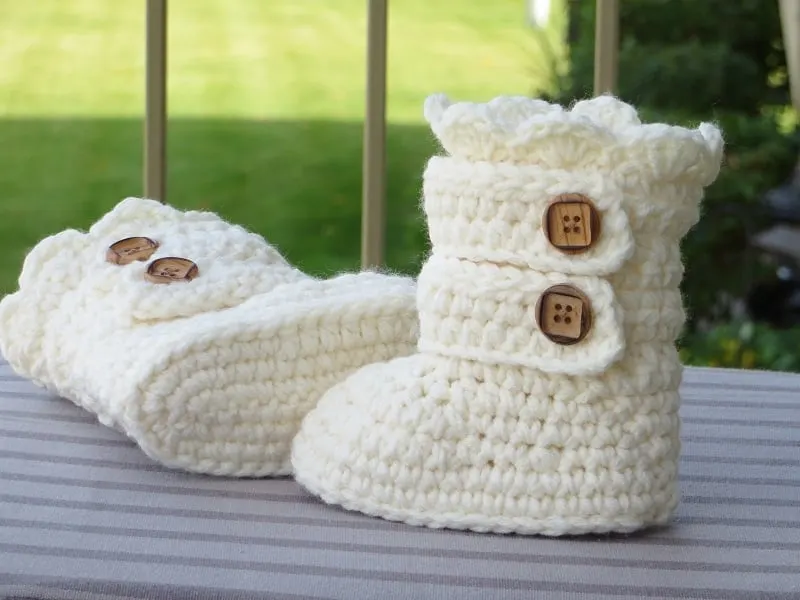
Our toddler slippers is designed for children, featuring a secure fit and playful style. The high shaft will make sure it doesn’t slip off.


The instructions are easy to follow, making these crochet kids slippers a joy to create. Perfect for gifting or keeping little feet warm all season long!


Crochet Toddler Slipper Boots Pattern
Materials
1. Worsted weight yarn of a soft texture. I used Vanna’s choice. You might need two skeins as the pattern is worked holding two strands of yarn together.
2. Hook H ( 5mm)
3. Four 7/8 inches for sizes 5 and 6 or 1 inch wooden buttons for sizes 7 and 8.
Size
Toddler sizes 5, 6, 7 and 8
Size 5: Sole 5 inches long and 2 ¼ to 2 ½ inches wide
Size 6: Sole 5 ¼ inches and 2 ¼ to 2 ½ inches wide
Size 7: Sole 5 ½ inches and 2 ½ to 2 ¾ inches wide
Size 8: Sole 6 inches and 2 ½ to 2 ¾ inches wide
Gauge
Use finished sizes of soles for gauge. Use any size hook to attain gauge.
Using H Hook and 2 strands of yarn held together, 12 hdc X 8 Rows = 4 inches
Stitch explanation
1. Hdc2tog: It is a decrease which joins two stitches into one. It is worked as follows:
[Yarn over, insert hook into next stitch and pull up a loop] twice to get 5 loops on the hook, yarn over and pull through all 5 loops on the hook.
2. Dc2tog: It is a decrease that joins two stitches into one. It is worked as follows:
[Yarn over, insert hook in next stitch, yarn over and pull up loop, yarn over, draw through 2 loops] 2 times, yarn over, draw through all loops on hook.
3. Sc2tog: It is a decrease that joins two stitches into one. It is worked as follows:
[Insert hook into the next st and pull up a loop] twice to get 3 loops on hook, yarn over and pull through all the loops on the hook.
Stitch Abbreviations
The pattern is in standard American terms.
sc: single crochet
sl st: slip stitch
hdc: half double crochet
ch: chain
yo: yarn over
sk: skip
NOTE: Sizes 5 and 6 are grouped together and sizes 7 and 8 are grouped together. Headings are color-coded.
Size 5 (Size 6)
SOLE
Notes
1. Count your stitches after every round.
2. Sole is worked in the round without turning at the end of rounds.
3. The stitch count for the bigger size is given in brackets.
4. Crochet over yarn tails wherever possible to minimize weaving in later.
5. The whole boot is worked with 2 strands held together except for the shell edging at the top.


1. Work around the foundation chain
With two strands held together Chain 12 (13)
Round 1: 1 sc into the 2nd chain from hook, 1 sc in each chain across till last chain, 3 sc in last chain, continue to work along the free loops in the opposite side of the foundation chain as shown in pic 1 above, 1 sc into each free loop across, sl st to beginning ch 1–24 (26) st in the round
Round 2: Ch 1, 2 sc in next, 1 sc in next 9 (10) st, 2 sc in next 3 st, 1 sc in next 9 (10) st, 2 sc in next, 1 sc in same st as beginning ch 1, sl st to beginning ch 1.—————30 (32) sts
Round 3: Ch 1, 2 sc in next, 1 sc in next 6 (7) st, 1 hdc in next 5 st, 2 hdc in next 6 st, 1 hdc in next 5 st, 1 sc in next 5( 6) st, 2 sc, 1 sc in same st as beginning ch 1, sl st to beginning chain 1.—————39 (41) sts


2. Finished sole with wider toe side
SIDE
Round 1: Ch 1 and Turn (ch 1 counts as 1st sl st for this round), now the wrong side of the sole will be facing up. Work 1 sl st into the next st and each st around, sl st to beginning Ch 1. Make your slip stitches loose as you will work your next round into them. Turn.———————39 (41) slip stitches
Note: The next round is worked in to slip stitches of the round above, take care not to insert your hook into the stitches of the sole.
Round 2: Ch 1 (does not count as a st), 1 sc in same st as ch 1, 1 sc in the next slip st, 1 sc in each slip st around, sl st to the 1st sc. Do not turn——————–39 (41) st
Round 3: Ch 1( does not count as a st), 1 sc in next st, 1 sc in each st around, 1 sc in the same st as beginning ch 1, sl st to 1st sc. Do not fasten off and do not turn.—————39 (41) st
TOE TOP
Notes
1. Crochet over yarn tails wherever possible to minimize weaving in later.
2. Move marker up means, after you work a stitch into a marked stitch, take the marker out and place it in the new stitch you worked into the marked stitch. Following the markers in the pattern will ensure that your work doesn’t get lopsided. To mark a stitch, you just have to pull a piece of contrasting color yarn through it.
3. Do not turn at the end of the rounds for the toe top.


3. Fold the sole along the middle line and count back half the number of stitches (11 st) on both sides to place the markers. Once you open the fold you will have symmetrically marked 22 st.
Mark 22 stitches symmetrically on the toe side. To mark your stitches, fold the shoe flat along the middle line, count back 11 stitches on either side, and place a marker. When you open the fold you will have 22 stitches marked symmetrically. See Pic 3 above.
Round 1: Ch 1 (does not count as a st), 1 sc in next st, 1sc in each st till 4 sts left before marker, sc2tog, 1sc, 1sc, 1 hdc in marked st, move the marker up, 1 hdc in next 5 st, *(1 hdc, hdc2tog), repeat from * a total of 3 times, 1 hdc in next 7 sts ending in marked st, move the marker up, 1 sc in next 2 st, sc2tog, 1 sc in each st across, 1 sc in the same st as beginning ch 1, sl st to 1st sc.—————-34 (36) sts
You will have 19 st marked on the toe side now.
Round 2: Ch 1 ( does not count as a st), 1 sc in next st, 1 sc in each st till marker,1 sc in marked st, move the marker up, hdc2tog, *(1 hdc, hdc2tog), repeat from * a total of 5 times, 1 sc in marked st, move the marker up, 1 sc in each st across, 1 sc in the same st as beginning ch 1, sl st to 1st sc.——————28 (30) st
You will have 13 stitches marked on the toe side now. They will be a little asymmetrical but that is fine. When working the next round, work the right boot first.
Round 3: Ch 1 (does not count as a st), 1 sc in next st, 1sc in each st till marker, 1 hdc in marked st, move marker up, 1 hdc in next st, *( skip next st, 1 hdc), repeat from * a total of 5 times, 1 hdc in marked st, move marker up, 1 sc in each st across, 1 sc in the same st as beginning ch 1, sl st to 1st sc. If you are making the right boot the last sl st should be made into the inner loop of 1st sc to leave a free loop outside. Fasten off only if you are making the left boot—————–23 (25) st
SHAFT WITH STRAPS
You will now have 8 st marked on the side. You must mark the 8 stitches again to make them symmetrical this time. Fold the shoe and count back 4 stitches on either side and place the markers as you did for the first round. You should get 8 stitches marked symmetrically once you open the fold.
Marking Ankle side for Round 1 (Both sizes 5 and 6)


4. Fold the shoe & count 3 st from the center point of the back


5. Place a marker on the right side for the Right boot and work as indicated by the arrow


6. Place a marker on the left side for the Left boot and work as indicated by the arrow
a.) Fold the shoe flat using the middle line on the sole as a guide to find the center point of the back as seen in pic 4. You will count from this center point to place a marker.
If you are doing the right boot, with the toe side towards you, place the marker in the 3rd st to the right of the center point of the back which will be the same as the last st of the previous round where you have your working yarn (see pic 5). You should make the right boot first.
If you are doing the left boot, with the toe side towards you place the marker in the 3rd st to the left of the center point of the back as seen in pic 6.
b.) You will have to work starting from the marker toward the toe side for both the left and right boot making decreases between the two markers on the toe side. See pictures 5 and 6 for help.
Note: For the right boot you don’t have to fasten off as you are already at the marked st, proceed with your working yarn as given below. For the left boot, you start with new yarn, sl st in to the inner loop of the marked st, and proceed as given below.
Round 1 for Size 5


7. When you reach back near the marked st work into the 5 free loops left outside the boot


8. A second layer was formed by working in the 5 free loops left outside, now chain for the strap


9. Make a long chain for the strap, turn and work into chains to make the first strap
Ch 1 in marked st (does not count as a st), 1 sc into the inner loop of the same st as chain 1, this will leave a free loop outside the boot, 1 sc into the inner loop of the next 4 st, now start to work in both the loops, 1 sc in any st left before the marked st on the toe side, 1 sc in to marked st, sc2tog, 1sc, 1sc, sc2tog, 1 sc in marked st, 1 sc in each st till you reach back near the marker on the ankle side, 1 sc into the free loop left outside the marked st as shown in pic 7, 1 sc into the next 4 free loops to form a second layer as shown in pic 8, ch 18 for the strap as shown in pic 9. ———-26 st including the ones worked into the 5 free loops
Round 1 for Size 6
Note: Please read the highlighted note above regarding the left and right boot.
Ch 1 into marked st (does not count as a st), 1 sc into the inner loop of the same st as chain 1, this will leave a free loop outside the boot, 1 sc into the inner loop of the next 4 st, now start to work in both the loops, 1 sc in any st left before the marked st on the toe side, 1 sc into marked st, hdc2tog, 1hdc, 1hdc, hdc2tog, 1 sc in marked st, 1 sc in each st till you reach back near the marker on the ankle side, 1 sc into the free loop left outside the marked st as shown in pic 7, 1 sc into the next 4 free loops to form a second layer as shown in pic 8, ch 20 for the strap as shown in pic 9. ———-28 st including the ones worked into the 5 free loops
NOTE: All the rounds starting from Round 2 are common for both sizes 5 & 6. The stitch count for size 6 is given in brackets.
Round 2: Turn, 1 hdc in 3rd ch and each ch across, continue to work 1 hdc in each st of the previous round till your spiral in. Turn. ———42 (46 st)
Round 3: Ch 2, 1 hdc in each st across till 3 st left on the strap, ch 1, skip 1 st, 1 hdc in next 2 st. Buttonhole made.


10. Sl st on the strap till you reach the point where the strap starts and then sc across
Round 4: Sl st to next st on strap, sl st into next ch, sl st across in each st till the point of starting of the strap as seen in pic 10, sl st and ch 1 in the next st (both in same st), 1 sc in each st across till you spiral in. Turn.


11. Chain for 2nd strap when you reach the point where the first strap starts
Round 5: Ch 1, 1 sc in each st till you reach where the strap starts (till you reach the last sl st of the previous round). Ch 19 (ch 21 for size 6) for the second strap as shown in Pic 11. Turn.
The next 3 rounds are a repetition of Rounds 2, 3, and 4 to make the next strap but you will be adding some increases to Round 8.
Round 6: 1 hdc in 3rd ch from hook, 1 hdc in each st across. Turn.
Round 7: Ch 2, 1 hdc in each st across till 3 st left on the strap, ch 1, skip 1 st, 1 hdc in next 2 st. Turn.
Round 8: ch 1, sl st to next st on strap, sl st into next ch, sl st across in each st till the point of starting of strap as you did for 1st strap, sl st and ch 1 in the next st ( both in same st), *(1 sc in next 2 st, 2 sc in next), repeat from * till you spiral in. Fasten off if you are making the left boot and do not fasten off if you are making the right boot.


12. Shows two straps completed
Last Round of Shells
Right boot: Turn. Drop 1 strand of yarn and proceed with a single strand, *(Ch 1, skip 1 st, 5 dc in the next st, ch 1, skip 1 st, 1 sc in next st) * Repeat from * till you reach the point where the two straps start and fasten off.


13. Shows where to start working the shells for the left boot
Left Boot: With single strand of yarn, sl st to the point where the strap starts as seen in pic 13 and work *(Ch 1 , skip 1 st, 5 dc in the next st, ch 1 , skip 1 st, 1 sc in next st) * Repeat from * till you spiral in.
Finishing
1. Weave in all the ends.
2. Sew the buttons on.
SIZE 7 & 8
SOLE
Tips for sole
1. Count your stitches after every round.
2. Sole is worked in the round without turning at each round.
3. The stitch count for the bigger size is given in brackets.
4. Crochet over yarn tails wherever possible to minimize weaving in later.
5. The whole boot is worked with 2 strands held together except for the shell edging at the top.
14. Work around the foundation chain
With two strands held together Ch 12 (14)
Round 1: 1 sc into 2nd chain from hook, 1 sc in each chain across till last chain, 3 sc in last chain, continue to work along the free loops in the opposite side of the foundation chain as shown in pic 14 above, 1 sc into each loop across, sl st to beginning ch 1—-24 (28) st in round
Round 2: Ch 1, 2 sc in next st, 1 sc in next 5(6) st, 1 hdc in next 4 (5) st, 2 hdc in next 3 st, 1 hdc in next 4 (5) st, 1 sc in next 5 (6) st, 2sc in next, 1 sc in same st as beginning ch 1, sl st to beginning ch 1.—————30 (34)st in the round
Round 3: Ch 1, 2 sc in next st, 1 sc in next 6 (8)st, 1 hdc in next 4 st, 1 dc in next, 2 dc in next 6 st, 1 dc, 1 hdc in next 4 st, 1 sc in next 5 (7) st, 2 sc in next, 1 sc in same st as beginning ch 1 , sl st to beginning ch 1——————39 (43) st in the round
15. Finished sole with wider toe side
SIDE
Round 1: Ch 1 and Turn (ch 1 counts as 1st sl st for this round), now the wrong side of the sole will be facing up. Work 1 sl st into the next st and each st around, sl st to beginning Ch 1. Make your slip stitches loose as you will work your next round into them. Turn.———————39 (43) slip stitches
Note: The next round is worked into slip stitches of the round above, take care not to insert your hook into the stitches of the sole.
Round 2: Ch 1 (does not count as a st), 1 sc in same st as ch 1, 1 sc in the next slip st, 1 sc in each slip st around, sl st to the 1st sc. Do not turn——————–39 (43) st
Round 3: Ch 1( does not count as a st), 1 sc in next st, 1 sc in each st around, 1 sc in the same st as beginning ch 1, sl st to 1st sc. Do not fasten off and do not turn.—————39 (43) st
TOE TOP
Notes
1. Crochet over yarn tails wherever possible to minimize weaving in later.
2. Move marker up means, after you work a stitch into a marked stitch, take the marker out and place it in the new stitch you worked into the marked stitch. Following the markers in the pattern will ensure that your work doesn’t get lopsided. To mark a stitch, you just have to pull a piece of contrasting color yarn through it.
3. The toe top rounds are worked without turning at the end of each round.
16. Fold the sole along the middle line and count back half the number of stitches (11 st) on both sides to place the markers. Once you open the fold you will have symmetrically marked 22 st.
Mark 22 stitches symmetrically on the side. To mark your stitches, fold the shoe flat along the middle line, count back 11 stitches on either side and place a marker. When you open the fold you will have 22 stitches marked symmetrically. See pic 16 above.
Round 1: Ch 1 (does not count as a st), 1 sc in next st, 1sc in each st till 4 st left before the marker, sc2tog, 1sc, 1sc, 1 hdc in marked st, move the marker up, 1 hdc in next 5 st, * (1 hdc, hdc2tog), repeat from * a total of 3 times, 1 hdc in next 7 st ending in marked st, move the marker up, 1 sc in next 2 st, sc2tog, 1 sc in each st across, 1 sc in the same st as beginning ch 1, sl st to 1st sc. —————-34 (38) st in the round
You will have 19 st marked on the toe side now.
Round 2: Ch 1 (does not count as a st), 1 sc in next st, 1 sc in each st till marker, 1 hdc in marked st, move the marker up, *(hdc2tog, 1 hdc), repeat from * a total of 2 times, dc2tog, 1 dc, dc2tog. *(1 hdc, hdc2tog), repeat from * a total of 2 times, 1 hdc in marked st, move the marker up, 1 sc in each st across, 1 sc in same st as beginning chain 1, sl st to 1st sc.————–28 (32) st in the round
You will now have 13 stitches marked on the toe side. The markers will be a little asymmetrical but that is fine.
Round 3: Ch 1 (does not count as a st), 1 sc in each st till the marked st, 1 sc into the marked st, move the marker up, 1 hdc in next, *(1hdc, skip next st), repeat from * a total of 4 times, 1 hdc in next 2 st, 1 sc in marked st, move the marker up, 1 sc in each st across, 1 sc in same st as beginning ch 1, sl st to 1st sc. If you are making the right boot the last sl st should be made into the inner loop of 1st sc to leave a free loop outside. Fasten off only if you are making the left boot.—————– 24 (28) st in the round.
SHAFT WITH STRAPS
You will now have 9 stitches marked on the toe side. You must mark the 9 stitches again to make them symmetrical this time. Fold the shoe, leave one odd stitch at the tip and count back 4 stitches on either side to place the markers. Once you open the fold you should have 9 st marked symmetrically.
Marking Ankle side before Round 1 (Both sizes 7 and 8)
17. Fold the shoe & count 3 st from the center point of the back
18. Place a marker on the right side for the Right boot and work as indicated by the arrow
19. Place a marker on the left side for the Left boot and work as indicated by the arrow
a.) Fold the shoe flat using the middle line on the sole as a guide to find the center point of the back as seen in pic 17 above. You will count from this center point to place a marker.
If you are doing the right boot, with the toe side towards you, place the marker in the 3rd st to the right of the center point of the back which will be the same as the last st of the previous round where you have your working yarn (see pic 18). You should make the right boot first.
If you are doing the left boot, with the toe side towards you place the marker in the 3rd st to the left of the center point of the back as seen in pic 19.
b.) You will have to work starting from the marker toward the toe side for both the left and right boot making decreases between the two markers on the toe side. See pictures 18 and 19 for a guide.
Note: For the right boot, you don’t have to fasten off as you are already at the marked st, proceed with your working yarn as below. For the left boot, start with new yarn, sl st into the inner loop of the marked st, and proceed as below.
Round 1 for Size 7
20. When you reach back near the marked st work into the 5 free loops left outside the boot
21. A second layer was formed by working in the 5 free loops left outside, now chain for the strap
22. Make a long chain for the strap, turn and work into chains to make the first strap
Ch 1 in marked st (does not count as a st), 1 hdc into the inner loop of the same st as chain 1, this will leave a free loop outside the boot, 1 hdc into the inner loop of the next 4 st, now start to work in both the loops, 1 hdc in any st left before the marked st on the toe side, 1 sc into marked st, 1 sc in next, sc2tog, 1 sc, sc2tog, 1 sc , 1 sc in marked st, 1 hdc in each st till you reach back near the marker on the ankle side, 1 hdc into the free loop left outside the marked st as shown in pic 20, 1 hdc into the next 4 free loops to form a second layer as shown in pic 21, ch 21 for the strap as shown in pic 22. Turn —–27 st including the ones worked into the 5 free loops
Round 1 for Size 8 (Please read the highlighted note above regarding left and right boot)
Ch 1 into marked st (does not count as a st), 1 hdc into the inner loop of the same st as chain 1, this will leave a free loop outside the boot, 1 hdc into the inner loop of the next 4 st, now start to work in both the loops, 1 hdc in any st left before the marked st on the toe side, 1 sc into marked st, 1 dc, dc2tog, 1dc, dc2tog, 1dc, 1 sc in marked st, 1 hdc in each st till you reach back near the marker on the ankle side, 1 hdc into the free loop left outside the marked st as shown in Pic 8, 1 hdc into the next 4 free loops to form a second layer as shown in pic 9, ch 22 for strap as shown in pic 10——-31 st including the ones worked into the 5 free loops
NOTE: All the rounds starting from Round 2 are common for both sizes 7 & 8. Stitch counts for size 8 are given in brackets
Round 2: Turn, 1 hdc in 3rd ch and each ch across, continue to work 1 hdc in each st of the previous round till you spiral all the way in. Turn. ———45 (51 st)
Round 3: Ch 2, 1 hdc in each st across till 4 st left on the strap, ch 2, skip 2 st, 1 hdc in next 2 st. Buttonhole made.
23. Sl st on the strap till you reach the point where the strap starts and then sc across
Round 4: Sl st to next st on strap, sl st into next 2 chains, sl st across in each st till the point of starting of the strap as seen in pic 23, sl st and ch 1 in the next st (both in same st), 1 sc in each st across till you spiral all the way in. Turn.
24. Chain for 2nd strap when you reach the point where the first strap starts
Round 5: Ch 1, 1 sc in each st till you reach where the strap starts (till you reach the last sl st of the previous round). Ch 20 (ch 22 for size 8) for the second strap as shown in Pic 24. Turn.
The next 3 rounds are a repetition of Rounds 2 , 3 and 4 to make the next strap, but you will be adding some increases to Round 8.
Round 6: 1 hdc in 3rd ch from hook, 1 hdc in each st across. Turn.
Round 7: Ch 2, 1 hdc in each st across till 4 st left on the strap, ch 2, skip 2 st, 1 hdc in next 2 st. Turn.
Round 8: Ch 1, sl st to next st on strap, sl st into next ch, sl st across in each st till the point of starting of the strap as you did for 1st strap, sl st and ch 1 in the next st (both in same st), *(1 sc in next 3 st, 2 sc in next), repeat from * till you spiral all the way in.
Fasten off if you are making the left boot and do not fasten off if you are making the right boot.
25. Shows two straps completed
Last Round of Shells
Right boot: Turn. Drop 1 strand of yarn and proceed with a single strand, *(Ch 1, skip 1 st, 5 dc in the next st, ch 1, skip 1 st, 1 sc in next st) * Repeat from * till you reach the point where the two straps start and fasten off.
26. Shows where to start working the shells for the left boot
Left Boot: With a single strand of yarn, sl st to the point where the strap starts as seen in pic 26 and work *(ch 1, skip 1 st, 5 dc in the next st, ch 1, skip 1 st, 1 sc in next st), repeat from * till you spiral all the way in.
Finishing
1. Weave in any tails left.
2. Sew on the buttons.
Pin it for later:

