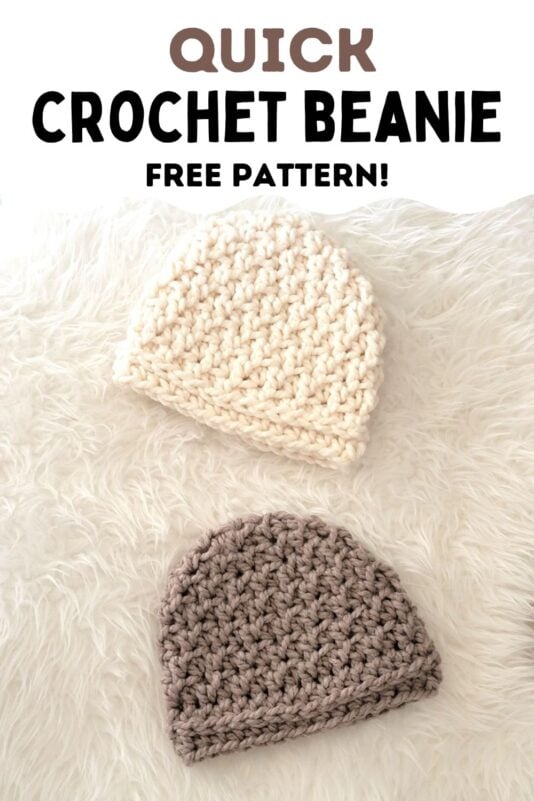
Quick Crochet Hat Pattern, The Breckon Beanie
This quick crochet chunky hat pattern is worked top down using a simple variation of the half double crochet stitch. The texture makes it look complicated but is actually very easy.

The stitch pattern has a good amount of stretch and fits great. The pattern includes baby, toddler, child, and adult sizes.

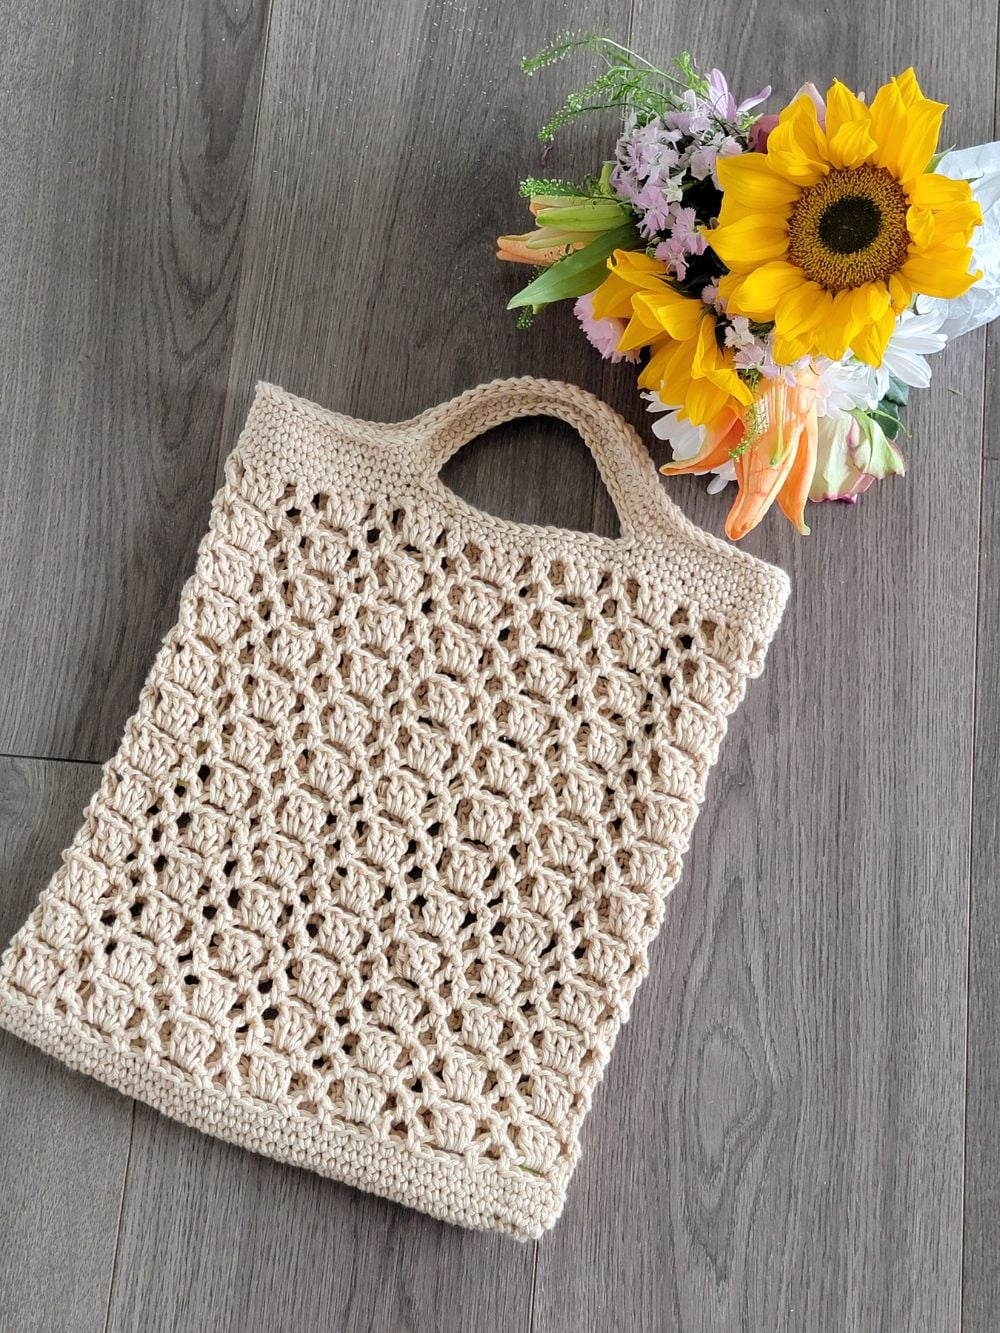
This hat was designed to match my Driftwood scarf with pockets (shown below). I had gotten requests both on my blog and YouTube for a matching beanie, so here it is!

You can make the hat and scarf as a set to keep yourself warm or gift it to a loved one. If you love chunk accessories, this is for you!

The hat has a beautiful texture achieved by working in the front and back loops only. It will be very easy as long as you are good at counting :).

I hope you will enjoy making this simple and quick chunky beanie this winter.
Quick Crochet Hat Pattern
Materials
1. Super Bulky, size 6 yarn. I used Lion Brand Wool-Ease Thick and Quick in color Driftwood and Fisherman for the hats.
2. An N/P(10mm) crochet hook.
3. Tapestry needle to weave in the ends
Finished Size
This hat has a good amount of stretch to it. For example, an 18″ hat will be a woman’s size small.
Baby– fits 6 to 12 months
Toddler– fits 1 to 4 years
Child– fits 5 to 10 years
Adult Small- fits preteen to adult small
Adult Large
Yardage
Just 1 skein of Lion Brand Wool-Ease is needed for one hat.
Baby & Toddler: 60 yards
Child and Adult Small: 75 yards
Adult Large: 100 yards
Stitch Abbreviations
The pattern is written in US crochet terms.
ch- chain
hdc– half double crochet
sc- single crochet
BLO– Back loop only
FLO– front loop only
Stitch Explanations

1. Working in Front or Back Loops only
1. Hdc in the Back Loop (hdc in BLO): Insert your hook under the loop that is away from you and work a hdc.
2. Hdc in the Front Loop (hdc in FLO): Insert your hook under the loop that is near you and work a hdc.
3. Working in the third loop: The 3rd loop is a horizontal loop at the back of your hdc sts (see pic 2 below). Working into the third loop will leave the st free and push the 2 loops of your stitch to the front forming a braided design.

More Hat Patterns
Crochet Chunky Beanie in 1.5 Hours
Ribbed Beanie Crochet Pattern Free
Pattern Notes
1. The pattern is worked by alternating hdc sts in the FLO and BLO throughout. The sequence is maintained even when your work increases.
2. It is very important you read the note given before each round carefully. The note will tell you how many sts you have to work before your increases.
Baby Size
Round 1: Make a magic ring, Ch 1 (does not count as a st), 8 hdc in the ring, close the ring, do not slip stitch, and do not turn.—–8 hdc
Note: In the next round, you work an increase in every stitch by working 2 sts into each st.
Round 2: Tighten the loop on your hook and work 1 hdc in the FLO of the next st, place a marker in this st to indicate the first st of the round, 1 hdc in the BLO of the same st, *(1 hdc in the FLO of the next st, 1 hdc in the BLO of the same st), repeat from * to end, do not slip stitch, and do not turn.———16 hdc
Note: In the next round, you continue the sequence of working alternately in the FLO and the BLO but work an increase after every st. An increase is made by working 2 sts into the same st.
Round 3: Tighten the loop on your hook and work 1 hdc in the FLO of the next marked st, move the marker up, *(1 hdc in the BLO of the next st, 1 hdc in the FLO of the same st), 1 hdc in the BLO of the next st, (1 hdc in FLO of the next st, 1 hdc in BLO of the same st)**, 1 hdc in FLO of the next st, repeat from * until you end in the st right before the marked one. Your last repeat will end at **. Do not slip stitch, and do not turn. ——-24 hdc
Note: In the next round, you continue the sequence of working alternately in the FLO and the BLO without adding any increases.
Round 4: Tighten the loop on your hook, 1 hdc in FLO of next marked st, move marker up, 1 hdc in BLO of next st, *1 hdc in FLO of next st, 1 hdc in BLO of next st, repeat from * to end. You will end in the st right before the marked one. Do not slip stitch, and do not turn.———24 hdc
Repeat the above round until your hat is 6″ tall, sl st to both loops of the marked st.
Note: For the next round, you will work into the 3rd loop which is a horizontal loop behind your work (see pic 2 above). This will push the 2 loops of your stitch to the front forming a braided design.
Last Round: Ch 1, 1 sc in 3rd loop of same st, 1 sc in 3rd loop of each st around, sl st to the first st and fasten off. —–24 sts
Finishing
Weave in any tails left.
Toddler Size
Round 1: Make a magic ring, Ch 1 (does not count as a st), 8 hdc in the ring, close the ring, do not slip stitch, and do not turn.—–8 hdc
Note: In the next round, you work an increase in every stitch by working 2 sts into each st.
Round 2: Tighten the loop on your hook and work 1 hdc in the FLO of the next st, place a marker in this st to indicate the first st of the round, 1 hdc in the BLO of the same st, *(1 hdc in the FLO of the next st, 1 hdc in the BLO of the same st), repeat from * to end, do not slip stitch, and do not turn.———16 hdc
Note: In the next round, you continue the sequence of working alternatingly in the FLO and the BLO but work an increase after every st. An increase is made by working 2 sts into the same st.
Round 3: Tighten the loop on your hook and work 1 hdc in the FLO of the next marked st, move the marker up, *(1 hdc in the BLO of the next st, 1 hdc in the FLO of the same st), 1 hdc in the BLO of the next st, (1 hdc in FLO of the next st, 1 hdc in BLO of the same st)**, 1 hdc in FLO of the next st, repeat from * until you end in the st right before the marked one. Your last repeat will end at **. Do not slip stitch, and do not turn. ——-24 hdc
Note: In the next round, you continue the sequence of working alternatingly in the FLO and the BLO but will work 2 increases, one after the first 5 sts and the second after the next 11 sts.
Round 4: Tighten the loop on your hook and work 1 hdc in the FLO of the next marked st, move the marker up, 1 hdc in BLO of next st, 1 hdc in FLO of next st, 1 hdc in BLO of next st, 1 hdc in FLO of next st, (1 hdc in BLO of next st, 1 hdc in FLO of same st), *(1 hdc in BLO of next st, 1 hdc in FLO of next st), repeat from * 4 more times, 1 hdc in BLO of next st, (1 hdc in FLO of next st, 1 hdc in BLO of same st) (1 hdc in FLO of next st, 1 hdc in BLO of next st)3 times, do not slip stitch, and do not turn. ——-26 hdc
Note: In the next round, you continue the sequence of working alternatingly in the FLO and the BLO without adding any increases.
Round 5: Tighten the loop on your hook, 1 hdc in FLO of next marked st, move marker up, 1 hdc in BLO of next st, *1 hdc in FLO of next st, 1 hdc in BLO of next st, repeat from * to end. You will end in the st right before the marked one. Do not slip stitch, and do not turn.———26 hdc
Repeat the above round until your hat is 6-1/2″ tall, sl st to both loops of the marked st.
Last Round: Ch 1, 1 sc in 3rd loop of same st, 1 sc in 3rd loop of each st around, sl st to the first st and fasten off. —–26 sts
Finishing
Weave in any tails left.
Child Size
Round 1: Make a magic ring, Ch 1 (does not count as a st), 8 hdc in the ring, close the ring, do not slip stitch, and do not turn.—–8 hdc
Note: In the next round, you work an increase in every stitch by working 2 sts into each st.
Round 2: Tighten the loop on your hook and work 1 hdc in the FLO of the next st, place a marker in this st to indicate the first st of the round, 1 hdc in the BLO of the same st, *(1 hdc in the FLO of the next st, 1 hdc in the BLO of the same st), repeat from * to end, do not slip stitch, and do not turn.———16 hdc
Note: In the next round, you continue the sequence of working alternatingly in the FLO and the BLO but work an increase after every st. An increase is made by working 2 sts into the same st.
Round 3: Tighten the loop on your hook and work 1 hdc in the FLO of the next marked st, move the marker up, *(1 hdc in the BLO of the next st, 1 hdc in the FLO of the same st), 1 hdc in the BLO of the next st, (1 hdc in FLO of the next st, 1 hdc in BLO of the same st)**, 1 hdc in FLO of the next st, repeat from * until you end in the st right before the marked one. Your last repeat will end at **. Do not slip stitch, and do not turn. ——-24 hdc
Note: In the next round, you continue the sequence of working alternatingly in the FLO and the BLO but will work 4 increases, one after every 5 sts.
Round 4: Tighten the loop on your hook and work 1 hdc in the FLO of the next marked st, move the marker up, 1 hdc in BLO of next st, 1 hdc in FLO of next st, 1 hdc in BLO of next st, 1 hdc in FLO of next st, (1 hdc in BLO of next st, 1 hdc in FLO of the same st), (1 hdc in BLO of next st, 1 hdc in FLO of next st)2 times, 1 hdc in BLO of next st, (1 hdc in FLO of next st, 1 hdc in BLO of the same st), (1 hdc in FLO of next st, 1 hd in BLO of next st)2 times, 1 hdc in FLO of next st, ( 1 hdc in BLO of next st, 1 hdc in FLO of same st), (1 hdc in BLO of next st, 1 hdc in FLO of next st)2 times, 1 hdc in BLO of next st, (1 hdc in FLO of next st, 1 hdc in BLO of the same st), Do not slip stitch, and do not turn. ——-28 hdc
Note: In the next round, you continue the sequence of working alternatingly in the FLO and the BLO without adding any increases.
Round 5: Tighten the loop on your hook, 1 hdc in FLO of next marked st, move marker up, 1 hdc in BLO of next st, *1 hdc in FLO of next st, 1 hdc in BLO of next st, repeat from * to end. You will end in the st right before the marked one. Do not slip stitch, and do not turn.———28 hdc
Repeat the above round until your hat is 6-1/2″ tall, sl st to both loops of the marked st.
Last Round: Ch 1, 1 hdc in 3rd loop of same st, 1 hdc in 3rd loop of each st around, sl st to the first st and fasten off. —–28 sts
Finishing
Weave in any tails left.
Adult Size Small
Round 1: Make a magic ring, Ch 1 (does not count as a st), 8 hdc in the ring, close the ring, do not slip stitch, and do not turn.—–8 hdc
Note: In the next round, you work an increase in every stitch by working 2 sts into each st.
Round 2: Tighten the loop on your hook and work 1 hdc in the FLO of the next st, place a marker in this st to indicate the first st of the round, 1 hdc in the BLO of the same st, *(1 hdc in the FLO of the next st, 1 hdc in the BLO of the same st), repeat from * to end, do not slip stitch, and do not turn.———16 hdc
Note: In the next round, you continue the sequence of working alternatingly in the FLO and the BLO but work an increase after every st. An increase is made by working 2 sts into the same st.
Round 3: Tighten the loop on your hook and work 1 hdc in the FLO of the next marked st, move the marker up, *(1 hdc in the BLO of the next st, 1 hdc in the FLO of the same st), 1 hdc in the BLO of the next st, (1 hdc in FLO of the next st, 1 hdc in BLO of the same st)**, 1 hdc in FLO of the next st, repeat from * until you end in the st right before the marked one. Your last repeat will end at **. Do not slip stitch, and do not turn. ——-24 hdc
Note: In the next round, you continue the sequence of working alternatingly in the FLO and the BLO but work an increase after every 2 sts. An increase is made by working 2 sts into the same st.
Round 4: Tighten the loop on your hook, 1 hdc in FLO of next marked st, move marker up, 1 hdc in BLO of next st, 1 hdc in FLO of next st, 1 hdc in BLO of same st, *1 hdc in FLO of next st, 1 hdc in BLO of next st, 1 hdc in FLO of next st, 1 hdc in BLO of same st, repeat from * to end. You will end in the st right before the marked one. Do not slip stitch, and do not turn.———32 hdc
Note: In the next round, you continue the sequence of working alternatingly in the FLO and the BLO without adding any increases.
Round 5: Tighten the loop on your hook, 1 hdc in FLO of next marked st, move marker up, 1 hdc in BLO of next st, *1 hdc in FLO of next st, 1 hdc in BLO of next st, repeat from * to end. You will end in the st right before the marked one. Do not slip stitch, and do not turn.———32 hdc
Repeat the above round until your hat is 7″ tall, sl st to both loops of the marked st.
Last Round: Ch 1, 1 hdc in 3rd loop of same st, 1 hdc in 3rd loop of each st around, sl st to the first st and fasten off. ——-32 sts
Finishing
Weave in any tails left.
Adult Size Large
Round 1: Make a magic ring, Ch 1 (does not count as a st), 8 hdc in the ring, close the ring, do not slip stitch, and do not turn.—–8 hdc
Note: In the next round, you work an increase in every stitch by working 2 sts into each st.
Round 2: Tighten the loop on your hook and work 1 hdc in the FLO of the next st, place a marker in this st to indicate the first st of the round, 1 hdc in the BLO of the same st, *(1 hdc in the FLO of the next st, 1 hdc in the BLO of the same st), repeat from * to end, do not slip stitch, and do not turn.———16 hdc
Note: In the next round, you continue the sequence of working alternatingly in the FLO and the BLO but work an increase after every st. An increase is made by working 2 sts into the same st.
Round 3: Tighten the loop on your hook and work 1 hdc in the FLO of the next marked st, move the marker up, *(1 hdc in the BLO of the next st, 1 hdc in the FLO of the same st), 1 hdc in the BLO of the next st, (1 hdc in FLO of the next st, 1 hdc in BLO of the same st)**, 1 hdc in FLO of the next st, repeat from * until you end in the st right before the marked one. Your last repeat will end at **. Do not slip stitch, and do not turn. ——-24 hdc
Note: In the next round, you continue the sequence of working alternatingly in the FLO and the BLO but work an increase after every 2 sts. An increase is made by working 2 sts into the same st.
Round 4: Tighten the loop on your hook, 1 hdc in FLO of next marked st, move marker up, 1 hdc in BLO of next st, 1 hdc in FLO of next st, 1 hdc in BLO of same st, *1 hdc in FLO of next st, 1 hdc in BLO of next st, 1 hdc in FLO of next st, 1 hdc in BLO of same st, repeat from * to end. You will end in the st right before the marked one. Do not slip stitch, and do not turn.———32 hdc
Note: In the next round, you continue the sequence of working alternatingly in the FLO and the BLO but will work 2 increases, one after the first 8 sts and the second after the next 15 sts.
Round 5: Tighten the loop on your hook, 1 hdc in FLO of next marked st, move marker up, 1 hdc in BLO of next st, (1 hdc in FLO of next st, 1 hdc in BLO of next st)3 times (1 hdc in FLO of next st, 1 hdc in BLO of same st), (1 hdc in FLO of next st, 1 hdc in BLO of next st)7 times, 1 hdc in FLO of next st, (1 hdc in BLO of next st, 1 hdc in FLO of same st), *1 hdc in BLO of next st, 1 hdc in FLO of next st, repeat from * to end. Do not slip stitch, and do not turn.———34 hdc
Note: In the next round, you continue the sequence of working alternatingly in the FLO and the BLO without adding any increases.
Round 6: Tighten the loop on your hook, 1 hdc in FLO of next marked st, move marker up, 1 hdc in BLO of next st, *1 hdc in FLO of next st, 1 hdc in BLO of next st, repeat from * to end. You will end in the st right before the marked one. Do not slip stitch, and do not turn.———34 hdc
Repeat the above round until your hat is 7-1/2″ tall, sl st to both loops of the marked st.
Last Round: Ch 1, 1 hdc in 3rd loop of same st, 1 hdc in 3rd loop of each st around, sl st to the first st and fasten off. ——-34 sts
Finishing
Weave in any tails left.
More Hat Patterns
1.5 Hours Crochet Chunky Beanie
 , The Breckon Beanie


What an easy pattern and pretty too. Thanks for my new hat of the season!