
Adeline Fingerless Mitts or Arm Warmers, Easy Crochet Pattern with Faux Cables ( Free Pattern)
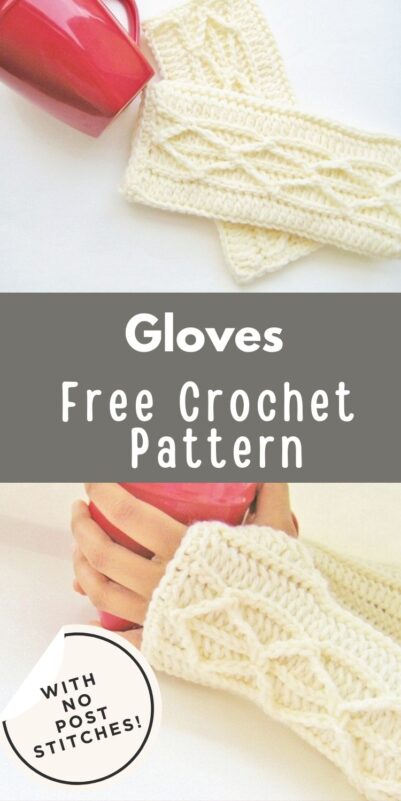
This is a must-have fingerless gloves crochet pattern that works up lightning fast. The design features a faux cable made with chain stitches that makes it perfect for beginners.


Fingerless Mitts, a Slouchy Beanie, and a Cowl, make fashion statements like none other. They are the perfect combination of style and comfort. Now make your own pair of fashionable mitts with this fun to work crochet pattern embellished with faux cables.
I wanted to design a fingerless mitts crochet pattern with cables that are suitable for beginners as well. So I came up with this faux cable idea that anyone with basic crochet skills can easily work.
Unlike the regular cables that use front post stitches, the cables on these mittens use the basic chain stitch to evoke the same effect. A pair of these can be worked in about two hours.
Fingerless Gloves Crochet Pattern
Materials
2. Hook H (5 mm).
3. Sewing needle to weave in the tails.
Gauge
14 dc st = 3 ½ inches
4 dc rows alternating with 3 sl st rows = 3 ½ inches
Switch to a bigger or smaller hook to attain gauge.
Size
Fits an average woman’s hand. A finished glove is 8 ½ inches long and 3.5 inches wide.
Yardage
140 yards for a pair
Stitch Abbreviations
The pattern is in standard American terms.
dc- double crochet
sc- single crochet
hdc- half double crochet
tr- triple crochet
sl st- slip stitch
ch- chain
sk- skip
Stitch Explanation
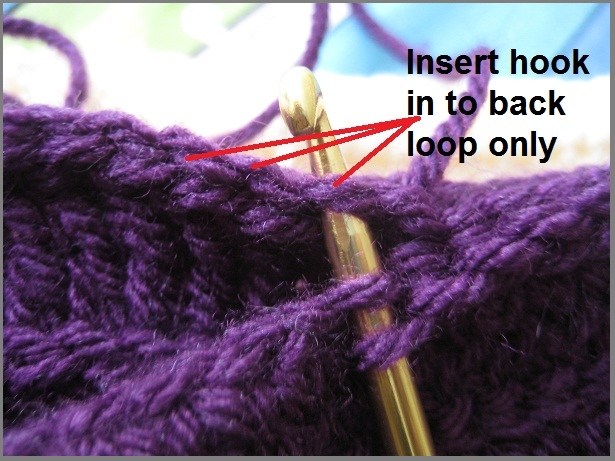
Work in Back Loops only: When you are asked to work in back loops only, you work inserting your hook though only one of the loops of the stitch leaving one loop free as shown below.
 Pic 1
Pic 1
Chain 32 + 3 for turning chain.
Row 1: 1 dc in to 4th chain from hook ( counts as 1st dc), 1 dc in each chain across———-33 dc
Row 2: Ch 1 (counts as 1st sl st), 1 sl st in back loop of next st, 1 sl st in back loop of each st till end of the row———————–33 sl st
Row 3: Ch 3( counts as 1st dc), 1 dc in the back loop of the next st, 1 dc in the back loop of each st across till the end of the row.—————33 dc
Repeat Rows 2 & 3 till you have a total of 16 rows and you end in a sl st Row ( Row 2). Now your gloves should measure 7 inches in width. Do not fasten off.

Pic 3
Fold it with the right side inside (the striped) and start to slip stitch the long sides together to make a tube as shown in pic 2 above. While making the joining sl stitches you will insert your hook through the free loop left on the foundation chain side and the back loop of the sl st on the other side as shown in pic 3 above.
 Pic 4
Pic 4
Sl st till 2 ½ inches is left open. Now stop joining the sides together and work sl stitches up along the foundation chain side only for 1 ½ inches, this will form the hole for your thumb as shown in pic 4 above. Now sl st the rest of the 1 inch together till you reach the end. Do not fasten off.
Continue to work a round of sc around the opening of the gloves to even out the irregular edges. Work the sc stitches along the inside of the tube as that would be the right side of the glove. Try to distribute the sc as evenly as possible.
Make one more glove following the exact same pattern. The right side of your glove will look like the pic below.

Pic 5
Faux Cables
 Pic 6
Pic 6
Try the glove on the left hand inserting your thumb through the hole and place markers to show 2 tracks running through the middle of your hand as shown in pic 6 above. Repeat with your right glove. Now you know where to work your faux cables for each side.
 Pic 7
Pic 7
Overview: You start from the point shown by the red dot and work upwards along the red arrow to complete one side of the cable. Once you reach the top you work down the brown arrow to complete the mirror image of the first half you made.
The three orange vertical lines indicate the left, middle and right sl st ridges.
Pattern for Faux Cables
Keep the gloves down with the markers showing on top. Sl st to the base of the ridge on the right as shown by the red dot and follow the blue line as shown in pic 7 above.
Ch 3, sl st to the 5th st on the middle ridge to the left, *(ch 4, sl st to the 9th st ( counted from the previous sl st made on the same ridge) on the right ridge, Ch 4, sl sl to the 9th st on the middle ridge) Repeat from * 2 more times. Now you will have reached the top of your glove.

Pic 8
Now, you will work your way down and make the mirror image of the cable you already made following the green line in pic 7 above.
*(Ch 4, sl st to the point opposite to the one made on the right ridge, ch 4, sl st to the middle ridge at the same point as the first cable you made). Repeat from * 2 more times, ch 3 and sl st to the end of the ridge. Do not fasten off. Work a round of sc around the glove opening to even out the edges. Weave in the remaining tails.
Follow the same steps to work cables between the markers for the right glove too. Your lovely fingerless mitts with faux cables is now ready to wear!
If you love it, please share it using one of the social media buttons below. Thank you!
You can find another one of my popular fingerless crochet gloves here.
Check out more patterns from Crochet Dreamz: Pattern Gallery





This is an incredible pattern. I've made several pairs so far, and intend to make many more. I've added an additional row along forearm edge of each warmer with a fur yarn. It makes a nice accent, and gives some added variety. Thank you for this beautiful pattern. Every time I see them worn by someone, I can't help but think how cute they look. Cheers!
Thank you so much. I would love to get a picture of the mittens with fur, so I can share on my facebook page.
Beautiful.
Thank you for the pattern.
Fingerless gloves are worn by motorcyclists to better grip the handlebars
fingerless gloves
Protect the palms of the hands and add grip in the event of a fall
fingerless gloves
I'm struggling on Row 3 to crochet into the back loop. Very hard to get my hook in the back loop. Am I doing something wrong?
Either you crochet too tight or you are trying to insert into the wrong loop. You will find videos on Youtube for working in back loops.
Love this! Can't wait to try it! Thanks for the pattern.
I finished the first mitt but I'm not sure if I fasten it off before proceeding with the cable pattern. Can you tell me if that's what I should do?
Yes, you have to fasten off.
I don't know why I deleted this but what it said was that I wasn't getting wide enough ridges and had to do way more rows than the pattern calls for to get 7 inches. I've figured it out now. Thank you for posting this. It's a fantastic pattern..once you figure out what stitchs to go into for row 3.
I have not tried this pattern yet but have looked at the fingerless handwarmers for , I know, a good couple of years. I am making afghans for my granddaughters for christmas gifts. But as I am sure you can understand, when you crochet on them for so long, and doing repetitive stitches, you sometimes need a break from it and have to put another pattern in the middle of it, just to break things up a little bit. Well, this is my breaker pattern, and i KNOW the girls will love them. Thank you SO MUCh for sharing such a gorgeous pattern…
Thank you so much for visiting my blog. I appreciate your feedback and hope your girls love them as much as you do.
I tried this pattern way back in March of last year and for some reason couldn't get it to work for me.Finally in frustration set it aside and have tried it again today and I got it! I'm so excited to have finally been able to make these. sometimes you just have to sit back and try again later I guess.It's so simple to me now. I don't know why I had a problem back then but I'm glad I tried again. Thank you for the pattern and putting up with me sending you all those emails.
I am so glad you could finally make them, yay!
I have one more comment…a suggestion. My dgd suggested making the faux cables in another color. I think in your purple ones pictured above a white cable would be awesome. I'm planning to make some with same color cables and some with contrasting colors. I have 14 grandchildren and 9 of them are girls who are going to love these.
I have seen some people make the cables in contrasting color and it looked nice. I am sure yours will turn out lovely too.