Crochet Scarf Free Pattern, 2 Hour Scarf
Using this crochet scarf free pattern you can work up a scarf in just 2 hours. You can find the matching 1.5 Hour Crochet Beanie here.


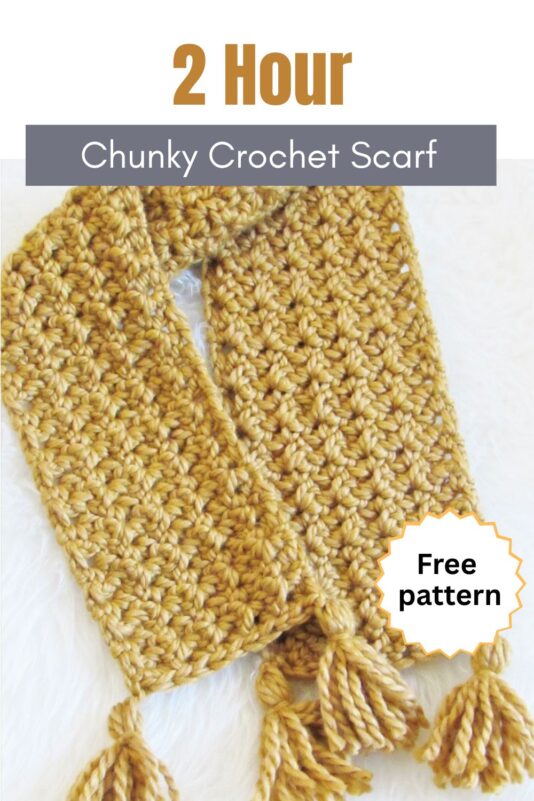
This crochet pattern uses a stitch that is very easy to work and grows quickly. The easy stitch combined with a big 8mm hook makes this a very quick crochet scarf free pattern that you will want to try again and again.
You can make a matching hat and scarf pair in 3-1/2 hours or less. I love this color Golden Rod from Cozy Wool but would love one in a neutral Cream color too.

The scarf is chunky, soft, and super warm too. You will love wearing it this winter. Paired with the matching 1.5 hour crochet hat, it would make a lovely gift too.

Crochet Scarf Free Pattern
You can pin it for later here.
Materials
1. Super Bulky size 6 yarn. I used the yarn Loops and Threads Cozy Wool in color Golden Rod.
2. An 8 mm crochet hook
3. A tapestry needle to weave in the ends.
Finished Size
5-3/4 inches wide and 66 inches long without the tassels and 73 inches long including the tassels. The width is easily adjustable.
Yardage
3 skeins of Loops and Threads Cozy Wool. Each skein is 90 yards. If you want to substitute with any other super bulky yarn, it will take around 250 yards.
Stitch Abbreviations
The pattern is written in US terms.
ch- chain
sl st- slip stitch
sc- single crochet
st- stitch
sk-skip
More Crochet Scarf Patterns
Crochet Scarf with Hand Pockets
2 Hour Crochet Scarf Pattern
Ch 10 loosely. If you want your scarf to be wider than 5-3/4 inches, you can chain any multiple of 2.

Row 1: Working into the back bumps of the foundation chain, (sc, ch 2, sc)in the 2nd ch from hook ( skipped ch counts as 1 sc, *[sk next ch, (sc, ch 2, sc) into the next ch], repeat from * to end, turn.———5 repeats
Notes
1. For all the following rows, every time you work your last sc, insert your hook into the ch or st specified, pull up a loop to the height of your current row and then pull through the 2 loops on your hook. This will give a straight edge to your scarf.
2. You can easily identify the ch-2 spaces by looking at the peaks formed by the stitch pattern.
Row 2: DO NOT ch 1, directly work (sc, ch 2, sc) in the first ch-2 space, (sc, ch 2, sc)in each ch-2 space until one ch-2 space is left, (sc, ch 2) in the last ch-2 space, 1 sc in the beginning ch, turn.—5 repeats
Note: The single crochet at the end of a row will be a vertical stitch that seems to have a knot at the base as shown in the picture.
Row 3: DO NOT ch 1, directly work (sc, ch 2, sc) in first ch-2 space, (sc, ch 2, sc)in each ch-2 space until one ch-2 space is left, (sc, ch 2) in the last ch-2 space, 1 sc in the last sc, turn.——–5 repeats
Keep repeating Row 3 until your scarf is the desired length.
Leveling Row: Ch 1, 2 sc in each ch-2 space across to end, 1 sc in last sc. Fasten off.
Tassels for your Crochet Scarf (Make 4)
Tassels are totally optional for this crochet scarf free pattern. You can omit it or add pom poms or fringes in its place.
1. Take a 4 1/4 inch wide piece of cardboard and wrap the yarn around it 7 times.
2. Pull a 12-inch strand of yarn through the winding and knot twice at the top.
3. Cut the yarn along the opposite side.
4. Take another 12-inch strand and make a knot a little below the top knot.
5. Trim the excess from the strand you just tied but leave the top 2 strands for attaching to the scarf.
6. To attach the tassels to the four corners, use the tails left to tie them on to the scarf, pull the tails through the tassel and then trim them to the size of the rest of the strands.
Finishing
Weave in any tails left.
You can also check out my Rose Petals Crochet Scarf and my Ocean Waves Crochet Scarf.
Pin it for later:


Beautiful and stunning to wear.
Please please make this into a video! I just love all of your youtube crochet along videos! They are amazing and helps so much with working the patterns! This scarf is just darling!
I will add it to my to-do list :).
Thank you so much I’m making the beanie now and then the scarf !