
How to Crochet a Hat, Free Autumn Harvest Beanie
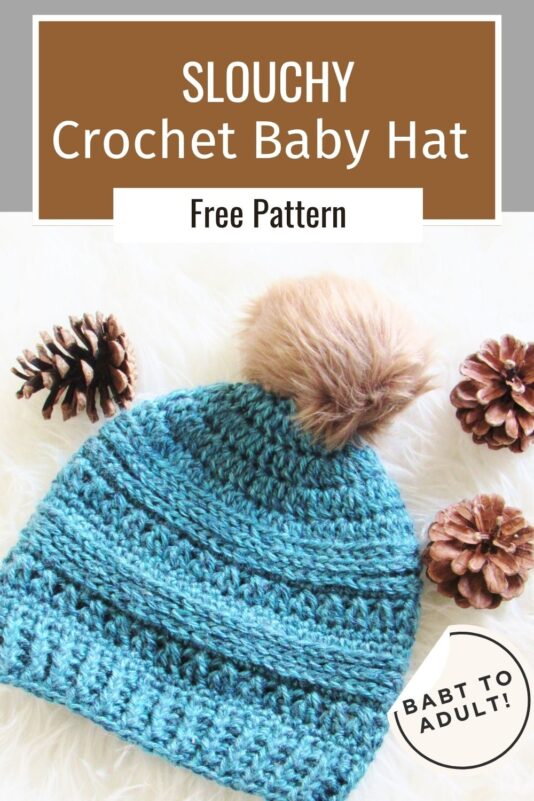
This blog post will teach you how to crochet a hat that has a beautiful mix of textures. The hat is crocheted top-down that gives it a nice shape.


I used Lion Brand Heartland yarn for these crochet hats and they turned out gorgeous. The yarn has the right amount of drape for a slouchy hat.
I initially set out to write the crochet pattern only in a woman’s size, but when I tested it, it turned out to be a toddler size, lol! So I went ahead and wrote it for 4 sizes, Baby, Toddler, Child, and Woman.


The next challenge I faced was keeping the seam invisible. I tried every trick in the book to make the unsightly seam disappear. Did I succeed? Well, almost! You be the judge :).
What do you think of this crochet hat pattern? Let me know in the comments section below. Your feedback helps me make my designs better.


Materials
- Worsted weight(size 4) yarn. I used Lion Brand Heartland in colors Glacier Bay and Bryce Canyon.
- Hook I(5.5)mm
- Locking stitch markers or safety pins. Split ring markers might fall off.
- Tapestry needle to weave in the ends.
- Fur pom pom
- Sewing needle and thread to attach the pom pom.
Finished Size
Baby(6-12 months): 8″ tall and 17″ circumference
Toddler( 1- 4 Years): 8.5″ tall and 18 1/2″ circumference
Child ( 4 to 10 Years): 9 1/2″ tall and 19 1/2″ circumference
Preteen to Woman: 10″ tall and 21 1/2′ circumference
Yardage
Approximately 220 yards for the Child and Woman’s sizes and 170 yards for the Baby and Toddler sizes.
Gauge
Start working the Crown Pattern for the Baby size hat. Measure the diameter of the circle after the first 5 rounds.
Diameter after 5 Rounds= 6 1/4 inches
Stitch Abbreviations
The pattern is written in standard US terms
ch- chain
st- stitch
hdc- half double crochet
sc- single crochet
dc- double crochet
sl st- slip st
beg- beginning
YO- yarn over
Stitch Explanations

The third loop of a st (see pic above): The third loop of a st is a horizontal bar or loop found behind the st. Working into this loop will push the ‘V’ of your st to the front to create a knit look.
hdc2tog: It is a hdc decrease worked across 2 sts. YO, insert your hook into the first st and pull up a loop, 3 loops on your hook, YO and pull up a loop in the next st, YO and pull through all the 5 loops on your hook.
front post half double crochet(fphdc) and back post half double crochet(bphdc): You can see a tutorial on front and back post double crochet here. The front and back post hdc sts are worked inserting the hook in the same way. Just replace the dc sts with hdc sts.
How to Crochet the Hat
Notes
1. Size Baby and Toddler are grouped together and sizes Child and Woman are grouped together.
2. Stitch count for bigger sizes is given in the order Baby (Toddler) or Child(Woman).
Baby (Toddler) Size- Crown
Round 1: Make a magic ring and make 12(13) dc in the ring, pull the yarn tail to close the ring and sl st to the first dc. Do not turn.—–12(13) dc
Round 2: Ch 3 ( does not count as a st here and throughout), 2 dc in the same st as beginning ch3, 2 dc in each st across to end, sl st to the first dc. Do not turn.—-24(26) dc
Round 3: Ch 3, 2 dc in the same st as beginning ch 3, 1 dc in next st, *( 2 dc in the next st, 1 dc in next), repeat from * to end, sl st to the first dc. Do not turn.—–36(39)dc
Round 4: Ch 3, 2 dc in the same st as beginning ch 3, 1 dc in next st 2 sts, *( 2 dc in the next st, 1 dc in next 2 sts), repeat from * to end, sl st to the first dc. Do not turn.—–48(52)dc
Round 5( Size Baby only): Ch 3, 2 dc in the same st as beginning ch 3, 1 dc in next st 3 sts, *( 2 dc in the next st, 1 dc in next 3 sts), repeat from * to end, sl st to the first dc. Do not turn.—–60 dc
Round 5( Size Toddler only): Ch 3, 2 dc in the same st as beginning ch 3, 1 dc in next st 3sts, *( 2 dc in the next st, 1 dc in next 3 sts), repeat from * to last 4 sts, 2 dc in next, 1 dc in next 2 sts, 2 dc in last st, sl st to the first dc. Do not turn.—–66 dc
Jump to Textured Rounds below.
Child (Woman’s Size)-Crown
Round 1: Make a magic ring and make 12(12) dc in the ring, pull the yarn tail to close the ring and sl st to the first dc. Do not turn.—–12(12) dc
Round 2: Ch 3 ( does not count as a st here and throughout), 2 dc in the same st as beginning ch3, 2 dc in each st across to end, sl st to the first dc. Do not turn.—-24(24) dc
Round 3: Ch 3, 2 dc in the same st as beginning ch 3, 1 dc in next st, *( 2 dc in the next st, 1 dc in next), repeat from * to end, sl st to the first dc. Do not turn.—–36(36)dc
Round 4: Ch 3, 2 dc in the same st as beginning ch 3, 1 dc in next st 2 sts, *( 2 dc in the next st, 1 dc in next 2 sts), repeat from * to end, sl st to the first dc. Do not turn.—–48(48)dc
Round 5: Ch 3, 2 dc in the same st as beginning ch 3, 1 dc in next st 3 sts, *( 2 dc in the next st, 1 dc in next 3 sts), repeat from * to end, sl st to the first dc. Do not turn.—–60(60) dc
Round 6( Size Child only): Ch 3, 2 dc in the same st as beginning ch 3, 1 dc in next st 6 sts, 2 dc in next, 1 dc in next 7 sts*( 2 dc in the next st, 1 dc in next 6 sts, 2 dc in next, 1 dc in next 7 sts), repeat from * to end, sl st to the first dc. Do not turn.—–68 dc
Round 6(Size Woman only): Ch 3, 2 dc in the same st as beginning ch 3, 1 dc in next st 4 sts, *( 2 dc in the next st, 1 dc in next 4 sts), repeat from * to end, sl st to the first dc. Do not turn.—–72 dc
Continue to make Textured Rounds below.
Textured Rounds for the Hat (All Sizes)
Notes
1. This how to crochet a hat tutorial tries to keep the seam as invisible as possible. Please pay close attention to the beginning and end of the following rows.
2. See stitch explanation at the top of the pattern to learn how to work into the 3rd loop of a st. 3rd loop behind a dc stitch will be a small loop stuck behind the stitch on the left side. It is harder to work into the 3rd loop of a dc stitch compared to working into the 3rd loop of a hdc stitch. Rest easy, you only have to work into the 3rd loop of dc sts for one round of the entire hat.
3. Stitch counts are given in the order Baby(Toddler, Child, Woman).
Row 1: Pull up the loop on your hook to loosen it up a bit and work a hdc in the 3rd loop of the first st (look behind the first dc of the previous round), place a marker in this st, 1 hdc in the 3rd loop of each st across to end. There will be a tiny sl st left before the marked st now. Do not sl st and do not turn.——60(66, 68, 72)sts
Note: In the next round you will have to work into a loop behind the sl st for your hdc2tog st. Look behind your work and find whichever loop you can grab. This is to keep the seam as invisible as possible.
Row 2: Hdc2tog in the loop behind the next sl st and the 3rd loop of the marked hdc, move the marker up into this hdc2tog you just made, 1 hdc in 3rd loop of each st across until you reach the marked st, do not sl st and do not turn.—–60(66, 68, 72)sts
Row 3: 1 sc in 3rd loop of the marked st, move marker up into the st you just made, 1 sc in 3rd loop of each st across to end, sl st to the marked sc.—–60(66, 68, 72)sts
Row 4: Ch 3 ( counts as a dc), 1 dc in the previous st to form an “X” shape with your stitches, *(sk the next st, 1 dc in the next, 1 dc in the skipped st), repeat from * to end and sl st to the top of beg ch-3.—-30(33, 34, 36)pairs of crossed dc sts
Round 5: Ch 1 ( does not counts as a st), 1 sc in the same st as beg ch-1, 1 sc in each st across to end, sl st to first sc, do not turn.——-60(66, 68, 72)sts
Round 6: Ch 2 ( does not count as a st), 1 hdc in the same st as beg ch-2, 1 hdc in each st across to end, sl st to first hdc, do not turn.—–60(66, 68, 72)sts
Round 7: Sl st loosely into the next 4 sts to reach under the seam, pull up the loop on your hook to loosen it up a bit and work a hdc in the 3rd loop of the same st, place a marker in this st, 1 hdc in the 3rd loop of each st across until you hit the slip sts, work hdc into both the loops of the sts stuck behind the sl sts to reach near the marked st. There will be a tiny sl st left before the marked st. Do not sl st and do not turn.——60(66, 68, 72)sts
For sizes Baby and Toddler, repeat Rounds 2-5 once more and proceed to make the hatband below.
For sizes Child and Woman, repeat Rounds 2-7 once more and then repeat Rounds 2-4. Proceed to make the hatband below.
Ribbed Hatband
Note: For the Baby and Child sizes, you will be working the next Round into the sc sts of Round 5 and for the bigger sizes, into the dc sts of Round 4.
Row 1: Ch 2 ( counts as a bphdc here and throughout), fphdc in next st, *(bphdc in next st, fphdc in next), repeat from * to end, sl st to beg ch-2, do not turn.—–60(66, 68, 72)sts
Row 2: Ch 2, 1 fphdc in next fpdc, *(1 bphdc in next bphdc, 1 fphdc in next fphdc), repeat from * to end, sl st to beg ch-2.—–60(66, 68, 72)sts
Repeat Row 2 until your hat is 8(8.5, 9.5, 10) inches tall and fasten off.
Finishing the Hat
- Weave in any tails left.
- Sew the fur pom pom to the top of your hat with a sewing needle and thread.
You might also like
Baby Hat Crochet Pattern for Boys
Watch a web story on this top down crochet beanie pattern here.
Pin it for later
You can find more such free hat patterns on Allfreecrochet.com


HI
I’m having a hard time with this hat. When I get to round 7 in the texture part I get lost. I’m basically done with the hat but I would like to try again. Would you be able to help me or are you going to do a video tutorial for this hat?
All in all this hat is beautiful and straight forward just that on part I’m lost on.
Hi Elise, I am a little busy writing and testing new patterns. So it might be a while before I make a video. In the meanwhile, can I help you via email? Let me know which part you don’t understand and I shall be happy to help.
In the last 5 days I have made 4 beanies with this pattern, and I have 4 more in my order queue! Awesome pattern for every age and gender. Thank you so much for the free pattern.
H Sayantani, thank you so much. I am really glad you like it.
Thank you so much for this beautiful free pattern! Is the toddler/child hat slouchy? If so, can you suggest how to make it not so? Thanks so much 🥰
It is kind of hard to make this hat non-slouchy as the stitch pattern won’t fit. Sorry!
Ch 3 ( does not count as a st here and throughout), 2 dc in the same st as beginning ch3
Do the 2 dc in the above instructions count as double crochets when the row is finished? I always end up with two extra dcs when I finish a row.
Yes, the 2 dc counts as stitches.
I’m not sure what you mean in Row 7 with the slip sts. Could you clarify?
When you work in the round without turning, your seam will become slanted, so you sl st to reach back under the seam, so you can keep it straight. I hope that helps.
Ahh thank you so much!! That makes a lot more sense. Love the color yarn you used for this pattern! I’ll have to check it out.
I LOVE this hat. Do you know how this could be made bigger for a adult man?
I haven’t tested it but am assuming you will need 4-6 stitches more than the woman’s size.
It’s a beauty all right! I’m going to make mine in sparkly black bc that’s the color i need, then I’m making it again in peach and creme to go w the chunky sweater I’m making now. Thanks.🌹 You are a doll!🙋
I’m So Confused at round 7… and my hat doesn’t look anything like the beanie pictured. My beanie is totally flat on top… What did I do wrong and how do I continue at round 7?
I think it will start taking the shape of a hat once you work more rounds. The crown looks flat in the beginning.
Hi! My daughter loves this pattern & well, all things called Autumn are especially favored by us, as my first grandblessing’s name is Autumn. 🙂 She was wanting me to make it with the Bernat Velvet yarn. I was wondering if there is anything special that I would need to do for that to work? Also, did you ever get a chance to video a tutorial? I’m hoping any changes are easy, I’ve been crocheting for a long time but I’m not very confident with it. And YES that line in the back, ughhh I just made a beautiful newborn hat as long as no one looks at the back. Lol
I never tried it in Bernat Velvet, so it is hard for me to say, sorry!
Hello!
When you say “Do not turn.—–12(12) dc” does that mean to do an additional 12 dc or that is the total amount of 12 dc you will do for that round?
THat is the total number of stitches at the end of the round.